16
HOW TO CHECK, ADJUST, AND REPLACE KNIVES
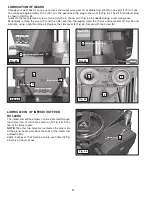
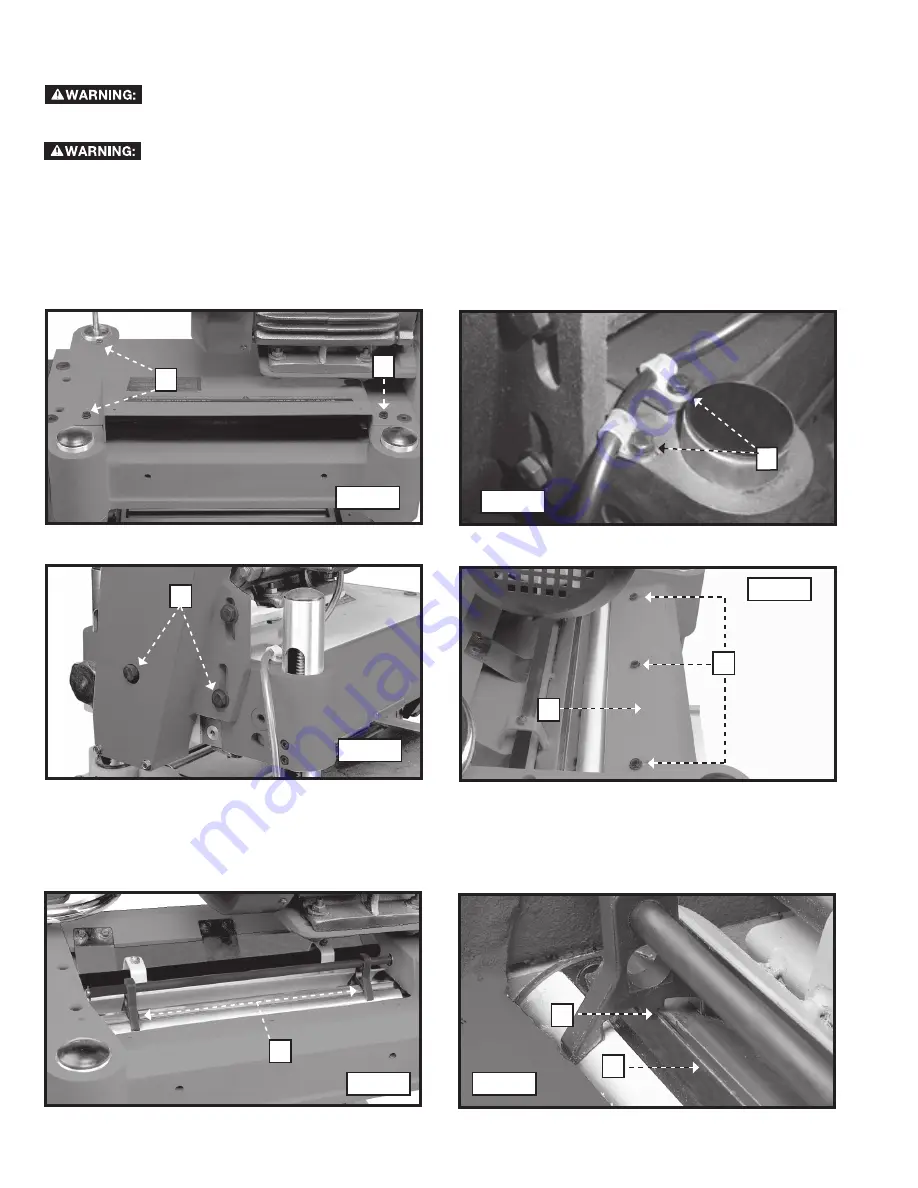
1. Remove the four screws, three of which are shown at (A) Fig. 39 and the screws that hold the cable (B) Fig. 40.
Remove the top cover.
2. Loosen the two screws (C) Fig. 41, and pivot the motor as sem bly to the front.
NOTE:
belt tension is not disturbed when pivoting the motor forward.
3. Take out the three bolts (E) Fig. 42, and remove the chip deflector (F).
Wear gloves when you remove the knives for sharpening or replacement. The knives in this planer
are very sharp.
Disconnect the machine from the power source.
A
A
Fig. 39
Fig. 40
Fig. 41
C
F
E
Fig. 42
4. To check and adjust the knives:
A. Carefully place the knife-setting gauge (G) Fig. 43 on the cutterhead.
B. Correctly adjusted knives (H) Fig. 44 will contact the bottom of the gauge (J) at each end. Check all three knives.
Fig. 43
G
H
J
Fig. 44
B


