


MASTER SLAVE
SM15K INTERFACES
8 / 19
DELTA ELEKTRONIKA B.V.
rev. Nov. 2019
o
The Master has a specific location in the system, depending
on the number of Slaves.
o
Although in a later stage the functional assigned is done via
the unit's menu, it is required to do the physical assignment
first; at which location will the Master be and at which the
Slave(s).
o
For an uneven number of units, position the Master in
between an equal number of slaves.
o
For example in a set of 5 units, the upper 2 units must be
slaves, the master in position 3, and below it another 2
slaves.
o
For an even number of units, position the master in such a
way that under it there's 1 slave more than above it.
o
For example in a set of 6 units, the upper 2 units must be
slaves, then the master, and below it another 3 slaves.
o
o
For set-ups with more than 1 rack, position the master as
described in the above, and fill the other racks with slaves
only.
Connect the copper strips.
o
See example drawings for different number of units in the
. See fig 3 - 2.
o
Remove safety covers from the DC power terminals.
o
Remove the M8 bolts from the DC power terminals.
o
Important: follow the exact order of washers, lock washers,
etc to ensure correct and safe operation.
Connect the load cables.
o
Connect the cable lugs at the position indicated on the
drawings in the application note.
o
Place the lugs directly on the strips - never place a washer
between a cable lug and a copper strip because it will burn
out.
o
Place the special M/S parallel safety covers over the output
terminals.
o
Cover with marking DWG2532 is for the outputs of the
upper and lower units. Cover DWG2533 is for units in
between them.
o
Create openings for the load cables where necessary.
Contact factory for systems with more than one rack of units.
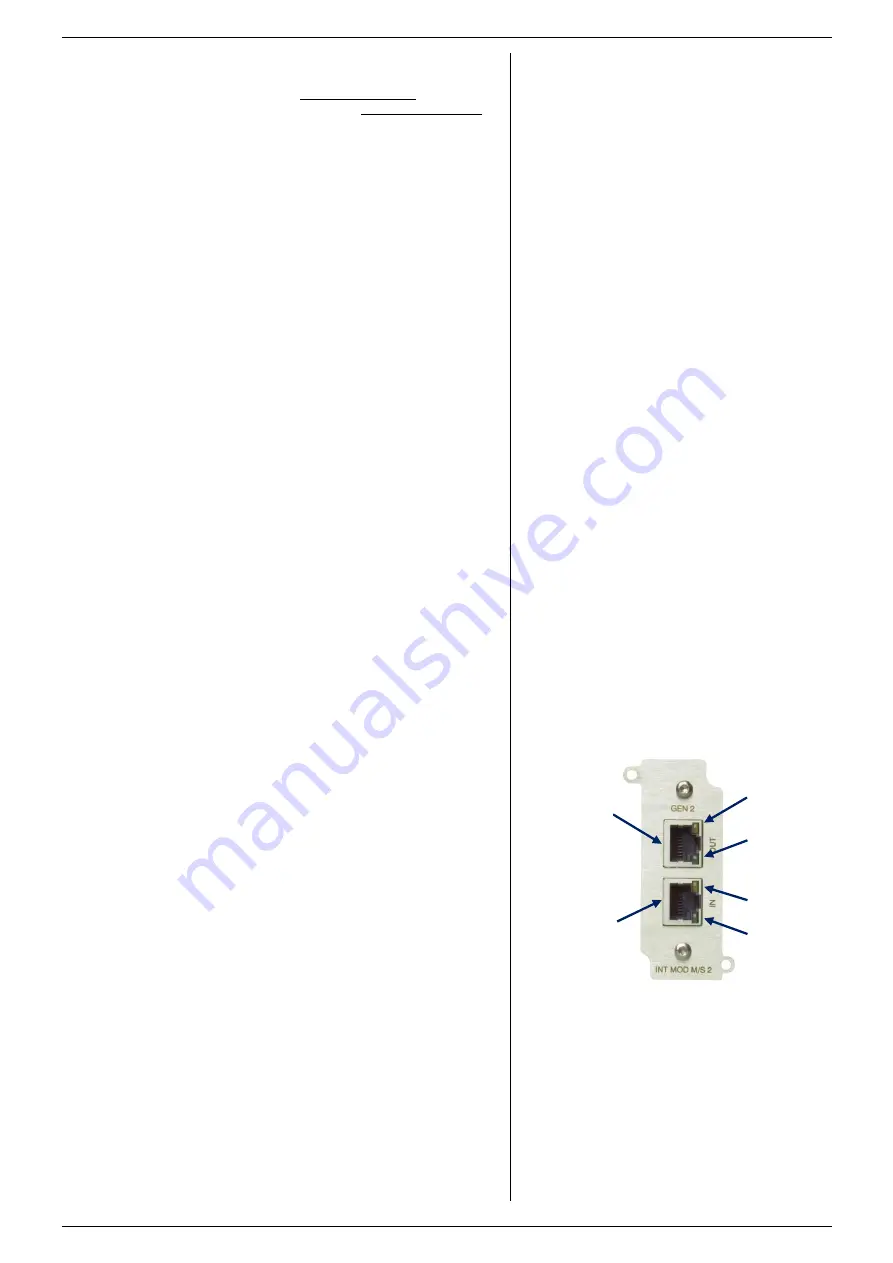
3.4.4
CONNECT INTERFACES
The available connectors on this interface are two 8 pole
modular jack connectors, see fig. 3 - 3.
Use the cables supplied with the M/S kit (Cat6, FTP or
S/FTP).
Start with the master and connect the cable from the "OUT"
connector to the "IN" connector of the first slave above.
Then connect another cable from the "OUT" connector of the
first slave to the "IN" connector of the next slave. Repeat this
until all devices are connected. (see fig 3 - 2).
For systems with 3 or more slaves, use the longer cable (1m
or 2m depending on amount of slaves) to connect the upper
unit to the most lower unit.
From the lower unit, again connect to "IN" of the unit above
Finally close the loop at the Master unit "IN" connector.
For more than one rack of units, connect the "OUT" of the
upper unit to the "IN" of the lower unit in the next rack. In that
rack connect up until the highest unit is reached. From that
unit, connect to the "IN" of the lowest unit of the first rack
again and there connect up to the master unit to close the
loop.
3.4.5
CONNECT AC MAINS
Connect the mains supply cables to the units.
o
Make sure the cable is not yet connected to the mains
supply!
o
Place the input safety covers.
Connect the mains supply cables to the mains supply.
fig 3 - 3
There are two 8-pole modular jack connectors
available on the INT MOD M/S-2.
enabled
Tx active
Rx active
valid
OUT
IN


