Removing and Replacing Parts on the Midsize Chassis
5-5
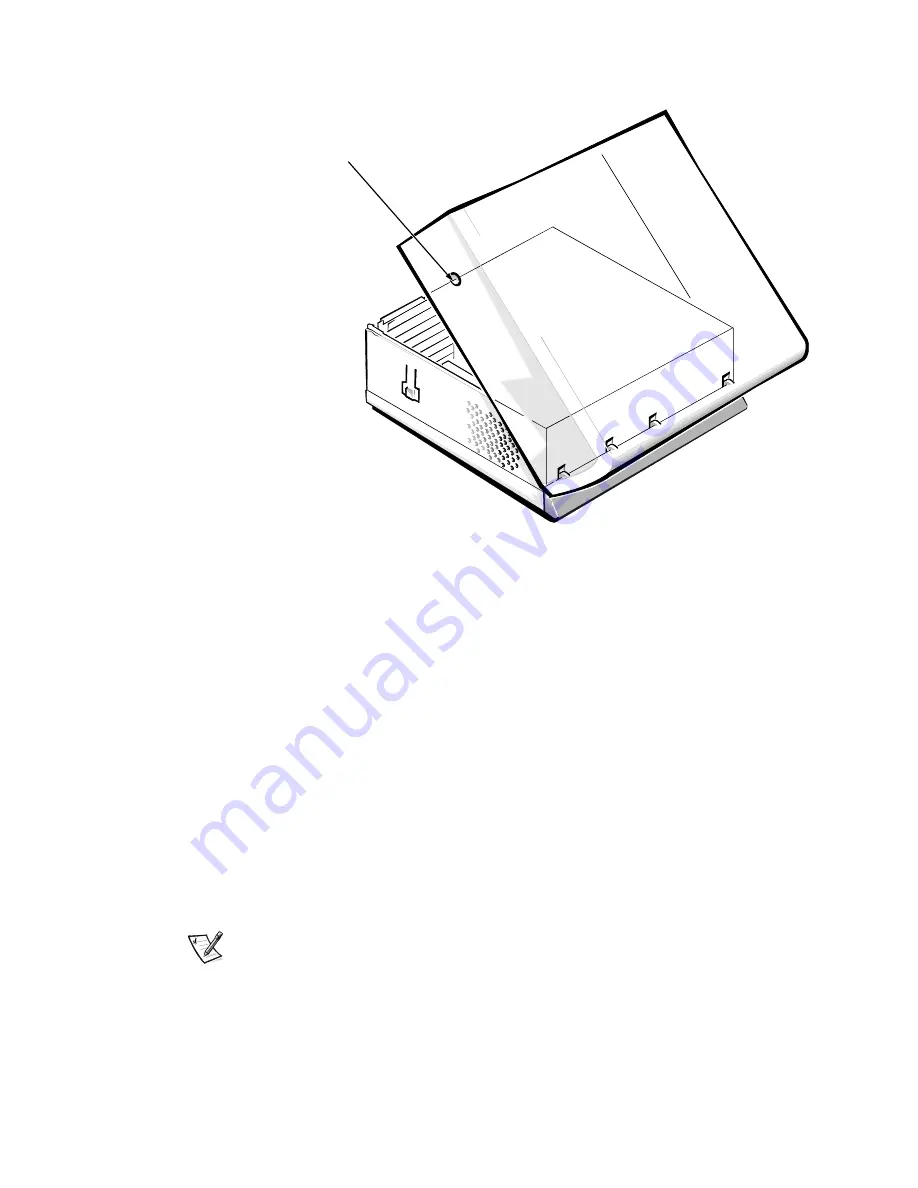
&RPSXWHU&RYHU
)LJXUH&RPSXWHU&RYHU5HPRYDO
To remove the computer cover, follow these steps:
7XUQRIISRZHUWRDOOSHULSKHUDOVDQGGLVFRQQHFWWKH$&SRZHU
FDEOHIURPLWV$&RXWOHW
3UHVVLQRQWKHWZRVHFXULQJEXWWRQVXQWLOWKHFRYHULVIUHHWR
VZLQJXS
5DLVHWKHEDFNRIWKHFRYHUDQGSLYRWLWWRZDUGWKHIURQWRIWKH
FRPSXWHU
/LIWWKHFRYHURIIWKHKRRNVDWWKHIURQWRIWKHFKDVVLV
Four plastic hooks on the inside-front part of the cover secure it to the
chassis.
Before you reinstall the cover, fold all cables out of the way so that they do not
interfere with the cover or with proper airflow inside the computer.
NOTE: After removing and replacing the chassis, the chassis intrusion detector
alerts you that the cover has been removed. Refer to “Chassis Intrusion Detec-
tion” in Chapter 1 for instructions on resetting the chassis intrusion detector.
securing
buttons (2)
front of computer
Summary of Contents for OptiPlex G1
Page 1: ...ZZZ GHOO FRP HOO 2SWL3OH 0DQDJHG 3 6 VWHPV 6 59 0 18 ...
Page 44: ...1 34 Dell OptiPlex G1 Managed PC Systems Service Manual ...
Page 58: ...3 8 Dell OptiPlex G1 Managed PC Systems Service Manual ...
Page 82: ...4 24 Dell OptiPlex G1 Managed PC Systems Service Manual ...
Page 132: ...6 26 Dell OptiPlex G1 Managed PC Systems Service Manual ...
Page 143: ......


