Removing and Replacing Parts on the Mini Tower Chassis
6-13
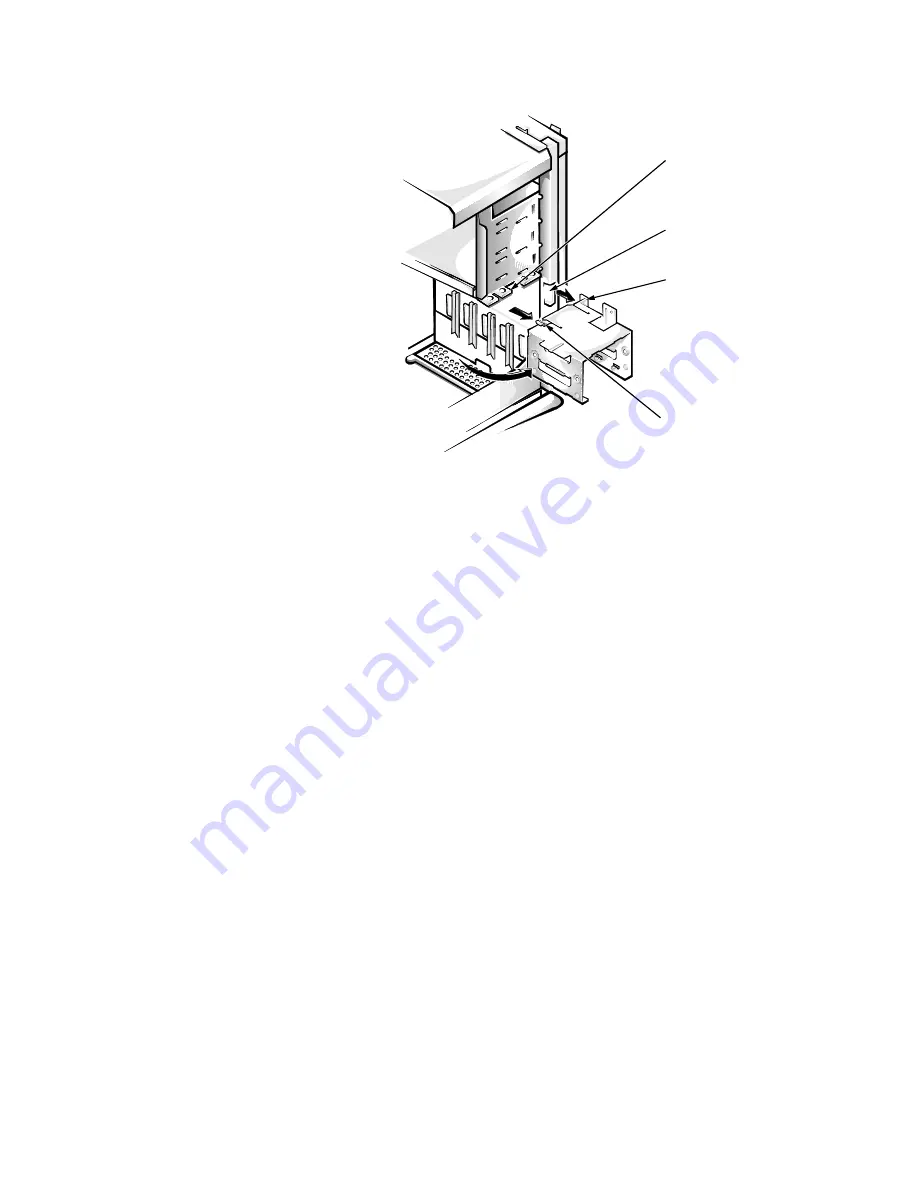
+DUG'LVN'ULYH%UDFNHW
)LJXUH+DUG'LVN'ULYH%UDFNHW5HPRYDO
To remove the hard-disk drive bracket, follow these steps:
'LVFRQQHFWWKH'&SRZHUFDEOHDQGWKHLQWHUIDFHFDEOHIURPWKH
EDFNRIHDFKKDUGGLVNGULYHLQVWDOOHGLQWKHKDUGGLVNGULYH
EUDFNHW
5HPRYHWKHVFUHZWKDWVHFXUHVWKHKDUGGLVNGULYHEUDFNHWWRWKH
GULYHFDJHLQWKHFKDVVLV
*UDVSWKHEUDFNHWDQGURWDWHLWRXWZDUGIURPWKHFKDVVLVXQWLO
WKHVOLGLQJWDEFOHDUVWKHVOLGHUDLORQWKHGULYHFDJH
/LIWXSWKHKDUGGLVNGULYHEUDFNHWVOLJKWO\WRIUHHWKHKLQJHWDEV
DQGUHPRYHLWIURPWKHFRPSXWHU
When you reinstall the hard-disk drive bracket, insert the bracket’s hinge tabs
into the chassis slot so that the tabs hook over the slot. Then rotate the bracket
toward the drive cage, and fit the bracket’s sliding tab onto the drive-cage slide
rail.
drive-cage
slide rail
chassis slot
hinge tabs (3)
sliding tab
Summary of Contents for OptiPlex G1
Page 1: ...ZZZ GHOO FRP HOO 2SWL3OH 0DQDJHG 3 6 VWHPV 6 59 0 18 ...
Page 44: ...1 34 Dell OptiPlex G1 Managed PC Systems Service Manual ...
Page 58: ...3 8 Dell OptiPlex G1 Managed PC Systems Service Manual ...
Page 82: ...4 24 Dell OptiPlex G1 Managed PC Systems Service Manual ...
Page 132: ...6 26 Dell OptiPlex G1 Managed PC Systems Service Manual ...
Page 143: ......


