Adding and Replacing Parts
129
7
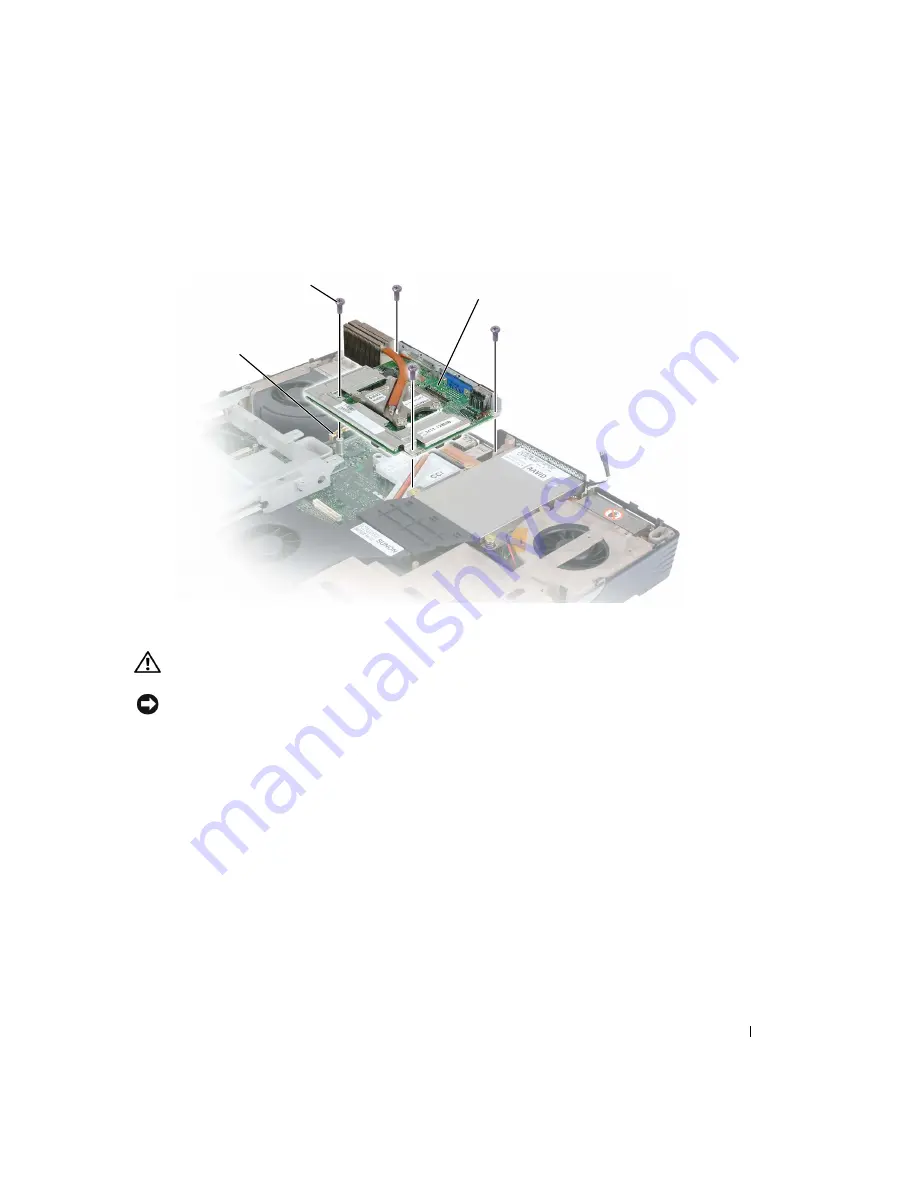
Lift up the video card to remove it.
The video-card heat sink is part of the video card assembly.
Processor Thermal-Cooling Assembly
CAUTION:
Before you begin this procedure, read the safety instructions at the front of this document
NOTICE:
To avoid electrostatic discharge, ground yourself by using a wrist grounding strap or by
periodically touching a connector on the back panel of the computer.
Removing the Processor Thermal-Cooling Assembly
1
Follow the procedures in "Before You Begin" (see page 103).
2
Remove the center hinge cover (see page 121).
3
Remove the keyboard (see page 114).
4
Remove the display (see page 124).
5
Remove the keyboard bracket (see page 118).
6
Remove the video card (see page 128).
7
Loosen in consecutive order the four captive screws, labeled "1" through "4," that secure the
processor thermal-cooling assembly to the system board.
video card
M2.5 x 6-mm screws (4)
system board
connector
Summary of Contents for Inspiron XPS
Page 1: ...w w w d e l l c o m s u p p o r t d e l l c o m Dell Inspiron XPS Owner s Manual Model PP09L ...
Page 10: ...10 Contents ...
Page 16: ...16 Safety Instructions w w w d e l l c o m s u p p o r t d e l l c o m ...
Page 20: ...20 Finding Information w w w d e l l c o m s u p p o r t d e l l c o m ...
Page 32: ...32 A Tour of Your Computer w w w d e l l c o m s u p p o r t d e l l c o m ...
Page 48: ...48 Optimizing Performance w w w d e l l c o m s u p p o r t d e l l c o m ...
Page 54: ...54 Using a Battery w w w d e l l c o m s u p p o r t d e l l c o m ...
Page 58: ...58 Using the Module Bay w w w d e l l c o m s u p p o r t d e l l c o m ...
Page 64: ...64 Using the Keyboard and Touch Pad w w w d e l l c o m s u p p o r t d e l l c o m ...
Page 74: ...74 Setting Up a Home and Office Network w w w d e l l c o m s u p p o r t d e l l c o m ...
Page 102: ...102 Solving Problems w w w d e l l c o m s u p p o r t d e l l c o m ...
Page 182: ...182 Appendix w w w d e l l c o m s u p p o r t d e l l c o m ...


