Steps
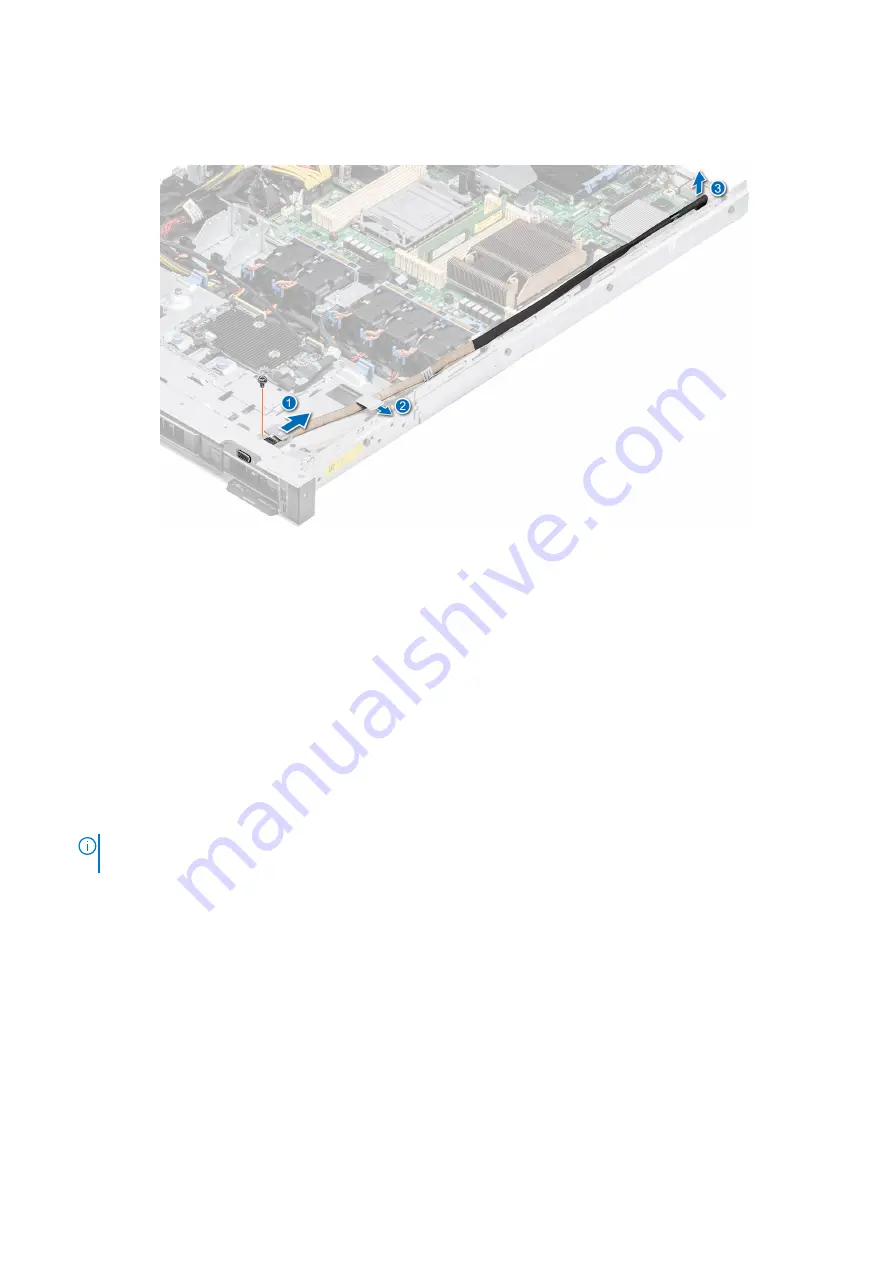
1. Using Phillips #1 screwdriver, remove the screw on the VGA module.
2. Slide the module out of the system.
Figure 84. Removing the VGA module
Next steps
.
Installing the VGA module
Prerequisites
1. Follow the safety guidelines in
.
2. Follow the safety guidelines listed in
Before working inside your system
.
3.
.
4.
5.
.
NOTE:
Ensure that you note the routing of the cables as you remove them from the system board. Route the cable
properly when you replace it to prevent the cable from being pinched or crimped
Steps
1. Route the VGA cable through the VGA module slot on the front of the system and slide the VGA module into the slot.
2. Align the hole on the module with the screw hole on the system.
3. Using the Phillips #1 screwdriver, secure the VGA module to the system with the screw.
Installing and removing system components
79
Summary of Contents for EMC XC Core XC450
Page 1: ...Dell EMC XC Core XC450 Installation and Service Manual September 2021 ...
Page 13: ...Figure 11 Memory information Dell EMC XC Core XC450 system overview 13 ...
Page 14: ...Figure 12 Service information electrical overview 14 Dell EMC XC Core XC450 system overview ...
Page 15: ...Figure 13 Service information mechanical overview Dell EMC XC Core XC450 system overview 15 ...


