Interposer-module
Removing the interposer module
Prerequisites
1. Follow the procedure in
before working inside your computer
2. Remove the
3. Remove the
4. Remove the
.
5. Remove the
.
NOTE:
This step is valid for system configuration that is shipped with 80 W CPU.
6. Remove the
About this task
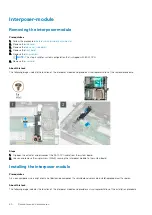
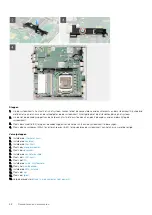
The following images indicate the location of the interposer module and provide a visual representation of the removal procedure.
Steps
1. Flip open the actuator and disconnect the SATA FPC cable from the system board.
2. Loosen and remove the single screw (M3x5) securing the interposer module to the system board.
Installing the interposer module
Prerequisites
Als u een component vervangt, dient u het bestaande component te verwijderen alvorens de installatieprocedure uit te voeren.
About this task
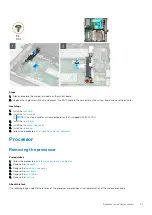
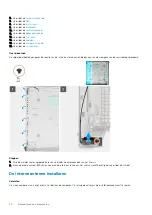
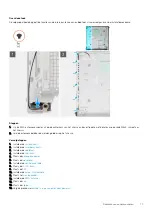
The following image indicates the location of the interposer module and provides a visual representation of the installation procedure.
60
Demonteren en hermonteren
Summary of Contents for D16S
Page 5: ...Hoofdstuk 6 Hulp verkrijgen en contact opnemen met Dell 78 Inhoudsopgave 5 ...
Page 17: ...3 Belangrijke componenten van uw systeem 17 ...
Page 18: ...Belangrijke componenten van uw systeem 18 Belangrijke componenten van uw systeem ...
Page 52: ...52 Demonteren en hermonteren ...
Page 65: ...Demonteren en hermonteren 65 ...
Page 67: ...Demonteren en hermonteren 67 ...

