background image

Using Corel Snapfire

Using the Corel Snapfire application you can display digital photos and learn how to organise, create and print digital
photos and videos. You can apply special sophisticated effects when correcting and organising photos and videos.

The application is installed from the 

Drivers and Utilities

 CD included in the package, and can be activated from the

list of programs on your computer.

Click on 

Startg Programs 

or

 All programsg Corel Applicationg Corel Snapfire.


NOTE: 

Some programs may not be available for the operating system you are using.

Editing Scanned Text Using ScanSoft OmniPage SE

The OCR software, ScanSoft OmniPage SE, allows you to convert a scanned image into modifiable text using a text
processing program.


NOTE:

 Ensure you have the OCR software installed on your computer. A copy of the OCR software is provided with your

printer and should have been installed at the same time as your printer drivers.

1.  Open the top cover.

2.  Place the document you want to scan face down on the scanner glass. Ensure that the upper left corner of the front of the

document is aligned with the arrow on the printer.

3.  Close the top cover.

4.  Open the 

AIO Center

 by clicking 

Startg Programs

 or 

All Programsg Dell Printersg All-In-One Centerg All-In-One

Center.

Summary of Contents for 928

Page 1: ...tenance Troubleshooting Appendix Click the links to the left for information on the features and operation of your printer For information on other documentation included with your printer see Finding Information To order ink or supplies from Dell 1 Double click the icon on your desktop ...

Page 2: ...tential for property damage personal injury or death Information in this document is subject to change without notice 2007 Dell Inc All rights reserved Reproduction in any manner whatsoever without the written permission of Dell Inc is strictly forbidden Trademarks used in this text Dell the DELL logo Dell Picture Studio and Dell Ink Management System are trademarks of Dell Inc Microsoft and Windo...

Page 3: ... provide last minute updates about technical changes to your printer or advanced technical reference material for experienced users or technicians How to set up my printer Setting Up Your Printer poster Safety information How to set up and use my printer Warranty information Owner s Manual Latest drivers for my printer Answers to technical service and support Dell Support Website The Dell Support ...

Page 4: ... documentation and product specifications How to use Windows 2000 XP Vista Documentation for my printer Windows 2000 XP Vista Help and Support Center 1 Click Start Help and Support 2 Type a word or phrase that describes your problem and then click the arrow icon 3 Click the topic that describes your problem 4 Follow the instructions shown on the screen ...

Page 5: ...ll In One AIO Center that allows you to access all the printer functions rapidly This CD also contains bundled software that you can install to explore digital photography You can even use your AIO printer without connection to a computer Directly copy a document placed on the scanner glass or print from a PictBridge enabled digital camera connected to the printer s USB interface or from a memory ...

Page 6: ...socket 10 USB connector Slot into which you plug the USB cable sold separately The other end of the USB cable is connected to your computer 11 Memory card slots Slots for inserting media cards containing digital pictures 12 USB port or PictBridge port Slot for plugging a USB memory pen or USB cable sold separately that connects your printer to a PictBridge enabled camera For more information see P...

Page 7: ...t language used on the operator panel repeat the procedure in Setting the Language described above Resetting Factory Defaults If you need to restore the factory default settings in the Main menu press and hold down the Menu button for at least 10 seconds until a message appears confirming the successful reset operation Restoring factory default settings Using the Operator Panel The operator panel ...

Page 8: ... with paper ejection Exit from a menu without saving the changes made 7 Start button Start a copy or scan operation 8 Select button Select a menu item Select an image to print in Photo mode Start paper feeding by holding down the button for three seconds Operator Panel Menus Press the Menu button on the operator panel at any time to display the Main menu In the Main menu you can use the Arrow butt...

Page 9: ...n If changes have been made you are asked for confirmation In Copy mode the prompt appears Do you want to save temporary copy settings Press Cancel again to exit without saving or save by highlighting Yes and then pressing Select Copy Mode Copy Menu Item Settings Colour Colour Black and white Copies 1 99 Zoom 100 Default factory setting Customisable percentage select custom zoom percentage from 25...

Page 10: ...he Copy menu can be changed however it is always possible to restore the default factory settings Photo Mode When a memory card or USB memory pen is inserted into the printer slot Photo mode options can be selected Photo Menu Item Settings Proof Sheet To create an A4 format index containing all the photos saved on the device connected to the printer USB memory card or digital camera The photograph...

Page 11: ... the computer connected to the printer By selecting the Print files mode the stored files are printed via the computer without needing to be opened by an application The file types supported are those recognised by the applications installed on the computer and depend on the association files present Scan Mode The Scan mode sub menu is displayed only if the printer is connected to a computer The l...

Page 12: ... Kodak Imaging Adobe Photoshop 7 0 Microsoft Paint Dell Image Expert dellix exe Microsoft PowerPoint Word Perfect Office X3 Presentations X3 Microsoft Word Word Perfect Office X3 QuattroPro X3 Microsoft Works WordPerfect Office 11 Notepad Adobe Photoshop Element Setup Mode The Setup mode sub menu allows you to set preferences for the All In One AIO Center program including the settings you want ap...

Page 13: ...uetooth Discovery Mode Security Passkey Device Name Device Address Paper Type PictBridge Settings Render mode Colour B W sepia Border Borderless Bordered Layout 1 page 4 page 9 page 16 page Quality Normal Photo Draft Paper Type Plain Coated Photo Transparency Brightness 10 levels of brightness can be set Enhance On Off Red eyes On Off Print All Settings Prints a listing of the current settings for...

Page 14: ...fy to select either the Device Name or the Device Address The address of a device cannot be modified Paper Type Type of paper Plain Coated Photo Transparency See Printing from a Bluetooth Enabled Device for more details Maintenance Mode Maintenance Menu Item Action Ink Levels Displays the percentage of ink left in the cartridges Clean Cartridge Cleans the cartridges and prints a test page This ope...

Page 15: ...against the edge so that the sheets are fed in straight Photo paper should be loaded short edge first with the glossy photo side facing upwards Placing an Original on the Scanner Glass 1 Lift the top cover 2 Place the document or photo to be scanned on the scanner glass with the side to be scanned face downward NOTE Align the upper left corner of the document with the arrow on the printer 3 Lower ...

Page 16: ...n the upper left corner of the document with the arrow on the printer 3 When scanning is terminated put the top cover back into place by sliding its hinges back into their slots on the printer 4 Lower the cover Using the Printer Mechanical Security System A mechanical blocking device is available for the printer to prevent theft The security system is based on an optional password protected device...

Page 17: ......

Page 18: ...g system The Printing Preferences dialogue box opens b In the Paper Quality tab select the settings you want for quality and print speed paper size black and white or colour printing printing with or without borders paper orientation and number of copies c After making your changes in the Printing Preferences dialogue box click OK at the bottom of the screen to return to the Print dialogue box 5 C...

Page 19: ...ze orientation and the number of copies NOTE Use Dell Premium photo paper for best results 7 When you have finished customising your print settings click OK 8 Click OK or Print depending on your program or operating system 9 Remove each photo immediately after it is output to the paper tray to prevent photos from sticking together or smudging NOTE Before placing your photos in a non adhesive photo...

Page 20: ...t the borderless paper format from the pull down list and click OK 8 Depending on your program or operating system click OK or Print Printing Envelopes 1 Switch on the computer and the printer and ensure that they are connected together 2 Load up to 10 envelopes into the feeder ensuring that the stamp is in the upper left corner NOTE You can load a single envelope into the paper support without ne...

Page 21: ...e the Bluetooh enabled devices D link DBT 120 Acer BU2 For more information contact Dell technical support Compatibility Information This printer is compatible with Bluetooth 1 2 specifications and supports the following profiles Serial Port Profile SPP allows you to synchronise Bluetooth Pocket PC with the information stored on the computer such as contacts and e mail Object Push Profile OPP allo...

Page 22: ...printer As not all devices display this information automatically you can access these settings on your printer from the Bluetooth menu by selecting Bluetooth Default Settings in Setup mode and then either Device Name or the Device Address After completing the set up procedures you can send a print request following the instructions in your device s documentation Enter Passkey If a passkey has bee...

Page 23: ...the computer by selecting the icon in the Application bar NOTE If the Bluetooth icon is not present in the Windows Application bar select Start g Control Panel g Bluetooth 5 Perform a search for Bluetooth devices installed on the computer and wait for them to be detected 6 Select the Dell Photo AIO 928 printer and make a note of the COM port that Windows has assigned to the printer s Bluetooth cha...

Page 24: ...tBridge compatible cameras 1 Insert one end of the USB cable into the camera 2 Insert the other end of the USB cable into the PictBridge port on the front of the printer NOTE When a PictBridge camera is connected to the printer but the printer is not connected to the computer some button functions on the printer operator panel are not available These functions become available again when you disco...

Page 25: ...damaged The connector used for the PictBridge can also be used to access information stored on a USB memory pen When you insert a memory card or USB memory pen the Photo mode menu is displayed NOTE Do not insert more than one memory card or USB pen at the same time NOTE If the memory card is not recognised an error message appears on the printer LCD Press the button to return to the Main menu and ...

Page 26: ...f Sheet of the photos contained on the memory card or USB memory pen 1 Insert a memory card or USB memory pen with photos into the printer slot 2 Wait for the printer to recognise the newly connected memory device NOTE If the Photo menu is not displayed proceed as follows In the Main menu on the operator panel use the Arrow buttons to highlight Photo then press the Select button 3 Proof Sheet is t...

Page 27: ...s are displayed Current photos total photos counter NOTE When all the saved photos have been viewed on the display a prompt appears allowing you to view them all again or print them all Browsing Your Photos When you select the Browse option from the Photo menu the first image on the memory card is displayed Using the Arrow buttons you can browse all the photos present on the card moving from one t...

Page 28: ...hoto NOTE The Options sub menu is available for the photo only after you specify the number of copies 5 To select the photo shown on the display press the Select button A yellow border appears around the photo to confirm selection NOTE Press the Select button again to cancel selection of the photo shown on the display 6 Set the values that can be defined for each of the photos selected using the A...

Page 29: ...uttons to select On or Off If you choose On the Red Eyes correction filter is automatically applied Settings From the Settings sub menu you can set Border Layout Quality and Paper Type For more information see Defining the Photo Setup NOTE The selections applied to the photo are not shown correctly on the display but can only be seen when the photo is printed You must therefore print the photo to ...

Page 30: ...tton and confirm when prompted Settings Menu Item Settings Border Border Borderless Layout 1 x page 4 x page 9 x page 16 x page Quality Normal Photo Draft Paper Type Plain Coated Photo Transparency Viewing or Printing Photos 1 In Photo mode on the operator panel use the Arrow buttons to highlight Browse then press the Select button 2 Press the Arrow buttons to scroll through the photos on the memo...

Page 31: ...lect button The printer prints all the photos present on the memory card or USB memory pen connected Saving Photos on Your Computer In Photo mode on the operator panel use the Arrow buttons to highlight Save Photos then press Select button All photos on the memory card or USB memory pen are transferred to the computer ...

Page 32: ... of the document is aligned with the arrow on the printer 5 Close the top cover 6 To modify copy settings select Copy in the Main menu by pressing when it is highlighted 7 Scroll through the options available using the Arrow buttons until the option you want to set is highlighted 8 Now use the Arrow buttons to scroll through the values When the value you want to set is displayed press to select it...

Page 33: ... colour by default Copying Documents from Your Computer 1 Switch on the computer and printer and ensure they are connected 2 Load the paper For more information see Loading Paper 3 Open the top cover 4 Place the document to copy face down on the scanner glass Ensure that the upper left corner of the document is aligned with the arrow on the printer 5 Close the top cover 6 Click Startg Programs or ...

Page 34: ...ick Copy Copying Photos from the Operator Panel 1 Switch on your printer 2 Load photo paper with the print glossy side face up For more information see Loading Paper 3 Open the top cover 4 Place the photo to copy face down on the scanner glass Ensure that the upper left corner of the photo is aligned with the arrow on the printer 5 Close the top cover 6 From the Copy sub menu select Quality and ch...

Page 35: ...dium speed and resolution and Photo low print speed high resolution Brightness If necessary you can adjust the brightness of the document or photo you want to copy by moving the cursor on the screen To darken the image move the cursor towards the black square to lighten it move the cursor towards the white square A central position corresponds to medium brightness You can also set printing in Colo...

Page 36: ...duce the size of the copied image you want to obtain Same scale The default selection the scale of the copied image remains unchanged Fit to page Adjust automatically the size of the original to the size of the paper loaded Scale Indicate the desired scale The default is 100 percent while the range of values you can select is from 25 percent to 400 percent When you choose a reduction the copied im...

Page 37: ...O Center opens 7 Click the Photocopier icon 8 Click Preview 9 Move the dashed lines so as to delimit the area of the image you want to print 10 Select the Photo option from the Document type tab and then specify if the photo is in Colour or Black and White 11 You can also select the copy quality select the paper size indicate the original document size lighten or darken document reduce or enlarge ...

Page 38: ...or Copy mode from the operator panel To modify settings highlight Copy in the Main menu using the Arrow buttons and press the Select button Next select Default Settings For information on the options available see Using the Operator Panel ...

Page 39: ...ts respective icon When you select Scan to application all the applications supported by the All In One AIO Center are listed in the pane on the right side of the window NOTE The applications available depend on how your computer is configured and the association files set in Microsoft Windows Setting Scan Options You can set scan options from a single dialogue which contains all the main operatio...

Page 40: ... 600 1200 2400 4800 and 9600 dpi Colour select the colour scale of the document or photo to be scanned by clicking on the corresponding button Colour full colour scanning Grey scanning in shades of grey B W scanning in B W Brightness and Contrast of the document or the photo to be scanned Move the brightness cursor towards the right to lighten the image or towards the left to darken it Move the co...

Page 41: ...n be set from the programs listed above are Type Text Mixed Photo Colour Colour Gray B W Custom Resolution Colour depth Brightness Contrast Sepia Descreen Scanning Documents You can scan with your printer using either the printer operator panel or your computer 1 Switch on your computer and printer and ensure they are connected 2 Open the top cover 3 Place the document you want to scan face down o...

Page 42: ... where you want to send the scanned image For example if you select Scan to application to scan an image and use it in an application installed on your computer you can then select the program you want as the scan destination from the applications available 2 Click the Proceed button to display the Scan dialogue Select the type of document to be scanned Select the scan quality and any other settin...

Page 43: ...splayed 10 Select the type of document to be scanned the scan quality and any other settings required 11 After you finish customising the image scanning parameters click Scan 12 When the document scanning completes you are prompted if you want to scan another image When you have finished scanning select No to exit At this point the application you selected is opened containing the scanned image Sc...

Page 44: ...he next sheet on the scanner glass and click Proceed 12 Repeat the same operations for all the pages you want to scan Converting Scanned Images Using Optical Character Recognition OCR Software Optical Character Recognition OCR software converts a scanned image into editable text within a word processing program NOTE For Japanese and Chinese users ensure that you have installed the OCR software on ...

Page 45: ...D into your computer drive and following the instructions displayed on the screen 8 Click the Proceed button The Scan dialogue opens on the computer screen 9 Select B W as the document type and 300 dpi as the resolution NOTE You can alter the document type and resolution settings to optimise the quality of the results that can be obtained depending on the characteristics of the original 10 After y...

Page 46: ...ers click Scan When document processing finishes the Explorer folder containing the saved image opens E Mailing a Scanned Image or Document To send scanned images or documents by e mail 1 Open the top cover 2 Place the document or photo face down on the scanner glass Ensure that the upper left corner of the front of the item is aligned with the arrow on the printer 3 Close the top cover 4 Open the...

Page 47: ...ing No 10 When the work session ends your default e mail program is run automatically Add a note to accompany the photo to be sent as an attachment and click Send NOTE If you have a query about how to attach a document to an e mail consult your e mail program s Help information Enlarging or Reducing Images or Documents You can enlarge or reduce your document in the range of 25 percent to 400 perce...

Page 48: ...o store the image you are about to scan 8 Click the Proceed button The Scan dialogue opens on the computer screen 9 Select the type of document to scan its quality and any other settings required 10 Use the buttons near the image preview frame to enlarge or reduce the image 11 Follow the instructions on the screen to select the size of the new image 12 After you finish customising the image scanni...

Page 49: ...m providing optical character recognition OCR Using the All In One AIO Center Program The AIO Center is composed of simple to use forms and dialogue boxes that help you use the printer functions Tab Function Print photos Define the characteristics of the document or photo to be printed Select the type and size of the paper on which you want to print Define the quality required Lighten or darken do...

Page 50: ...m solving and maintenance Cleaning and checking ink cartridges Automatically aligning ink cartridges See Aligning Ink Cartridges Purchasing new ink cartridges from Dell Help Consult the online help for information on how to use the software The online help is contextual and explains in detail how to complete the parameter settings that appear in dialogue boxes To activate click the Help button To ...

Page 51: ...nces To access the Printing Preferences dialogue when a document is open 1 Click Fileg Print The Print dialogue opens 2 Depending on the program or operating system you are using in the Print dialogue click Preferences Properties Options or Setup The Printing Preferences dialogue opens To access Printing Preferences when no document is open 1 On Windows XP click StartgControl Panelg Printers and o...

Page 52: ...single sheet Define the order in which multiple pages are to be inserted onto a single sheet of paper and indicate if there should be a border around each image printed Choose to print multiple pages in poster format expanding the contents of a single page over one or more sheets of paper Define the number of sheets on which to print the poster image and if a border should be inserted around each ...

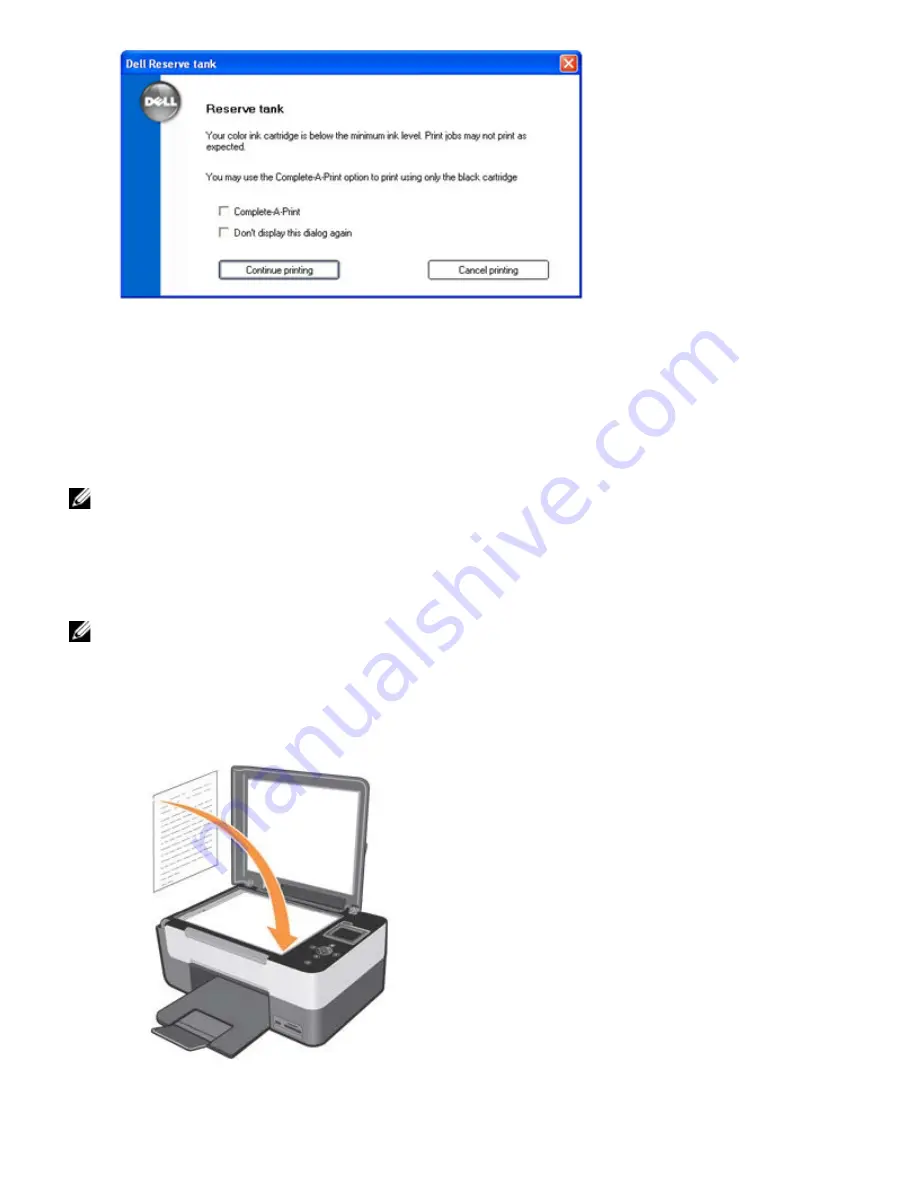
Page 53: ...operation executed until a new ink cartridge is installed For further information on cartridge replacement see Replacing Ink Cartridges When one or both ink cartridges are empty and a print operation is attempted the Reserve Tank window is displayed If you continue printing the print result may not be satisfactory If the ink in the black cartridge has run out you can print using the colour cartrid...

Page 54: ...ating system you are using Editing Scanned Text Using ScanSoft OmniPage SE The OCR software ScanSoft OmniPage SE allows you to convert a scanned image into modifiable text using a text processing program NOTE Ensure you have the OCR software installed on your computer A copy of the OCR software is provided with your printer and should have been installed at the same time as your printer drivers 1 ...

Page 55: ...h Service Pack 1 minimum memory requirement 256MB 5121MB suggested 32 bit Windows Vista and 64 bit Windows Vista minimum memory requirement 512MB 1GB suggested If you press the Cancel button during software installation the process stops and the installation is cancelled A message is displayed indicating the current status and informing you what to do next Any software updates to the printer drive...

Page 56: ...ot appear a On Windows XP click Startg My Computer On Windows 2000 double click My Computer from your desktop On Windows Vista Startg My Computer b Double click the CD or DVD drive icon c When the printer software installation screen appears click Install d Follow the instructions on your screen to complete the installation Removing and Repairing the Software From Windows 2000 select Startg Settin...

Page 57: ...drivers Printer firmware or Dell All In One Center Software Tools 4 If updates are found they are displayed in a list and you can select the check box of the ones you want to download Click Next to continue or Cancel to exit without updating 5 If you choose to update the Printer firmware the Status Monitor appears displaying the percentage of the operation completed in real time 6 If you choose to...

Page 58: ...fety Instructions in this Owner s Manual 1 Switch on your printer 2 Lift the scanner unit and position the scanner support between the tabs to hold it open The ink cartridge carrier moves and stops at the loading position unless the printer is busy 3 Press the ink cartridge securing tab to release the old ink cartridge Remove the cartridge 4 If the cartridge is going to be reused place it in the i...

Page 59: ...in the left ink cartridge carrier and the colour ink cartridge fixed securely in the right carrier 7 Press the new ink cartridge in until it locked in place by the securing tab 8 Raise the scanner unit and move the support arm forward Lower the unit carefully until it is completely closed Aligning Ink Cartridges The ink cartridges are aligned automatically by the printer every time a new cartridge...

Page 60: ... printed characters are poorly defined or that straight lines appear wavy even after cleaning the nozzles on the ink cartridges you can align the ink cartridges manually From the operator panel 1 In the Main menu press the Arrow buttons to highlight Maintenance 2 Press the Select button 3 Press the Arrow buttons to highlight Align Cartridges 4 Press the Select button From the AIO Center 1 Select t...

Page 61: ...The photo cartridge is normally used together with the colour cartridge to obtain the best results possible when printing photos however for normal B W and colour printing the black and colour cartridges are usually used NOTE When using the black cartridge place the unused photo cartridge in the integrated garage and vice versa To replace ink cartridges proceed as follows 1 Open the scanner unit o...

Page 62: ...ANUALLY 1 Insert the Drivers and Utilities CD 2 On Windows XP click Startg Computer Resources On Windows 2000 double click Computer Resources on the desktop On Windows Vista click Startg Computer Resources 3 Double click the icon for the CD drive and double click the file setup exe 4 When you see the software installation screen for the printer click Install or Install Now 5 To complete the instal...

Page 63: ...e Dell printer in the Printers folder when you disconnect and reconnect the printer to the computer always insert the USB cable into the same USB port that you used originally when connecting the Dell printer also install the Dell printer only once from the printer CD Printer related errors ENSURE THAT THE PRiNTER POWER SUPPLY cABLE iS cONNEcTEd cORREcTLY TO THE PRiNTER ANd TO THE ELEcTRicAL OUTLE...

Page 64: ...ke hold of the paper and pull it carefully out of the printer 3 Switch on the printer and print the document again Paper is jammed in a hidden place 1 Switch off the printer 2 Lift the scanner unit and position the scanner support in a way that it maintains the scanner in the open position 3 Pull the paper out of the printer carefully including any remaining bits 4 Close the scanner unit switch th...

Page 65: ...D displays Error followed by a 4 digit number a more serious error has occurred Contact Customer Services For more information visit our web site support dell com or see Error Messages Listing No computer Check that the computer is connected and switched on The Start button was pressed when the printer was in Scan mode but a computer was not found connected to the printer Ensure that the printer i...

Page 66: ... are printing photos using a photo cartridge use Dell Premium photo paper Use thicker white or coated paper For printing photos use Dell Premium photo paper Select a higher print quality level If there is no improvement in print quality try Cleaning the ink cartridges For more details see Cleaning the Ink Cartridge Nozzles Aligning the ink cartridges For more details see Aligning Ink Cartridges Se...

Page 67: ...etected or invalid result occurred in USB mode Switch the printer off and on again 1212 Watchdog error Restart Printer Indicates printer system reset by Watchdog timer Subsystem stall failure Switch the printer off and on again 1213 Memory error Restart Printer Attempt to load from or store in an invalid address Switch the printer off and on again 1214 Printer Error Restart Printer Indicates that ...

Page 68: ...a slot windows pop up error message The card media inserted is not valid for the slot Insert the correct type of memory card into the slot and ensure that the card is operational 4101 Card Read Write Error Change media card windows pop up error message Problem reading or writing to the media card Insert the correct type of memory card into the slot and ensure that the card is operational 0200 Unab...

Page 69: ...e Lift the scanner unit and replace the ink cartridge 1206 Ink Cartridge Error Replace ink cartridge windows pop up error message Problem in colour TSR circuit cannot determine ink cartridge temperature Lift the scanner unit and replace the ink cartridge 1207 Paper Control system error Restart printer windows pop up error message Paper system control failure detected Switch the printer off and on ...

Page 70: ...d Custom Factory Integration CFI DellPlus Contacting Dell You can access Dell Support at support dell com Select your region on the WELCOME TO DELL SUPPORT page and fill in the requested details to access help tools and information You can contact Dell electronically using the following addresses World Wide Web www dell com www dell com ap for Asian Pacific countries only www dell com jp for Japan...

Page 71: ......

Reviews: