3. Press the central button of the control wheel.
The custom White Balance values appear. Ignore the error message ("Custom WB Error") – this
message appears because the camera has been changed to an NIR camera in the factory.
4. Select the register to save the settings in. By default, register 1 is selected. Press the central button of
the control wheel to confirm.
5. The color infra-red (CIR) display on the camera appears. When using the B+W 040 (orange) filter,
vegetation appears blue and the sky appears brown.
Inserting the camera
The camera and lens are stored in the flight case.
1. Screw the lens onto the camera body and adjust the camera focus. For more information, refer to the
maintenance procedures for the camera in the
Maintenance
screen or in the
Delair UX5 HP Aerial
Imaging Solution Maintenance Guide
.
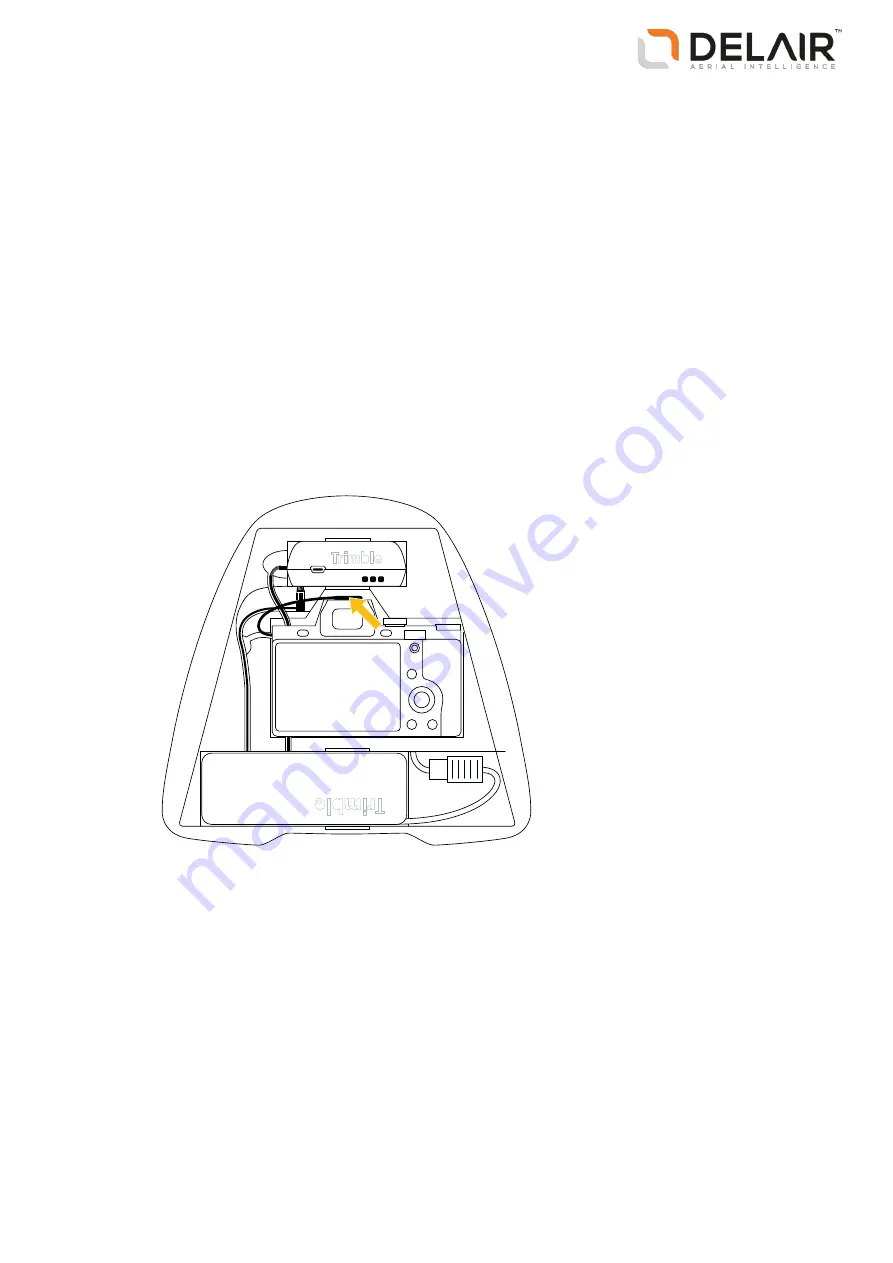
2. Loosen the Velcro strap in the payload bay of the rover body and insert the camera into the payload
bay.
3. Connect the hot shoe connector to the hot shoe of the camera.
4. Secure the camera using the Velcro strap.
Note –
After inserting and securing the camera, check the shutter speed and the exposure compensation
dial (which should be set to 0) as the settings control might have spun and changed the setting.
66
Delair-Tech
|
676, Rue Max Planck – 31670 Toulouse-Labège, France
|
Tel: +33 (0) 5 82 95 44 06
|
Capital: 238 110,30 € - APE: 3030Z – Intra-Community VAT number: FR90 53 09 69 781 – 530 969 781 R.C.S. Toulouse
This document is the sole property of Delair-Tech and cannot be used or reproduced without the written authorization of Delair-Tech
.


