Page 13
MAIN MENU
- - - -
ESC
(
)
(
)
(
)
Push 1
1. SET TEMP
2. USER TIMER
3. CLOCK
4. USER ALARM
5. SLEEP TIMES
6. MAINT TIMERS
7. MISC OPTIONS
8. ADV. OPTIONS
9. LD. DEFAULTS
7.1 Main Menu
The SP1200 menu system provides a simple interface that allows you to view and modify most user options. These
options include set temperature, sleep times, filtration time and filtration period to name a few.
Throughout the entire menu system only three touch pad buttons are used - DOWN, SCROLL and UP. Generally,
while you are within the menu system the lower line of text on the LCD Display will show the function of each of these
buttons.
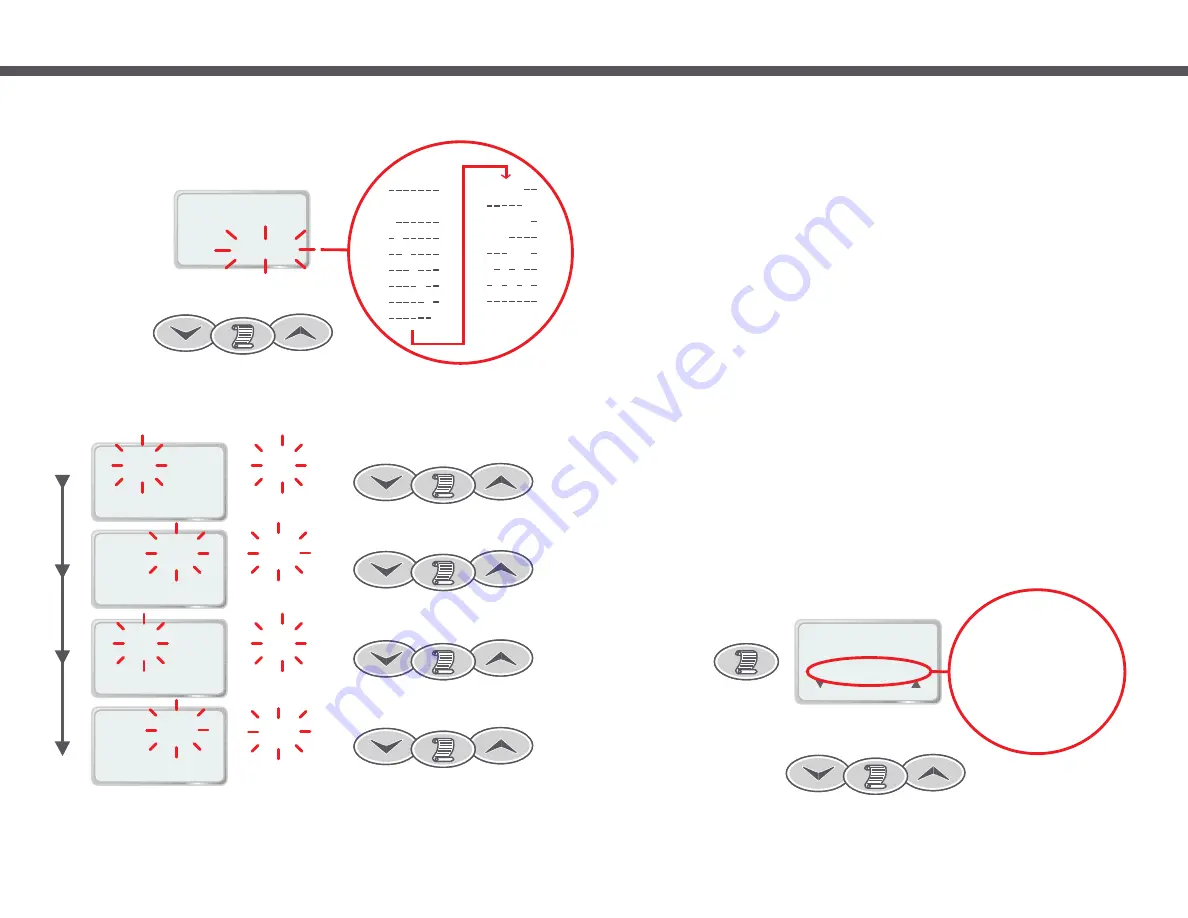
To access the main menu from the default display, press the SCROLL button. The LCD display will change to show
the Main Menu title. Each menu consists of a menu title and several menu items - menu items are numbered
whereas the menu title is not. Use the UP and DOWN buttons to browse through the main menu.
If you do not press any touch pad buttons for over one minute while inside the menu system the display will
automatically return back to the default view, however you do not need to wait for this timeout period. To quickly exit
from the menu system, use the UP and DOWN buttons to select the current menu title and press the SCROLL
button.
Note that while viewing the menu title the LCD Display text above the SCROLL button shows “(ESC)” to indicate that
the function of the SCROLL button is to escape from the menu. The action taken by the SCROLL button is
dependent on which menu item is selected and this is reflected by the LCD Display text above the SCROLL button.
The menu system contains five sub menus - User Alarms Menu, Sleep Times Menu, Maintenance Timers Menu,
Miscellaneous Options Menu and Advanced Options Menu. These sub menus are accessed via main menu items 4
to 8 respectively. Simply select one of these items in the main menu and press the SCROLL button. You will now be
in the given sub menu. Browse sub menus just as you would the main menu - the interface functions exactly the
same.
To select any other item either within the main menu or any of the sub menus simply select the desired menu item
using the UP and DOWN buttons then press the SCROLL button.
The main menu is the top level of the menu system. It provides quick access to the set temperature setting, user
timer and clock. The five sub menus are also accessed via main menu items 4 to 8.
To access the main menu from the default view, simply press the SCROLL button. Please read “Navigating the menu
system” section above if you have not already done so.
Navigating The Menu System
1. SLEEP START
DAYS:
[ MTWTFSS ]
11 00
PM
:
Scroll to SET
[
]
MTWTFSS
T
W
T
F
S
S
MTWTF
SS
MTWTFS
MTW
TFS
M W F
T
T S
[
]
[
]
[
]
[
]
[
]
[
]
[
]
[
]
[
]
[
]
[
]
[
]
[
]
[
]
[
]
M
1. SLEEP START
DAYS:
[ MTWTFSS ]
11 00
PM
:
11
Scroll to SET
1. SLEEP START
DAYS:
[ MTWTFSS ]
11 00
PM
:
Scroll to SET
00
1. SLEEP STOP
08.0 HRS
ASLEEP
7 00
AM
:
Scroll to SET
00
1. SLEEP STOP
08.0 HRS
ASLEEP
7 00
AM
:
7
Scroll to SET
Page 20
[
]
4) Use the UP and DOWN buttons to select the desired weekdays that the sleep period will operate. There are 15
possible weekday settings to choose from - Monday to Sunday and various combinations of each.
5) Press the SCROLL button to confirm the current setting and move to the next field.
6) Repeat step four and five to carry on adjusting sleep start hours & minutes then sleep stop hours & minutes.
Tip: As you modify the stop time the hours asleep field will change accordingly, use it to verify your new settings
are correct.
When the SCROLL button is pressed to set the sleep stop minutes the minutes will stop flashing and if desired more sleep
periods can be st by repeating steps 6.


