AP20 Installation and Operating Guide
Page 15
AP20 Installation & Operating Guide
Document # 9301H39200 Ver. 1.1
1.2 Front Panel Controls and Indicators
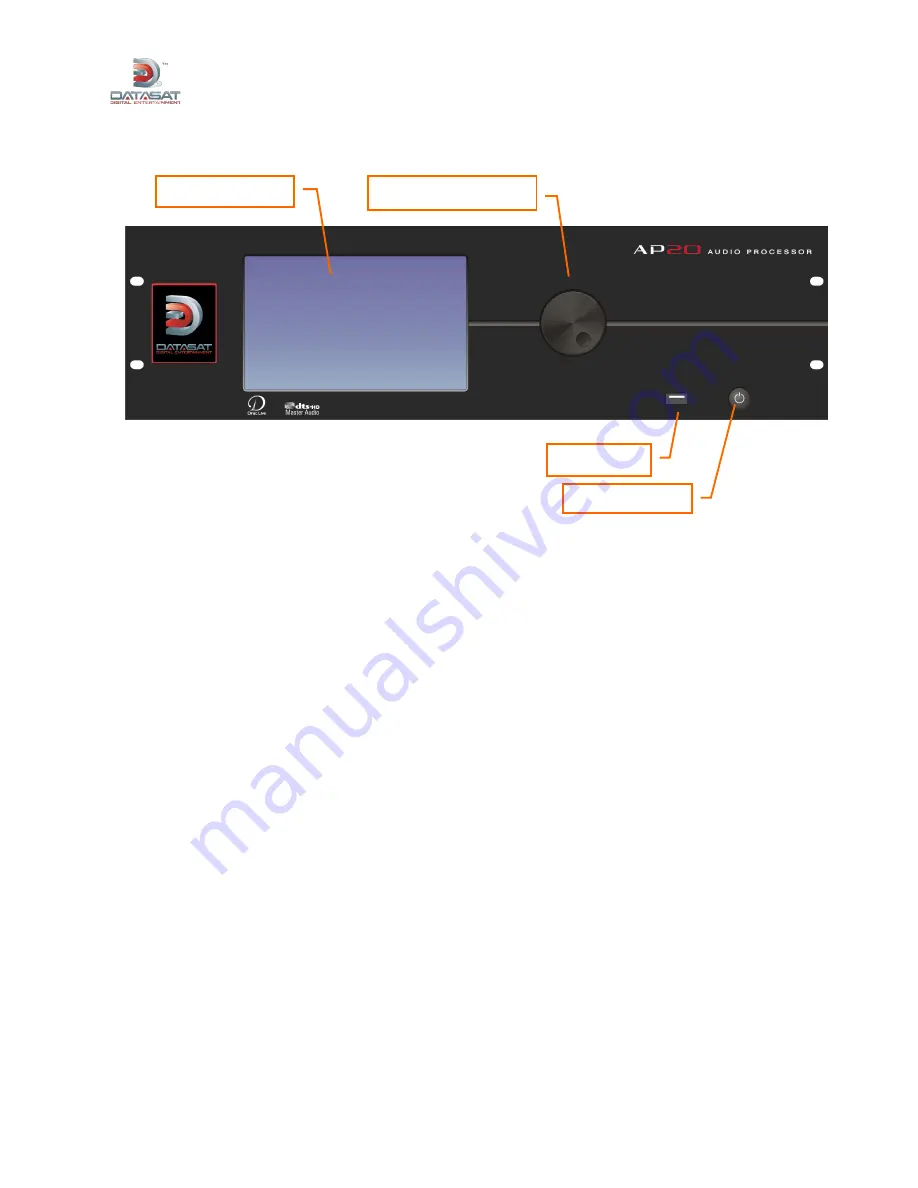
Figure 1: Front Panel Controls and Indicators
The front panel contains the following controls and indicators for operating AP20.
Power button
: Turns the unit on and off
LCD/Touch Screen
: Displays theater system configuration and status and allows
configuration changes. Most selections can be made by touching the screen with your finger
or by using a stylus.
The LCD screen operates in two modes:
o
Home screen. The projectionist can select formats and mute volume from this screen.
They can also change the monitor volume and execute manual automation commands
via the popup windows. During playback, the screen displays information about the
content currently being played.
o
Setup mode
. In menu mode, the screen displays menus for viewing and adjusting
operational settings by the cinema technician. The projectionist does not need to enter
these menus.
Adjustment knob
:
Used for fader control and parameter adjustments. On the Home screen,
this knob adjusts the fader level. However, it is used within the setup screens to adjust values,
EQ filter faders, and other values. When the setup screen contains many controls, first set the
focus by touching the control on the display. Then move the knob clockwise to increase the
value, or counterclockwise to decrease the value.
USB port
: Use for software updates and loading and saving of configurations. See topic
Update System Software From USB Device
on page 54 for more details.
Touchscreen
Adjustment knob
USB
port
Power button


