


E-GENIUS
90
AV7000 LINEAR CAMERA
Accessing e-Genius
To access e-Genius
:
1. Connect your computer to the AV7000
HOST NET
or
IMAGE NET
port using an RJ45
Ethernet cable.
2. Turn on your laptop computer.
3. Configure your PC’s IP Address to be in the same network as the
HOST NET
or
IMAGE NET
port.
4. Open a web browser and enter the IP address for the unit. If the correct IP address
is entered, the Log On window will appear.
The default setup IP address for all
AV7000
cameras is 192.168.3.10 (Host), and
10.0.40.20 (Image).
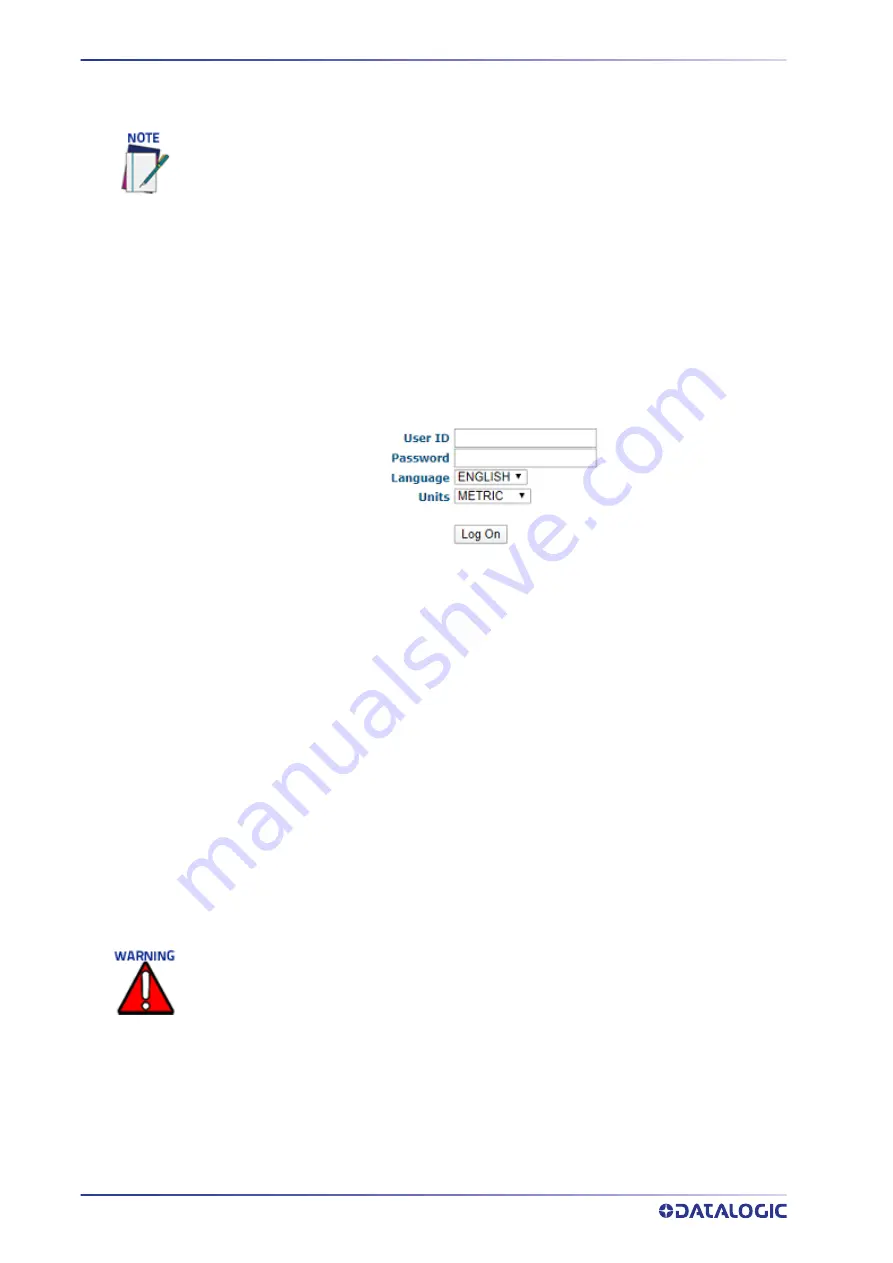
5. Enter the
User ID
(default is
setup
) and
Password (
default is
DLAset
) for your sys-
tem in the fields provided. Your site administrator may have modified these
defaults.
6. Select a language from the Language drop-down list.
7. Select
METRIC
or
IMPERIAL
from the Units drop-down list.
8. Click
Log On.
If the user name and password are valid,
the application enables all functions available
to the user and displays the
System Info
window.
If the password is not valid,
the application displays a results box with the message,
“Incorrect Password.
”
Click
O
K
to return to the
Log On
window and enter the correct
user name and password. If you don’t know the password, contact your system man-
ager.
To change your PC’s IP Address:
Windows 7 or 8
1. From the desktop, click the
Start
button, and then select
Control Panel
.
Before starting up or testing the AV7000, it must be connected to a CBX Connection Box
depending on the system configuration.
The user ID and password shown above provide full setup rights to the user.
If a user only needs to view system information
without saving changes
, the
User ID:
monitor
and
Password:
DLAmon should be used.
Summary of Contents for AI7000
Page 1: ...AV7000 PRODUCT REFERENCE GUIDE Linear CAMERA...
Page 48: ...MECHANICAL INSTALLATION 34 AV7000 LINEAR CAMERA...
Page 49: ...INSTALLATION SEQUENCE PRODUCT REFERENCE GUIDE 35...
Page 55: ...INSTALLING THE DEFLECTION MIRROR PRODUCT REFERENCE GUIDE 41...
Page 57: ...INSTALLING THE DEFLECTION MIRROR PRODUCT REFERENCE GUIDE 43...
Page 60: ...MECHANICAL INSTALLATION 46 AV7000 LINEAR CAMERA...
Page 66: ...ELECTRICAL INSTALLATION 52 AV7000 LINEAR CAMERA Controller Client Array with DM3610...
Page 69: ...TYPICAL CONNECTION BLOCK DIAGRAMS PRODUCT REFERENCE GUIDE 55 AV7000 in Hybrid Configuration...
Page 80: ...ELECTRICAL INSTALLATION 66 AV7000 LINEAR CAMERA Photoelectric Sensor to CBX510 PNP...
Page 96: ...ELECTRICAL INSTALLATION 82 AV7000 LINEAR CAMERA Unpowered Outputs...
Page 97: ...CBX100 CBX510 CBX800 INITIAL CONFIGURATION PRODUCT REFERENCE GUIDE 83 Powered Outputs...
Page 116: ...E GENIUS 102 AV7000 LINEAR CAMERA...
Page 134: ...E GENIUS 120 AV7000 LINEAR CAMERA...
Page 175: ...PRODUCT REFERENCE GUIDE 161 4 Again run the small package through the system...
Page 239: ...PRODUCT REFERENCE GUIDE 225 12 Click Update to save your changes...
Page 278: ...FOCUSING SETUP AND CALIBRATION 264 AV7000 LINEAR CAMERA...
Page 309: ...READING LINEAR BARCODES PRODUCT REFERENCE GUIDE 295 READING LINEAR BARCODES...
Page 310: ...AV7000 FEATURES 296 AV7000 LINEAR CAMERA...
Page 311: ...PRODUCT REFERENCE GUIDE 297...
Page 312: ...AV7000 FEATURES 298 AV7000 LINEAR CAMERA...
Page 313: ...PRODUCT REFERENCE GUIDE 299 READING 2D BARCODES...
Page 314: ...AV7000 FEATURES 300 AV7000 LINEAR CAMERA...
Page 315: ...PRODUCT REFERENCE GUIDE 301...
Page 316: ...AV7000 FEATURES 302 AV7000 LINEAR CAMERA...
Page 336: ...TROUBLESHOOTING 322 AV7000 LINEAR CAMERA 4 Click Stop Acquiring to freeze the scope...
Page 350: ...TECHNICAL FEATURES 336 AV7000 LINEAR CAMERA...
Page 351: ......


