5-8
Adjustments
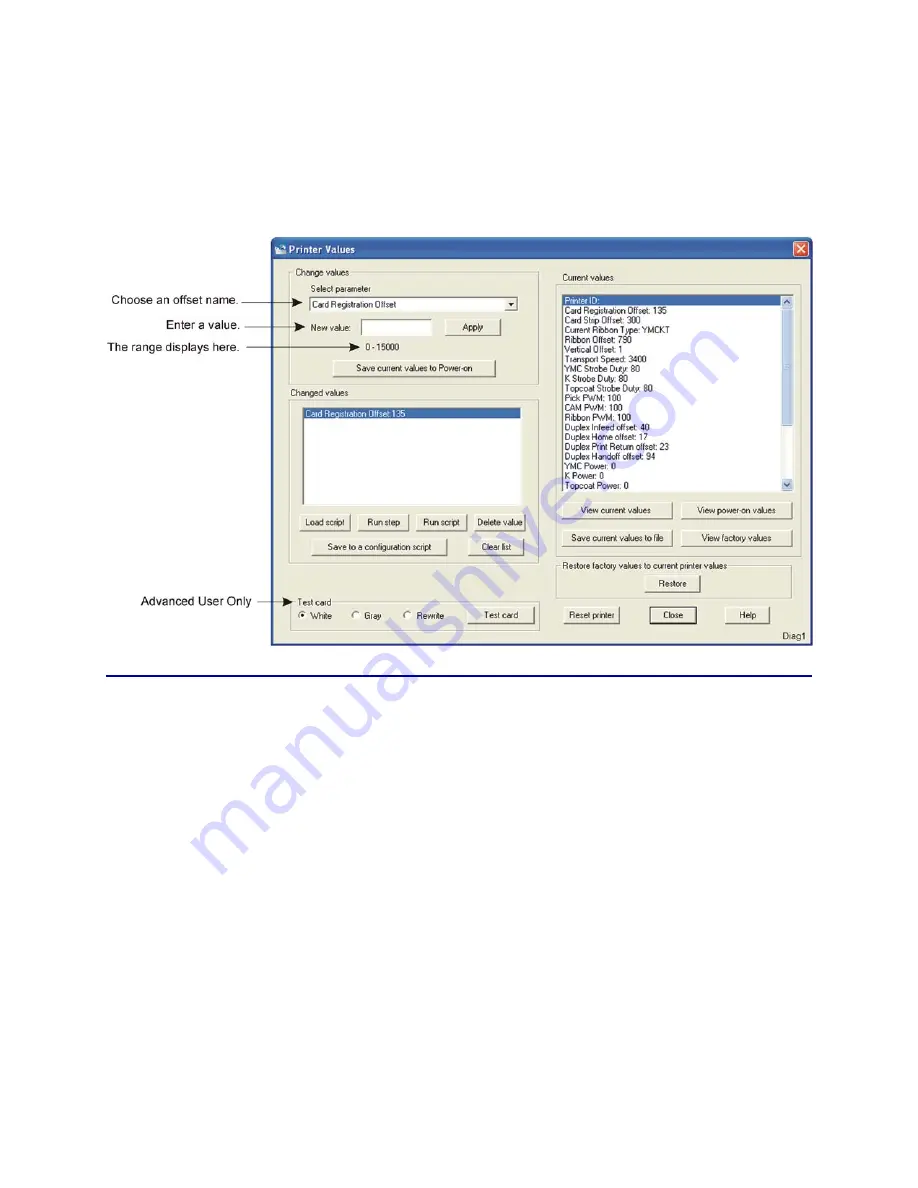
Changing Printer Values
Use the Printer Values dialog box to change the operational parameters of the
printer. For a description of each parameter and how to change it, refer to Setting
Printer Value Parameters. For information on how to create a test script, refer to
Working With Scripts. For information on whether to save your changes or
discard them, refer to Viewing and Saving Values.
Procedure
1.
If you need to access the advanced settings, log in as an Advanced User.
2.
Select the parameter to change from the list in the Change Values box.
3.
Type your change in the New Value data box and click on
Apply
. (The new
value is temporarily stored in the printer’s RAM memory, but it is not
permanently stored in EPROM memory yet. If you turn off or reset the
printer, the value is removed from RAM and the original power-on default
value is loaded.)
4.
Use the
Test card
option or a card creation program to print a test card to
test your changes. The printer will use your new values for the test.
5.
If the changes are not acceptable, either reset the printer or turn it off.
6.
If the changes are acceptable, click on the
Save current values to Power-on
button to store the changes permanently. You will be prompted for a
password. Enter
42360
.
Summary of Contents for CP60
Page 1: ...Datacard CP60 and CP60 Plus Card Printers Service Manual May 2007 Part No 539358 002 Rev C ...
Page 12: ...1 4 Introduction ...
Page 14: ...2 2 Theory of Operation Printer Components Functional Block Diagram ...
Page 19: ...CP60 and CP60 Plus Service Manual 2 7 LCD Menu Diagram ...
Page 50: ...2 38 Theory of Operation ...
Page 124: ...5 40 Adjustments ...
Page 128: ...6 4 Removal and Replacement Front Wire Routing ...
Page 129: ...CP60 and CP60 Plus Service Manual 6 5 Duplex and Printhead Wire Routing ...
Page 130: ...6 6 Removal and Replacement Functional Block Diagram ...


