CP60 and CP60 Plus Service Manual
5-5
Using Printer Diagnostics
1.
The first time you use the Printer Diagnostics you may be required to select
the printer model. Make sure the printer is connected and powered on, and
then click on the appropriate printer.
2.
Next, select
User Properties
from the
File
menu to change the logon level.
A.
Select
Advanced User
from the list and press
OK
.
Selecting
Basic User
will disable some of the settings within
Diagnostics. No password will be required for this option.
B.
At the prompt, enter the service technician password (
926918
).
Do not share this password with the end-user of the printer. It permits
access to settings that should not be altered by untrained personnel.
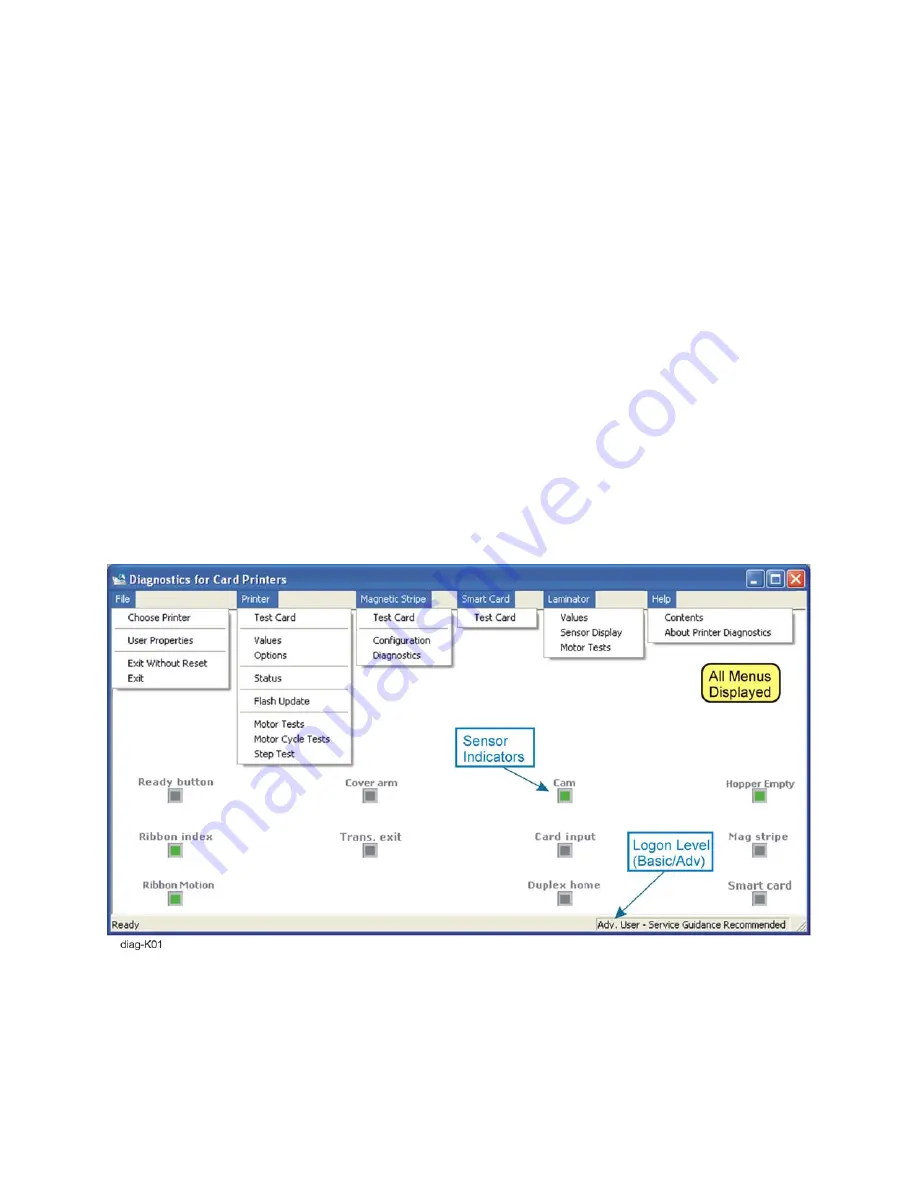
Parts of the Diagnostics Window
The main Diagnostic window shows the near-real-time status of the printer’s
sensors (there may be a communication delay). The lower right corner shows the
current Logon Level (either Basic or Advanced). Menu options that are not
appropriate for the printer are grayed out.
Summary of Contents for CP60
Page 1: ...Datacard CP60 and CP60 Plus Card Printers Service Manual May 2007 Part No 539358 002 Rev C ...
Page 12: ...1 4 Introduction ...
Page 14: ...2 2 Theory of Operation Printer Components Functional Block Diagram ...
Page 19: ...CP60 and CP60 Plus Service Manual 2 7 LCD Menu Diagram ...
Page 50: ...2 38 Theory of Operation ...
Page 124: ...5 40 Adjustments ...
Page 128: ...6 4 Removal and Replacement Front Wire Routing ...
Page 129: ...CP60 and CP60 Plus Service Manual 6 5 Duplex and Printhead Wire Routing ...
Page 130: ...6 6 Removal and Replacement Functional Block Diagram ...


