CR825 and CE875 Instant Issuance System Installation and Administrator’s Guide
A-11
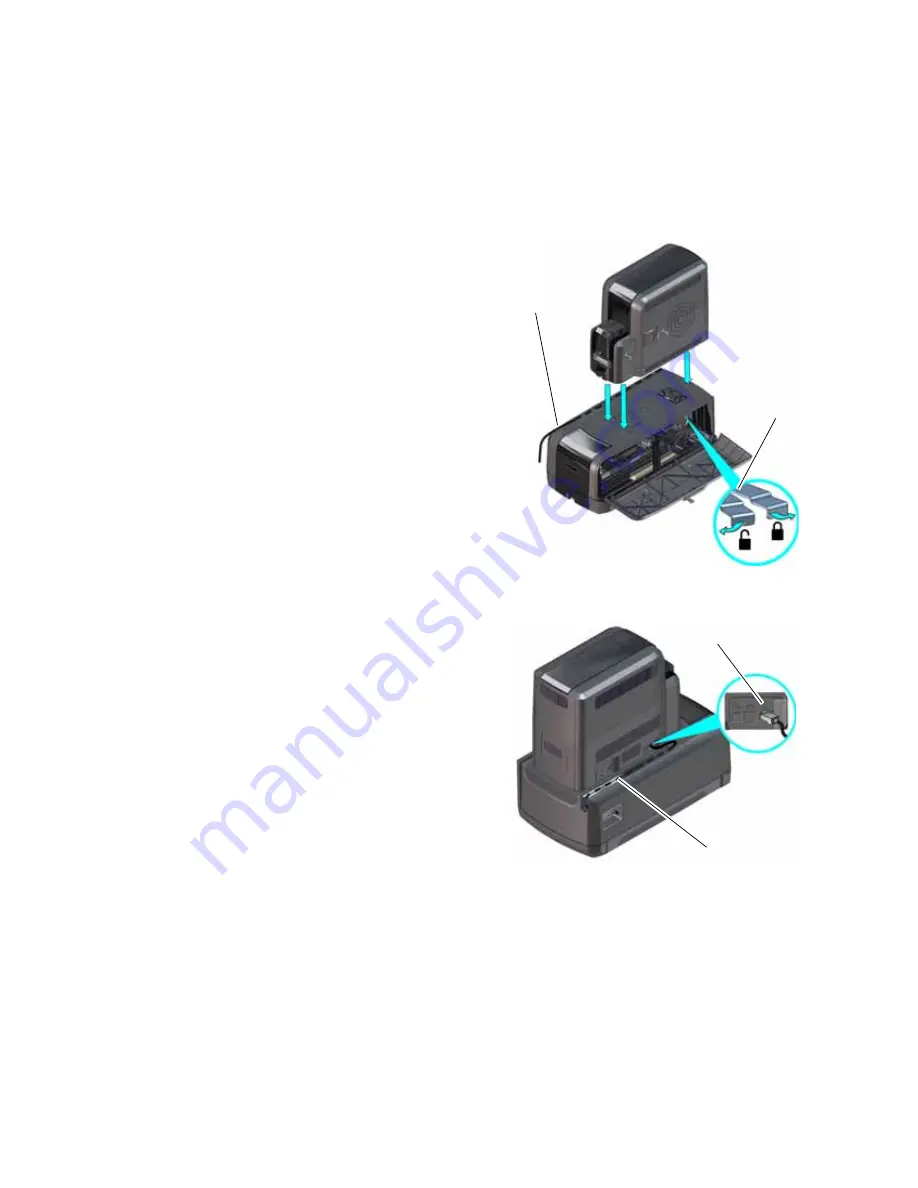
Assemble the Printer and Embosser
1.
Locate the interconnect cable in the cable routing area of the embosser and make sure that it
remains accessible.
2.
Slide the printer locking lever in the embosser
to the left to place the mounting lock in the
unlocked position.
3.
Lift the printer over the embosser and align the
pins on the embosser with the holes on the
underside of the printer.
4.
Press down on the printer carefully, but firmly,
to position it.
5.
Push the printer locking lever to the right to
lock the printer onto the embosser. Make sure
that the printer is securely locked to the
embosser.
6.
Connect the interconnect cable from the
embosser to the data port on the printer.
Interconnect
Cable
Printer
Locking Lever
Data
Port
Interconnect
Cable
Summary of Contents for CE875
Page 8: ...viii ...
Page 10: ...x ...
Page 16: ...xvi ...
Page 20: ...4 Printer Installation Multi Hopper Printer 13 4 in 340 mm 16 2 in 411 mm 25 6 in 651 mm ...
Page 28: ...12 Printer Installation Unpack the Optional Multi Hopper ...
Page 54: ...38 Printer Installation ...
Page 70: ...54 Elements of Card Design ...
Page 112: ...96 Printer Manager ...
Page 129: ...CR825 and CE875 Instant Issuance System Installation and Administrator s Guide A 9 ...


