background image

68  


Appendix B: GPIO Control


Outputs 

Outputs are used to control external devices and monitor internal signals.  

Step 1 

 Select the output line. 

Step 2 

Set the Signal Routing Block parameter. Refer to section “PLC Input Signal Routing Block” 

for more detail about PLC settings.  


Important Note:

 Signals PLC_10 to PLC_15 should not be changed unless you are 

very


experienced with triggers and PLC settings. 

Step 3 

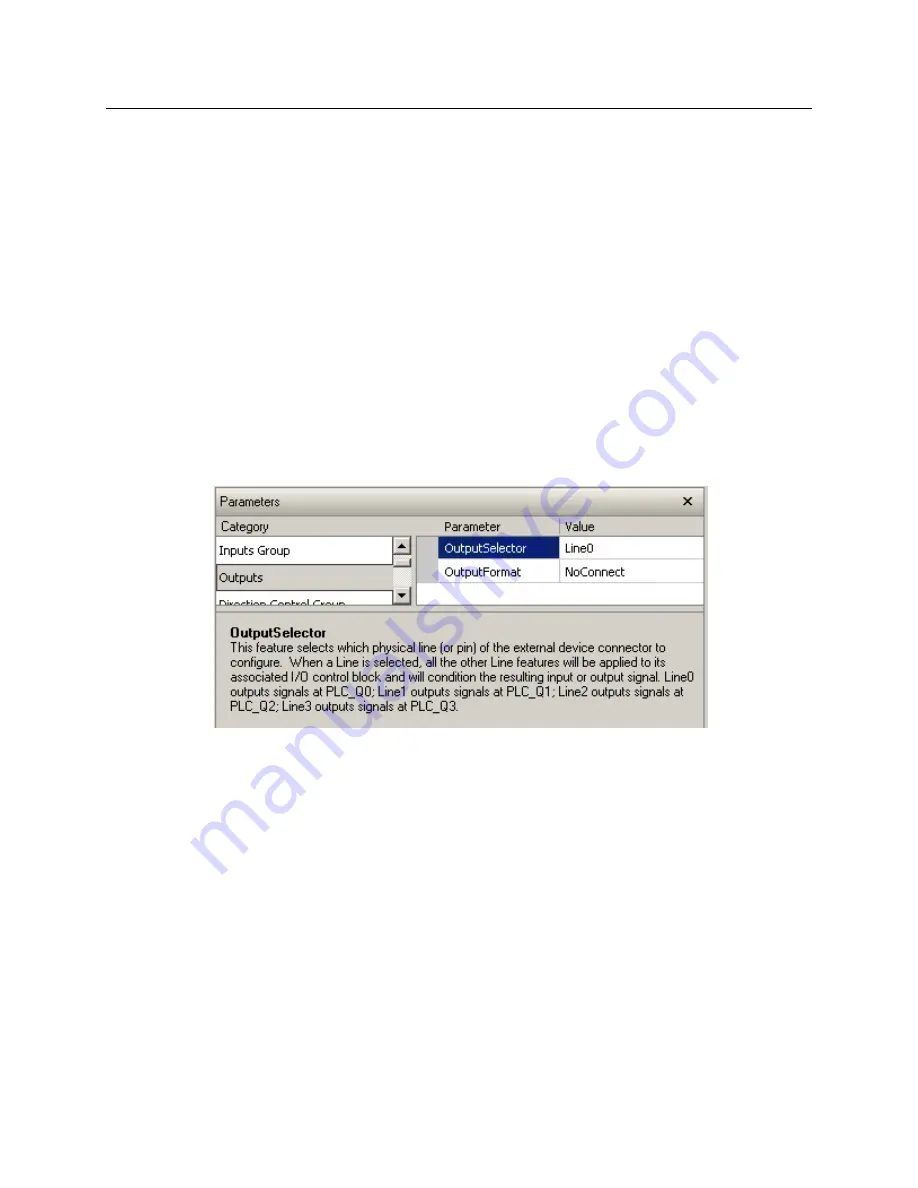
Set the signal output: Q0 to Q3. 


Use the lookup table to output signals to one of 4 GPIO outputs.  


Figure 53: Output Selector 


The signal to output can be selected from the Signal Routing Block parameters. For 

example, the following figures will output line 0. Please note that the frame valid (PLC_A4) 

is always high since Spyder3 is a line scan camera.   

Summary of Contents for Spyder3 SG-34 Series

Page 1: ...Spyder3 Color SG 34 Camera User s Manual SG 34 04k80 00 R and SG 34 02k80 00 R P N 03 032 20124 03 www teledynedalsa com sensors cameras frame grabbers processors software vision solutions ...

Page 2: ...found here Sales Offices http www teledynedalsa com corp contact offices Technical Support http www teledynedalsa com imaging support About Teledyne DALSA Teledyne DALSA is an international high performance semiconductor and electronics company that designs develops manufactures and markets digital imaging products and solutions in addition to providing wafer foundry services Teledyne DALSA Digita...

Page 3: ...g with the camera 16 4 Check camera LED settings and test pattern 16 5 Operate the Camera 16 Step 1 Ethernet Network Card Install and Configure 17 Install Network Card 17 Configure Network Card 17 Step 2 Connect Power Ethernet and Trigger Cables 20 Power Connector 20 Ethernet Connector and Ethernet LED 21 Status LED 21 GPIO Connector 22 GPIO Isolation 23 GPIO Configuration 23 TTL Inputs and Output...

Page 4: ...___________________________________________________________________ 53 Gate Dark Current Clear 53 Auto Mode srm 0 53 Immediate read out mode default srm 2 54 Gate dark current clear mode always on srm 1 54 Setting the Readout Mode 54 Appendix B GPIO Control_________________________________________________________________________________ 56 GPIO Getting Started Beginner Mode 56 The GPIO Connector 5...

Page 5: ...__ 91 Appendix D Setting up the FVAL ___________________________________________________________________________ 92 Examples Setting the FVAL 95 Appendix E Using the RGB12 Mode in CamExpert _____________________________________________________________ 98 Data Format 98 Revision History_________________________________________________________________________________________ 101 Index ______________...

Page 6: ... transmission up to 100 m 50 µm x y sensor alignment RoHS and CE compliant GeniCam compliant Easy to use GUI Optional serial interface ASCII 57600 baud adjustable to 19200 57600 115200 through virtual serial port through Ethernet not GeniCam compliant Programmable gain offset exposure time and line rate trigger mode test pattern output and camera diagnostics Flat field correction minimizes lens vi...

Page 7: ...Third party software E g CVB and NI Compatible Drivers need to be provided by the third party Camera Performance Specifications Table 3 Spyder3 GigE Vision Color Camera Performance Specifications Feature Specification 2k 4k Imager Format Bilinear CCD Resolution1 2048 pixels 4096 pixels Pixel Fill Factor 90 86 Pixel Size 14 µm x 14 µm 10 µm x 10 µm Output Format of taps 2 Antiblooming 100x Gain Ran...

Page 8: ...t pixels as a result the number of effective full color RGB pixels for the 2k and 4k cameras is reduced by 2 to 2046 or 4094 respectively Table 4 Camera Operating Specifications Single Color Specifications Unit 0 dB 10 dB 20 dB Min Typ Max Min Typ Max Min Typ Max Broadband responsivity DN nJ cm 2k 7 9 25 79 4k 4 12 6 40 Random noise rms DN 2k 0 788 1 56 2 5 5 4k 0 75 1 19 2 38 3 75 7 5 Dynamic ran...

Page 9: ... 25 C Exposure mode disabled Unless specified dual line mode Notes PRNU measured at 50 SAT Certifications Table 5 EMC Compliance Standards Compliance The CE Mark FCC Part 15 and Industry Canada ICES 003 Evaluation of the Teledyne DALSA Spyder GigE SG 34 cameras meet the following requirements EN 55022 Class A and EN 61326 Emissions Requirements EN 55024 and EN 61326 Immunity to Disturbances Image ...

Page 10: ...first and last pixels as a result the number of effective full color RGB pixels for the 2k and 4k cameras is reduced by 2 to 2046 or 4094 respectively CCD Readout Shift Register CCD Readout Shift Register N Pixels 14 µm x 14 µm or 10 µm x 10 µm N Pixels 14 µm x 14 µm or 10 µm x 10 µm N 2048 4096 Pixel 1 1 R R R R R R B B B B B B G G G G G G G G G G G G ...

Page 11: ...The Spyder3 SG 34 Cameras 11 Responsivity Figure 2 Spyder3 GigE Vision Responsivity ...

Page 12: ...B 0 2 46 B0 2 38 B0 2 6 B 0 2 6 56 B0 25 IMAGE AREA OPTICAL DISTANCE M4x0 7 Z 6 MAX TORQUE 25 IN LB M42x1 Z 4 5 12 30 37 12 16 61 60 B0 2 72 B 0 2 30 B0 05 CENTER OF IMAGE AREA 36 B0 05 CENTER OF IMAGE AREA M4x0 7 Z 6 BOTH SIDES MAX TORQUE 25 IN LB M4x0 7 Z 6 BOTH SIDES MAX TORQUE 25 IN LB 6 B0 2 56 65 38 B 0 2 ...

Page 13: ...ENTER OF IMAGE AREA 30 B0 05 CENTER OF IMAGE AREA 57 B0 2 46 B 0 2 60 B 0 2 72 B0 2 38 B0 2 6 56 B0 25 IMAGE AREA OPTICAL DISTANCE 38 B 0 2 6 B0 2 6 B 0 2 56 65 M58x0 75 Z 4 5 M4x0 7 Z 6 MAX TORQUE 25 IN LB M4x0 7 Z 6 BOTH SIDES MAX TORQUE 25 IN LB M4x0 7 Z 6 BOTH SIDES MAX TORQUE 25 IN LB 12 16 23 48 30 61 ...

Page 14: ...g Heat generated by the camera must be allowed to move away from the camera Mount the camera on the frontplate using the provided mounting holes with maximum contact to the area for best heat dissipation Figure 5 Spyder3 Mounting Example ...

Page 15: ...es However switches offer a range of functions and performance grades so care must be taken to choose the right switch for a particular application Setup Steps Overview Take the following steps in order to setup and run your camera system They are described briefly below and in more detail in the following sections 1 Install and Configure Ethernet Network Card If your host computer does not have a...

Page 16: ...he external control cable to the camera 3 Establish communicating with the camera Start the GUI and establish communication with the camera 4 Check camera LED settings and test pattern Ensure that the camera is operating properly by checking the LED the current settings and by acquiring a test pattern 5 Operate the Camera At this point you wil be ready to operate the camera in order to acquire and...

Page 17: ...erating system as the host platform The camera communicates using the Ethernet connection and employs the static IP address 192 168 5 100 default A static address ensures the fastest operation Alternatively you can use a dynamic IP address To configure the network card from the host PC 1 In the Start menu under Control Panel select Network Connections and configure the network card as follows 2 Se...

Page 18: ...w the address 192 168 5 50 is used Alternatively select Obtain an IP address automatically to use a dynamic address 6 Set subnet to 255 255 255 0 and click on OK Figure 7 IP Address 7 Click OK to save settings 8 Click on Configure button and select Advanced tab 9 Enable Jumbo Frames to greater than 9000 bytes If your NIC does not support jumbo packets the image transfer speed will be slower ...

Page 19: ...The Spyder3 SG 34 Cameras 19 Figure 8 Jumbo Frames 10 Click OK to save settings ...

Page 20: ...mance of the camera Figure 9 Input and Output trigger and Power Connectors Power Connector WARNING It is extremely important that you apply the appropriate voltages to your camera Incorrect voltages may damage the camera Input voltage requirement 12 V to 15 V DC Table 6 Hirose 6 Pin Power Pinout 1 6 5 4 3 2 Pin Description 1 2 3 Supply voltage Min 12 VDC to Max 15 VDC 4 5 6 Ground The camera requi...

Page 21: ...ch for a single camera is supported Ethernet Connection LED Steady ON indicates that an Ethernet connection is successfully established at 1Gbps Data Transmission LED Steady ON indicates that the camera is ready for data transmission Flashing indicates that the camera is transmitting or receiving data EMC Compliance In order to achieve EMC compliance the Spyder3 camera requires the use of shielded...

Page 22: ...uts Group Figure 10 GPIO Connector and Pin Numbers Table 7 GPIO Connector Pinout Pin Signal Description GenICam Default 1 INPUT_ 0 LVDS TTL format positive EXSYNC 2 INPUT_0 LVDS negative EXSYNC 3 INPUT_1 LVDS TTL format positive FrameTrig 4 INPUT_1 LVDS negative FrameTrig 5 GND 6 INPUT_2 LVDS TTL format positive Direction 7 INPUT_2 LVDS negative Direction 8 INPUT_3 TTL auxiliary input 9 OUTPUT_3 T...

Page 23: ...is attached to the camera case GPIO Configuration Refer to Appendix B GPIO Control for a detailed description of the GPIO use cases and configuration options TTL Inputs and Outputs Figure 11 TTL Input Schematic Termination 1000 Ω series Input current minimum 0 nA maximum 2 mA Input voltage maximum of low 0 66 V minimum of high 2 6 V TTL inputs are maximum 5 V and 3 3 V logic tolerant Figure 12 TTL...

Page 24: ...on created during the software installation 2 CamExpert will search for installed Sapera devices In the Devices list area on the left side the connected Spyder camera will be shown 3 Select the Spyder camera device by clicking on the camera user defined name By default the camera is identified by its serial number Check LED Status If the camera is operating correctly at this point the diagnostic L...

Page 25: ...t of CamExpert is its live acquisition display window which allows immediate verification of timing or control parameters without the need to run a separate acquisition program For context sensitive help click on the button then click on a camera configuration parameter A short description of the configuration parameter will be shown in a popup Click on the button to open the help file for more de...

Page 26: ...choices when they do not apply to the hardware in use Display pane Provides a live or single frame acquisition display Frame buffer parameters are shown in an information bar above the image window Control Buttons The Display pane includes CamExpert control buttons These are Acquisition control button Click once to start live grab click again to stop Single frame grab Click to acquire one frame fr...

Page 27: ...ernet connections without the need for a camera lens or proper lighting The test patterns are useful for verifying camera timing and connections and to aid in system trouble shooting Using CamExpert select Image Format Control Test Image Selector and choose one of the available test images Select live grab to see the pattern output The following test patterns are available Figure 17 Grey horizonta...

Page 28: ... be retrieved via a controlling application in the examples shown here CamExpert Parameters such as camera model firmware version sensor characteristics etc are read to uniquely identify the connected device The camera information parameters are grouped together as members of the Camera Information set GigE Vision Input Controls Camera Information Parameter Options Manufacturer Name Model Name Man...

Page 29: ...der the Camera Information set of features GigE Vision Input Controls Camera Information Parameter Description User Set Selector Device Configuration Selector Selects the camera configuration set to load feature settings from or save current feature settings to factory default or user sets The Factory Default set contains default camera feature settings User camera configuration sets contain featu...

Page 30: ...er Setting The user setting is the saved set of camera configurations that you can customize resave and restore By default the user settings are shipped with the same settings as the factory set The command User Set Save saves the current settings to non volatile memory as a User Set The camera automatically restores the last saved user settings when it resets and or powers up To restore the last ...

Page 31: ...e Trigger Frequency Reads the external line trigger frequency NOTE The camera cannot detect frequency less than 5 Hz and will display 1 if it cannot detect a signal This feature is available when the Line Trigger Mode is set o ON and Sensor Direction Control is set to External The three trigger modes are described here Free running trigger disabled The camera free running mode has a programmable i...

Page 32: ...rom Diagramed ExSync tEthernet Latency Table 8 Timing Parameter Table Units Min Typ Max Notes tLine_Period μs 27 78 1000 1K 1 Tap 14 71 1000 1K 2 Tap 54 1 1000 2K 1 Tap 27 78 1000 2K 2 Tap 54 1 1000 4k 2 Tap twSync ns 100 twSYNC_INT ns 100 3000 For exposure mode 4 this value needs to be 3000ns other wise 100ns tPR ns 0 twPR_LOW ns 3000 twPR_HIGH ns 3000 tPR_INT ns 3000 Table 9 tReadout Values tREA...

Page 33: ...ted 1 First set the camera mode using Exposure Mode and Line Trigger Mode commands 2 Next if using mode 2 6 or 7 see below use the commands Acquisition Line Rate Abs and or Exposure Time Abs to set the line rate and exposure time GigE Vision Input Controls Sensor Control Exposure Mode This feature is used to set the operation mode of the Exposure or shutter Off Timed Trigger Width If Off is select...

Page 34: ... the camera to external signal modes EXSYNC must be supplied Exposure Modes in Detail Mode A Internally Programmable Line Rate and Exposure Time Factory Setting ExposureMode Timed and LineTriggerMode Off Internal When setting the line rate using the AcquisitionLineRateAbs command exposure time will be reduced if necessary to accommodate the new line rate The exposure time will always be set to the...

Page 35: ...e falling edge initiates readout Example 3 Trigger Period is Repetitive and Greater than Read Out Time Mode D External Line Rate and Internally Programmable Exposure Time ExposureMode Timed and LineTriggerMode On External Programmable Period command ExposureTimeAbs Line Period Readout CR Exposure Time CR Charge Reset Line Period Programmable Period CR Exposure Time Programmable Period command Aqui...

Page 36: ...rol Parameter Description Line Rate Hz Camera line rate in Hz 300 Hz min 68000 Hz max Only available when the camera is in Internal Mode trigger is disabled Trigger Mode off Exposure Mode is Timed and Line Trigger Mode is ON Line rates are in the following configurations 2k 1 tap 300 18500 Hz 2k 2 tap 300 36000 Hz 4k 2 tap 300 18500 Hz Readout EXSYNC Line Period CR Charge Reset Readout Line Period...

Page 37: ...so be used to control the exposure duration at the beginning of a frame Parameter Description Trigger Overlap Specify the type of trigger overlap permitted with the previous frame This defines when a valid trigger will be accepted or latched for a new frame Frame Trigger Delayer Specifies the delay in microseconds μs to apply after the trigger reception before activating it The delay of the select...

Page 38: ...Activation Specifies what type of signal i e high or low causes a line trigger if Line Trigger Mode is On External Line Trigger Frequency Reads the external line trigger frequency NOTE The camera cannot detect frequency less than 5 Hz and will display 1 if it cannot detect a signal This featuer is available when the Line Trigger Mode is se to ON and Sensor Direction Control is set to External Read...

Page 39: ...utputs signals at PLC_Q0 Line1 outputs signals at PLC_Q1 Line2 outputs signals at PLC_Q2 Line3 outputs signals at PLC_Q3 Output Format This feature returns or sets if possible the current electrical format of the selected physical output Line No Connect TTL or LVDS Gain Black Level and Background The cameras provide gain and black level adjustments in the digital domain for the sensor The gain and...

Page 40: ...he combination of the ColorGain ColorGainReference and DigitalGainAbs in dB This value ranges from 0 92 to 24 0 Color Gain Reference DB The color gain reference value Calibrate White Balance Result The result of the last calibrate white balance Read Calibrate White Balance GigE Vision Input Controls Analog Controls Parameter Description Digital Gain DN Sets the digital system gain control The gain...

Page 41: ...Default width size of the sensor Image Width Current width of the image area of interest in pixels This value is dependent on the horizontal binning and maximum width values Default size width size of the sensor Image Height Actual image height in active image pixels Default height 480 pixels Maximum height 16 383 pixels Image Offset Image start position in pixels The horizontal offset from the or...

Page 42: ...l set of features GigE Vision Input Controls Direction Control Parameter Description Sensor Scan Direction Selects the forward or reverse CCD shift direction or external direction control This accommodates object direction change on a web and allows you to mount the camera upside down Sensor Shift External Direction The current sensor shift direction when the direction is externally controlled Thi...

Page 43: ...ample using an Inverting Lens Resetting the Camera The feature Camera Reset part of the Camera Information set resets the camera The camera resets with the last saved settings and the baud rate used before the reset Previously saved pixel coefficients are also restored GigE Vision Input Controls Camera Information Parameter Description Camera Reset Reset the camera and put it in its power up state...

Page 44: ...ty of individual pixels i e given the same amount of light different pixels will charge up at different rates and the change in light intensity across the image either because of the light source or due to optical aberrations e g there may be more light in the center of the image PRNU coefficients are multipliers and are defined to be of a value greater than or equal to 1 This ensures that all pix...

Page 45: ...etween pixels and compensate for light distortion This calibration employs a two point correction that is applied to the raw value of each pixel so that non uniformities are flattened out The response of each pixel will appear to be virtually identical to that of all the other pixels of the sensor for an equal amount of exposure Correction Overview This camera has the ability to calculate correcti...

Page 46: ...y of this reference is important for proper calibration White paper is often not sufficient because the grain in the white paper will distort the correction White plastic or white ceramic will lead to better balancing For best results ensure that 50 or 60 Hz ambient light flicker is sufficiently low not to affect camera performance and calibration results For best results the analog gain should be...

Page 47: ...on 47 Digital Signal Processing The FPN and PRNU calibration parameters are available as members of the Advanced Processing set and are only available to Guru users Figure 25 Advanced Processing Calibration Parameters ...

Page 48: ...tion is set to External WARNING This command can take up to 3 seconds Please adjust the GUI s timeout values Target to Calibrate PRNU The target value for the PRNU calibration algorithm PRNU Calibrate Performs a PRNU Calibration To calibration PRNU the direction must not be External Always set proper target before clicking this button WARNING This command can take up to 15 seconds Ideally FPN cali...

Page 49: ...maximum failure to reach target Timeout FPGA did not return new end of line statistics or video line Step 3 FPN Calibration Note that you do not need to turn off the FPN and PRNU coefficients before calibrating the camera will do this automatically 1 Stop all light from entering the camera The best way to do this is to put on lens cap 2 Calibrate FPN using the FPN Calibrate command 3 Use the Read ...

Page 50: ...d Greater than 1 of PRNU coefficients have been calculated to be greater than the maximum allowable 8 Subtracting Background Use the Background Subtract features after performing flat field correction if you want to improve your image in a low contrast scene It is useful for systems that process 8 bit data but want to take advantage of the camera s 12 bit digital processing chain You should try to...

Page 51: ...s to convert image data from one color space to another using user entered multipliers This process is suitable for use in a wide variety of image processing and display applications The primary purpose of the color correction is to make color display better on the output device i e CRT LCD Plasma etc In order to get the decimal equivalent multiplication every number in the table has to be divided...

Page 52: ...t Channel specifies the output channel The Color Correction Value in a range 32000 to 32000 parameter specifies the correction coefficient Starting with the default values Ending with an increase of red and green in the red output Color Correction r g b r 4096 0 0 g 0 4096 0 b 0 0 4096 OK ColorCorrectionInputChannel Red OK ColorCorrectionOutputChannel Red OK ColorCorrectionValueRaw 8191 Color Corr...

Page 53: ... Using the Set Readout Mode srm command the camera user can control the camera s behavior in order to minimize the dark current artifact The modes of operation selected by the srm command are Auto On or Off Auto Mode srm 0 Note Teledyne DALSA recommends Auto mode for most users In this mode camera will automatically start and stop dark current clear based on the line rate Stop Max line rate DC Cle...

Page 54: ...is received the dark current is cleared from the image sensor before the image is acquired The line rate is limited to the maximum line rate available for that model of camera For information on artifacts that may be experienced while using this mode see the Artifacts section below Table 12 Maximum Line Rates Model Max Line Rate Immediate Readout Mode Dark Current Clear Mode SG 34 02K80 18000 Hz 9...

Page 55: ...the ssf value will not be changed Warning 09 Internal line rate inconsistent with readout time The effect in both internal and external line rate modes is that an EXSYNC is skipped and therefore the output will be at least twice as bright This value is saved with the camera settings This value may be viewed using either the gcp command or the get srm command Example srm 0 ...

Page 56: ...l scenarios described below 3 If you want to use applications other than those provided in the Beginner level examples you can use the LUT programming language to map the GPIO Input Configuration to the GPIO Output Configuration in the Guru level Note the screenshots presented in this section are from the CamExpert GUI If you are using a different GUI the arrangement of the commands and parameters...

Page 57: ...e Configure GPIO Signal Levels Before using any external triggers the input lines must be set to a proper signal level either TTL transistor transistor logic or LVDS low voltage differential signaling The Spyder 3 GigE cameras hardwire 3 input lines that require signal level selection Line0 line trigger or rotary encoder phase A input Line1 Frame trigger Line2 Direction control or rotary encoder p...

Page 58: ...nternal frame trigger In the Line Trigger Function Group set the parameter Line Trigger Mode value to Off Figure 29 Line Trigger In the Direction Control Group set the parameter Sensor Scan Direction to Forward or Reverse depending on your application Figure 30 Scan Direction In the Rotary Encoder Group set the value to False ...

Page 59: ...Appendix B GPIO Control 59 Figure 31 Rotary Encoder Group In the Start Mode set the Frame Start Trigger value Off Figure 32 Start Mode ...

Page 60: ...ntrol In the Active Mode set the Frame Active Trigger value Off Figure 33 Active Mode In the Sensor Control Group set the desired exposure mode exposure time and line rate Figure 34 Exposure Mode Time and Line Rate Settings ...

Page 61: ... Trigger Internal Direction Control Internal frame trigger In the Direction Control Group set the parameter Sensor Scan Direction to Forward or Reverse depending on your application Set the Frame Start Trigger and Frame Active Trigger values to off as described above In the Line Trigger Function Group Set the Line Trigger Mode value to On Figure 36 Line Trigger Mode Set the Input Direction Signal ...

Page 62: ...ree values only 0 frequency x 256 1 frequency x 16 2 frequency x 4096 For more information about the Rescaler please refer to Rescaler in the GURU section External Line Trigger External Direction Control from Rotary Encoder Physically connect rotary Encoder phase A to pin1 5 if using TTL or pin 1 2 if using LVDS and phase B to pin 6 5 if using TTL or pin6 7 if using LVDS In the Line Trigger Functi...

Page 63: ... Encoder Multiply Factor to 1 and Rotary Encoder Drop Factor to 4 Figure 39 Rotary Encoder Multiply Factor The forward and reverse direction is set by changing Rotary Encoder Direction Phase Check the direction shown in the Direction Control Group to confirm the direction Figure 40 Rotary Encoder Direction Phase In some situations it is desirable to only respond to one direction either forward or ...

Page 64: ...ntrol is disabled the camera will respond to both directions This may cause image artefacts when the direction changes To avoid this increase the Rotary Encoder Debounce Factor as shown in the following figure Figure 42 Rotary Encoder Debounce Factor Figure 43 Shaft Encoder Module ...

Page 65: ...er Function Group set the Device Scan Type to Linescan Figure 44 Device Scan Type In the Active Mode group ensure that the Frame Active Trigger Mode value is Off Figure 45 Frame Trigger Mode In the Start Mode group set the Frame Start Trigger Mode value to ON Figure 46 Frame Start Trigger Mode ...

Page 66: ...e to False depending on the Frame Active Trigger Mode Enable the delayer in the Start Mode group set the Frame Start Delay value to True Figure 47 Frame Start Delay In the Frame Trigger Function Group set the Frame Trigger Delayer value Figure 48 Frame Trigger Delayer External Frame Trigger Frame Active Trigger mode In the Start Mode group Make sure Frame Start Trigger Mode is Off Figure 49 Frame ...

Page 67: ... 51 Frame Trigger Mode On Note on the Frame Active Trigger When the frame trigger goes high the PC will collect data until either the signal goes low or the frame buffer is filled The frame height length will be determined by the length of the frame trigger At this point you can enable frame delayer as well Figure 52 Frame Active Delay ...

Page 68: ...portant Note Signals PLC_10 to PLC_15 should not be changed unless you are very experienced with triggers and PLC settings Step 3 Set the signal output Q0 to Q3 Use the lookup table to output signals to one of 4 GPIO outputs Figure 53 Output Selector The signal to output can be selected from the Signal Routing Block parameters For example the following figures will output line 0 Please note that t...

Page 69: ...Appendix B GPIO Control 69 Figure 54 Signal Routing Block Figure 55 Signal Q0 linked to the value of parameter PLC_10 ...

Page 70: ... default settings of the camera Cameras are shipped from the factory in a default setting Default settings are restored by loading the factory default see the figure below NOTE loading the factory default will take 10 seconds or more to complete If you are not using CamExpert it is recommended that you set your GUI timeout values to maximum setting If you do not adjust the GUI timeout your GUI wil...

Page 71: ... is fed to a rescaler input So the rescaler will rescale line trigger signals PLC_Q16 is set to Line1 which is frame trigger PLC_Q16 is fed into delayer so the frame trigger signal can be delayed PLC_Q6 is direction and is fed by line2 ...

Page 72: ...LC_I0 or PLC_I3 depending on whether or not the rescaler is enabled PLC_Q12_Variable0 can be PLC_I1 or PLC_I4 depending on whether or not the delayer is enabled PLC_Q14_Variable0 can be PLC_I1 or PLC_I4 depending on whether or not the delayer is enabled ...

Page 73: ...of the delay then active for the duration of the width After that it will become inactive until the next trigger occurs If a trigger occurs while pulse generator is already handling a previous trigger the new trigger is ignored In periodic mode the trigger continuously generates a signal that is based on the configured delay and width The period of the pulse is therefore the delay time plus the wi...

Page 74: ...dge of an input Triggered on low level Indicates if a triggered pulse generator is triggered on the low level of an input Pulse Period ns Displays the value of the parameter in nanoseconds of a complete delay width cycle of the pulse generator This value is computed every time the delay width or granularity is modified and is available regardless of the periodic mode Pulse Frequency Hz Displays th...

Page 75: ...rs in the GPIO Control Block programming languages are I7 for pulse generator 0 I6 for pulse generator 1 Rescaler The Rescaler lets you change the frequency of a periodic input signal You can use the Rescaler to multiply the period by up to 4096 or divide it by up to 4095 Figure 57 Granularity The Rescaler is defined by the following settings Granularity The granularity is the number of clock cycl...

Page 76: ... you select an input label that is not being used for its default behavior For example Q9 is used to send a trigger to pulse generator 0 If pulse generator 0 is used in triggered mode then it will be triggered by Q9 and cannot be used as the input for the rescaler The possible values are Q3 Q7 Q8 Q9 Q10 Q11 Q16 and Q17 Backup Enabled Indicates that the rescaler will use a back up input source if i...

Page 77: ...value that can be increased decreased or cleared based on input signals The counter outputs two signals which are inputs to the GPIO LUT Counter Incremental Source Specifies how the input for incrementing the count is handled The counter s up event uses the Q17 label in the LUT It can be one of the following settings Disabled On the rising edge On the falling edge On both edges On the high level O...

Page 78: ... 1 and Input 2 The debouncers make sure that their corresponding inputs filter out bouncing effects Bouncing is when there are a few very short pulses when the input signal transitions from low to high Without debouncing the controller may see these small pulses as real signals The debouncers make sure that the signal is truly high for the specified amount of time before it is declared as high The...

Page 79: ... timestamp module handles the set event Possible values are Disabled On Apply The specified value is set when the user clicks the Apply button Rising edge input signal When the signal on the set event input rises the timestamp module applies the specified value Set Input Indicates which label from the GPIO LUT that is associated with the set event input of the timestamp module Make sure you select...

Page 80: ...estamp counter value Clear Input Indicates which label from the GPIO LUT that is associated with the clear event input of the timestamp module Make sure you select an input that is not being used for its default behavior The possible values are 0 Q3 1 Q7 2 Q8 3 Q9 4 Q10 5 Q11 6 Q16 7 Q17 Broadcast When set to true the operation is broadcasted to all other devices on the same network as the current...

Page 81: ...om the delayer in the GPIO Control Block programming languages depend on the LUT input configuration Figure 58 Delayer The following sections provide details on the LUT control block the LUT programming language and the advanced features of the GPIO PLC Control PLC control allows very precise control of the camera Most users do not need to access the PLC functions as the Beginner level and Guru le...

Page 82: ...ld contain a similar arrangement to what is shown The PLC Control Block All signals pass through the PLC Control Block Depending on its programming the PLC Control Block generates output signals that can be redirected to various camera outputs The PLC control block uses a look up table LUT to generate the outputs This LUT contains eight different inputs each of which can generate 18 different outp...

Page 83: ... create logical equations that specify the conditions that set particular outputs Note There is a delay of two clock cycles between the inputs of the LUT and its outputs A clock cycle has a period of 30 nanoseconds so the delay is 60 nanoseconds The signals in the PLC Control Block are defined in the tables below Inputs to CamExpert are labeled In where n is an integer from 0 to 7 and outputs are ...

Page 84: ...icated by the fact that each entry in the table has a different set of enumerated inputs So for example a value of 0 for i0 i e GPIO Input 0 means something different for i6 i e Pulse Generator 1 Output Below is a table of enumerated values with respect to each entry For more information on the Signal Routing Block refer to the section below Signal Routing Block on page 87 ...

Page 85: ...2 Data Valid Spare 8 GPIO Control Bit 2 GPIO Control Bit 3 GPIO Control Bit 1 GPIO Control Bit 1 GPIO Control Bit 2 GPIO Control Bit 3 Timestam p Trigger 1 GPIO Control Bit 0 9 Q2 feedbac k Q3 feedbac k Q2 feedbac k Q3 feedbac k Q2 feedback Q3 feedback GPIO Control Bit 1 GPIO Control Bit 1 10 CC3 feedbac k CC4 feedbac k CC3 feedbac k CC4 feedbac k CC3 feedback CC4 feedback GPIO Control Bit 2 Times...

Page 86: ... input PULSE_TRIG0 Q9 Trigger for pulse generator 0 Used only when the pulse generator is in triggered mode If available can be used by one of the following modules Rescaler 0 input Delayer 0 reference signal Counter 0 clear event input Timestamp counter set event input Timestamp counter clear event input PULSE_TRIG3 Q10 Trigger for pulse generator 3 Used only when the pulse generator is in trigge...

Page 87: ...k is invoked it provides the following information A bit mask of the 8 LUT inputs at the time the interrupt was generated The timestamp value at the time of the interrupt CNT_DOWN Q16 Trigger for the down event of counter 0 If available can be used by one of the following modules Rescaler 0 input Delayer 0 references signal Counter 0 clear event input Timestamp counter set event input Timestamp co...

Page 88: ...from one block to another How the Signal Routing Block Works The Signal Routing Block has 8 outputs I0 I7 Each output uses a 16 1 multiplexer that connects to 16 inputs The Signal Routing Block has more than 16 input signals so not every input can be connected to every one of signals I0 I7 However signals I0 I7 are functionally identical so connecting to a specific one isn t important If you can t...

Page 89: ... Output Expression EOL end of line Output Q0 Q1 Q2 Q16 Q17 Input I0 I1 I2 I6 I7 Expression Input Not Input Boolean constant Q1 I5 Q1 I5 Q1 FALSE Combined Expression Expression Boolean operator Expression Q1 I5 I3 Q16 I8 I6 Boolean Operators and or xor Q14 I4 I6 Q15 I3 I5 Q9 I1 I8 Not Q0 I0 Q10 I8 I5 Delimiter Q0 I0 Q3 I1 I7 I5 Q6 I3 I5 I1 I2 Boolean Constants 1 true TRUE 0 false FALSE Q0 1 Q3 TRUE...

Page 90: ...e a total number of 256 input combinations The result of each combination can be 1 or 0 When you modify the equations in the Lookup Table the controller calculates the results of all 256 input combinations and stores the result of each output as a 256 bit lookup table hence the name There are 18 outputs Q0 Q17 so the controller calculates 18 different lookup tables The controller then passes the r...

Page 91: ... 34 02k80 The CE Mark FCC Part 15 and Industry Canada ICES 003 evaluation of the Teledyne DALSA Spyder3 GigE cameras which are manufactured by Teledyne DALSA Inc satisfied the following requirements EN 55022 Class A 1998 and EN 61326 1997 Emissions Requirements EN 55024 1998 and EN 61326 1997 Immunity to Disturbances Place of issue Waterloo Ontario Canada Date of Issue August 28 2006 Hank Helmond ...

Page 92: ...Setting up the FVAL This setup only works with fixed frame trigger mode Setup Signal Routing Block Figure 58 Signal Routing Block Step 1 Match counter duration with image height Figure 59 Setting counter duration under Counters and Timers Controls ...

Page 93: ...igure 60 Setting image height under Image Format Controls Step 2 Setup counter incremental source to line valid PLC_A5 Figure 61 Setting PLC_I7 to PLC_A5 under Signal Routing Block Figure 62 Setting PLC_Q17_Variable0 to PLC_I7 under Q17 ...

Page 94: ...ure 63 Setting Counter Incremental Source to PLC_Q17_RisingEdge under Counters Timers Control Step 3 Setup Counter Reset Source to external fixed frame trigger Figure 64 Setting PLC_I1 to Line1 Figure 65 Setting PLC_Q3_Variable0 to PLC_I1 ...

Page 95: ...Reset Source to PLC_Q3 Examples Setting the FVAL Line rate 5000 image height 100 input frequency is 40 hz In the Frame Trigger Function Group set the parameter Device Scan Type value to Linescan In the Inputs Group set the parameter Line Selector value to Line1 ...

Page 96: ...set the parameter Frame Start Trigger value to On In the Sensor Control set the parameter Accqusition Line value to 5000 000 In the Q0 set the parameter PLC_Q0_Variable0 value to PLC_I5_Not In the Outputs set the parameter Output Selector value to Line0 ...

Page 97: ...Appendix D Setting up the FVAL 97 The output from GPIO output line0 is shown below Figure 68 FVAL signal waveform ...

Page 98: ...or geometry format Table 15 2K sensor geometry format R0 B0 R1 B1 R2 B1021 R1022 B1022 R1023 B1023 G0 G1 G2 G3 G4 G2043 G2044 G2045 G2046 G2047 In RGB12 mode the output data are serialized as shown in the table below Table 16 2K camera RGB12 mode output format CamExpert Configuration Image format is determined by a few parameters in the Image Format Control menu Refer to the figure below Figure 59...

Page 99: ...image However it is able to display the color as mono In other words it displays the raw data as it is To do so three parameters in the Image Format Control menu need to be changed as follows 1 Pixel format select the Raw Mono12 2 Image width set to 2x the sensor size The sensor size is 2048 in this example so the image width should be set to 4096 This is because CamExpert displays the two row dat...

Page 100: ...properly Similarly you also can easily configure the 4K camera The only difference being the sensor size Therefore the pixel format and the sensor taps options remain the same Raw Mono12 and Two respectively The image width however should be changed to 4096 x 2 8192 Note that CamExpert displays the dual line data in single line format Therefore the bottom half of the image e g if the image height ...

Page 101: ...ease February 1 2012 01 Added Appendix D Setting Up the FVAL Revision to the Clearing Dark Current section Revised EMC Declaration section May 31 2013 02 Operating temperature range revised from 0 50 C to 0 65 C July 28 2014 03 Appendix E Using the RGB12 Mode in CamExpert added August 25 2017 ...

Page 102: ...tandards 9 ethernet connector 20 ethernet card installation 14 exposure mode timing 33 exposure time 35 F factory settings 27 flat field correction restrictions 44 frame triggers 35 G gain 48 digital 48 Gain control 37 GenICam description of 2 website 2 GigE Vision description of 2 website 2 GPIO and camera modes 56 connector 54 Control 54 control block 80 counter 75 debouncer 76 delayer 79 Output...

Page 103: ...1 R readout mode gate dark current clear 52 rebooting 41 requirements Ethernet switch 14 network adapter 14 requirments PC 14 rescaler 73 resolution 7 responsivity 10 revision history 96 routers 20 S sensor 9 settings current 29 factory 27 30 loading 28 saving 28 user 29 setup overview 14 Signal Routing Block 90 shift direction 41 signal routing block 84 size image 39 software required 6 38 standa...

Reviews: