background image


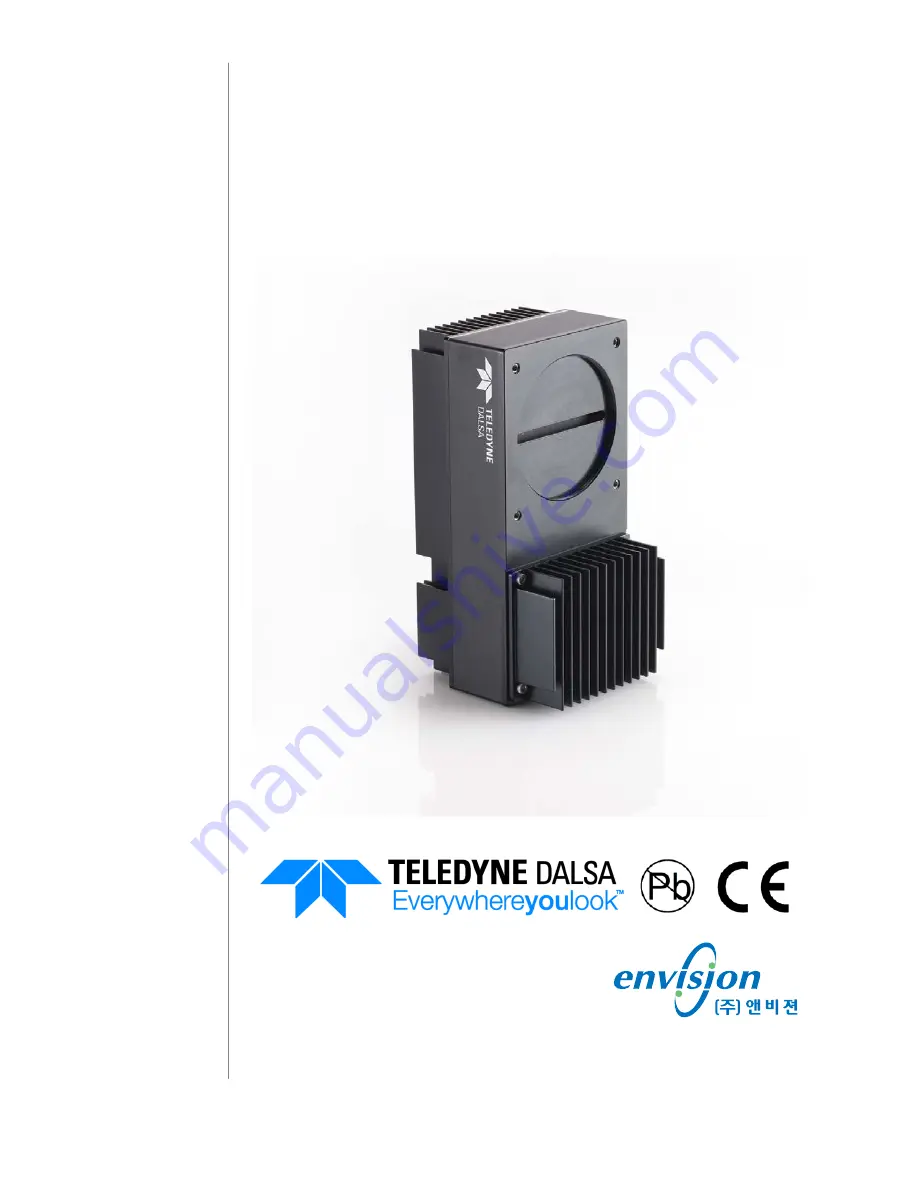
Piranha ES-Sx 

Camera User’s Manual 

ES-S0-12K40 HSLink 


En

ha

nce

Se

ns

iti

vi

ty

 Li

ne

 S

ca

n/

Ar

ea

 S

ca

n C

CD

 C

am

er

2

0

-

June

-12 

 03-032-20162-00 

 www.teledynedalsa.com


www.envision.co.kr


•Supporting your Vision

(주)앤비젼

 서울시 금천구 가산동 550-1 IT캐슬 1동 603호 (153-768)

Tel.


02. 2624. 5503 

  Fax.


02. 2082. 6427


e-mail.


[email protected] 

Summary of Contents for ES-S0-12K40 HSLink

Page 1: ...nk Enhanced Sensitivity Line Scan Area Scan CCD Camera 20 June 12 03 032 20162 00 www teledynedalsa com www envision co kr Supporting your Vision 주 앤비젼 서울시 금천구 가산동 550 1 IT캐슬 1동 603호 153 768 Tel 02 2624 5503 Fax 02 2082 6427 e mail sales envision co kr ...

Page 2: ...ompany is an international leader in high performance digital imaging and semiconductors with approximately 1 000 employees worldwide headquartered in Waterloo Ontario Canada Established in 1980 the company designs develops manufactures and markets digital imaging products and solutions in addition to providing MEMS products and services For more information visit Teledyne DALSA s website at www t...

Page 3: ...Piranha ES Sx User Manual Teledyne DALSA 03 032 20162 00 3 IMPORTANT Handling Warning page 47 ...

Page 4: ...ting the Camera s CCD Shift Direction 22 Exposure Mode and Line Frame Rate 23 Setting Frame Rate and Exposure Time 26 3 3 Data Processing 26 Setting a Region of Interest 26 Digital Signal Processing Chain 27 3 4 Saving and Restoring Settings 36 Saving and Restoring Factory and User Settings 36 Saving and Restoring PRNU and FPN Coefficients 37 Rebooting the Camera 38 3 5 Diagnostics 39 Generating a...

Page 5: ...49 Error Handling and Command List ___________________________________________ 50 A1 Error Handling 50 A2 Commands Quick Reference 52 EMC Declaration________________________________________________________ 57 Revision History ________________________________________________________ 58 Index _______________________________________________________________ 59 ...

Page 6: ...lled by Sapera software not by the camera Selectable Area or TDI Mode of operation Area Mode facilitates camera alignment and focusing Area mode can also be used for regular operation Flat field correction minimizes lens vignetting non uniform lighting and sensor FPN and PRNU Flat field correction is available in TDI mode only it is not avaliable in Area mode Description The Piranha ES camera fami...

Page 7: ... Sx cameras are available in these models Table 1 Piranha ES Sx Camera Models Overview Model Number Description ES S0 12K40 12k resolution 90 kHz line rate 1 08 Gpix s throughput HSLink interface Throughout the manual the cameras are refered to as the Piranha ES Sx camera family unless a section is valid to a specific model only where the camera s model number is used Sensor The camera uses a bidi...

Page 8: ...6 0 25 mm Sensor Alignment aligned to sides of camera Flatness Θ y parallelism x y z Θ z 25 µm 100 µm 0 175 mm 0 175 mm 0 25 mm 0 6 Lens Mount Hole M72x0 75 Mechanical Interface Camera Size w x h x d 90 x 180 x 92 1 mm Mass 1500 g Connectors power connector control data connector 2 pin Lemo HSLink Electrical Interface Input Voltage 24 10 Volts DC Power Dissipation 39 W Operating Temperature1 0 ºC ...

Page 9: ...alues are referenced at 8 bit 1 Measured at the front plate It is the user s responsibility to insure that the operating temperature does not exceed this range Performance Min Gain 0dB Min Gain 10dB Min Gain 20dB Min Typ Max Min Typ Max Min Typ Max Dynamic Range 500 160 50 Random Noise DN rms 0 5 1 5 4 8 SEE nJ cm 2 3 4 1 1 0 33 NEE pJ cm 2 6 4 6 4 6 4 Corrected Broadband Responsivity DN nJ cm 2 7...

Page 10: ...Piranha ES Sx User Manual 03 032 20162 00 Teledyne DALSA 10 1 3 Responsivity 0 10 20 30 40 50 60 70 80 90 Responsivity Dn nJ cm 2 Wavelength nm ES12K Responsivity 0 dB ...

Page 11: ...cable Power supplies must meet the requirements defined in the Power Connector section below 5 Inspect all cables and connectors prior to installation Do not use damaged cables or connectors or the camera may be damaged 6 Connect data and power cables 7 After connecting cables apply power to the camera 8 Check the diagnostic LED See LED Status Indicator for an LED description Note You must also se...

Page 12: ...e camera LED Status Indicator The camera is equipped with a red green LED used to display the operational status of the camera The table below summarizes the operating states of the camera and the corresponding LED states When more than one condition is active the LED indicates the condition with the highest priority Error and warning states are accompanied by corresponding messages further descri...

Page 13: ... temperature HSLINK CMD channel still functional Red Green alternating fast Link Up but idle not locked held in Farend reset Red Green alternating medium Incompatilbe HSLINK configuration Red Green alternating slow Looking for Link Power Connectors Table 4 Lemo 2 pin Circular Male Power Connector Lemo EEG 0B 302 CYM 2 Pin Pin Description 1 Supply voltage 24 10 Volts 2 Ground The camera requires a ...

Page 14: ...ot recover from this failure and the camera will have to be returned to Teledyne DALSA for repair Note Camera performance specifications are not guaranteed if your power supply does not meet these requirements Data Connectors HSLink Pinout SFF_8470 or CX4 with thumbscrews Signal Camera Frame Grabber Input Frame Grabber Signal DataTx 2 S16 S1 DataRx 2 DataTx 2 S15 S2 DataRx 2 DataTx 1 S14 S3 DataRx...

Page 15: ...t Section Exposure Mode and Line Frame Rate for details on how to set frame times exposure times and camera modes Direction Control You control the CCD shift direction through the serial interface With the software command scd you determine whether the direction control is set via software control or via the control signal on CC3 Refer to section Setting the Camera s CCD Shift Direction for detail...

Page 16: ...with screw lock connectors AC CA 00410 xx R HSLink data cable 10M with screw lock connectors AC CA 00415 xx R HSLink data cable 15M with screw lock connectors AC CA 00115 xx R DC power cable Lemo 2 pin to open ended cable HSLink cables are also available from a number of supplies including www componentsexpress com www gore com Frame Grabbers The ES S0 model cameras HSLink are compatible with the ...

Page 17: ...on before or after starting the data acquisition program Turn off the camera when exiting a program that uses the Frame grabber Data Forwarding Yes Customer must identify the Master Slave Frame grabber during the system configuration step There is no Master Slave communication channel support Communication Between FG No This is the GMII command channel and will enable auto enumeration of slaves an...

Page 18: ...of order Master to Slave Power On Discovery Notes Please Note The communication channel between master and slave frame grabbers is not functional at this time and therefore must be configured manually as shown below The power on sequence for the Alphas to guarantee function is 1 Camera Master 2 Slave 1 3 Slave 2 4 Slave 3 5 Slave 4 6 Slave 5 The slave should only be turned on once an image is acqu...

Page 19: ...ed protocol and the PC does not require any custom software Note This command set has changes from previous Teledyne DALSA cameras Do not assume that the Piranha ES commands perform similarly to older cameras Serial Protocol Defaults 8 data bits 1 stop bit No parity No flow control 115 200 kbps baud rate Camera does not echo characters Command Format When entering commands remember that A carriage...

Page 20: ...mand wus Note For 8 and 10 bit depths the number of lanes must be set to 5 in Sapera For 12 bit depth the number of lanes must be set to 6 in Sapera Camera Help Screen For quick help the camera can return all available commands and parameters through the serial interface There are two different help screens available One lists all of the available commands to configure camera operation The other h...

Page 21: ...camera to your web direction or when you need a rectangular 2D image and the lighting supports a full frame imager In TDI Mode the camera operates as a TDI enhanced sensitivity line scan camera and combines multiple exposures of an object into one high resolution result The camera stores user settings for Area Mode and TDI Mode separately allowing you to switch between Area and TDI mode without lo...

Page 22: ...s you to mirror the image vertically or mount the camera upside down Syntax scd i Syntax Elements i Readout direction Allowable values are 0 Forward CCD shift direction 1 Reverse CCD shift direction 2 Externally controlled CCD shift direction via HSLink control CC3 CC3 1 forward CC3 0 revese Note ES S0 Direction tied to bit 5 GPIO output of HSLink Notes The following user settings are stored separ...

Page 23: ...e generated internally through the software command ssf or set externally with an EXSYNC signal CC1 When operating in TDI Mode it is important that the line rate used matches the web speed Failure to match the web speed will result in smearing Refer to the application note Line Scan TDI Line Scan Calculation Worksheet located on the Knowledge Center page of our website for a further explanation on...

Page 24: ...sure mode use the command gcp or get sem When setting the camera to external signal modes EXSYNC must be supplied Refer to section Error Reference source not found for more information on how to operate your camera in TDI or Area Mode Exposure Modes are saved separately for TDI Mode and Area Mode Refer to section 3 4 Saving and Restoring Settings for more information on how to save camera settings...

Page 25: ...ut time are ignored The falling edge of EXSYNC marks the start of readout Note In TDI mode the frame period equals the line period Figure 4 Mode 3 Timing Mode 7 Internal Frame Rate Maximum Exposure Time In this mode the frame rate is set internally using the ssf command with a maximum exposure time Note In TDI mode the frame period equals the line period Figure 5 Mode 7 Camera Timing ...

Page 26: ...emains unchanged To return the camera s frame rate use the commad gcp or get ssf Related Commands sem Example ssf 10000 3 3 Data Processing Setting a Region of Interest Purpose Sets the pixel range used to collect the end of line statistics and sets the region of pixels used in the ccg cpa gl gla and ccf commands In most applications the field of view exceeds the required object size and these ext...

Page 27: ...in FPN correction the PRNU correction the background subtract and the system gain and offset All of these elements are user programmable Notes FPN and PRNU correction is not available when operating the camera in Area Mode The following user settings are stored separately for forward and reverse direction digital gain system gain and background subtract They are saved using the wus command For det...

Page 28: ...ed to the PRNU multiplier is nominally zero and zero multiplied by anything is still zero resulting in no PRNU coefficient induced FPN If the offset is not subtracted from the video then there will be artifacts in the video at low light caused by the multiplication of the offset value by the PRNU coefficients 3 Background subtract ssb command system gain ssg command and background addition sab are...

Page 29: ...tion determines exactly how much offset to subtract per pixel in order to obtain flat output when the CCD is not exposed The white light calibration is performed next to determine the multiplication factors required to bring each pixel to the required value target for flat white output Video output is set slightly above the brightest pixel depending on offset subtracted Flat Field Correction Restr...

Page 30: ...s equal to or greater than the maximum pixel value in the image The camera will respond with OK if no errors occur 3 After the correction is complete save the settings by issuing a wpc command Note that Forward and Reverse direction settings are stored separately and coefficients must be saved before switching directions 4 Enable the coefficients using the command epc 1 1 You should now see a flat...

Page 31: ...ference To update the gain reference Purpose Sets the current gain setting to be the 0dB point This is useful after tap gain matching to allow you to change the gain on all taps by the same amount Syntax ugr FPN Correction Performing FPN Correction Syntax Performs FPN correction and eliminates FPN noise by subtracting away individual pixel dark current For a complete description on how to use this...

Page 32: ... pixel number from 1 to sensor pixel count i Coefficient value in a range from 0 511 12 bit LSB Notes Available in TDI Mode only Example sfc 10 50 Returning FPN Coefficients Purpose Returns a pixel s FPN coefficient value in DN 12 bit LSB Syntax gfc i Syntax Elements i The pixel number to read in a range from 1 to sensor pixel count Notes Available in TDI Mode only Example gfc 10 ...

Page 33: ...ue 14 bits in range from 4096 to 16220DN For example if the camera is in 8 bit mode and the target is to be 200DN use 200x64 12800 14 bit equivalent as target value The calculation is performed for all sensor pixels but warnings are only applied to pixels in the region of interest This algorithm is useful for achieving uniform output across multiple cameras It is important to note that the target ...

Page 34: ...e specified by x1 and x2 The camera also returns the pixel number with every fifth coefficient Syntax dpc x1 x2 Syntax Elements x1 Start pixel to display in a range from 1 to sensor pixel count 1 x2 End pixel to display in a range from x1 1 to sensor pixel count Notes If x2 x1 then x2 is forced to be x1 Example dpc 10 20 Enabling and Disabling Pixel Coefficients Purpose Enables and disables FPN an...

Page 35: ...put can no longer reach its maximum Use this command to correct for this where ssg value max output value max output value ssb value Syntax ssg i Syntax Elements i Gain setting The gain ranges are 0 to 61439 The digital video values are multiplied by this value where System Gain i 4096 1 Notes Use this command in conjunction with the ssb command described above Digital offset is set to zero after ...

Page 36: ...n TDI Mode digital gain and offset and background subtract values are saved as distinct values for Forward and Reverse directions In other words you can program the camera to operate with a digital gain value of 5db in Forward direction and an digital gain value of 3db in Reverse direction Forward and Reverse direction settings are saved simultaneously with the wus command Note that when you switc...

Page 37: ...estoring PRNU and FPN Coefficients Pixel coefficient sets are saved separately for Forward and Reverse direction depending on which direction the camera is operating in when the wpc or wfc command is issued It is important that you save pixel coefficients before switching CCD shift direction or current coefficient values will be lost Figure 9 How Pixel Coefficients are saved in the ES Sx Cameras a...

Page 38: ...nt set Syntax wfc Notes Available in TDI mode only Loading a Saved Set of Coefficients Purpose Loads a saved set of pixel coefficients for the current direction A factory calibrated set of coefficients is available Syntax lpc Notes Available in TDI mode only Resetting the Current Pixel Coefficients Purpose Resets the current pixel coefficients to zero This command does not reset saved coefficients...

Page 39: ...for verifying proper timing and connections between the camera and the frame grabber Syntax svm i Syntax Elements i 0 Video 1 DCi Integer i 1 400 8 8 Where i 1 to 12000 2 HORi Modulus DCi Modulus Modulus i 1 1600 256 256 Where i 1 to 12000 3 VERi Row 1 Where i 1 to 12000 4 DIAGi Modulus HORi VERi 256 Where i 1 to 12000 Notes Example svm 2 horizontal ramp line profile Figure 10 Test Pattern ...

Page 40: ... command to ensure the proper video input range into the processing chain before executing any pixel calibration commands Syntax gl x1 x2 Syntax Elements x1 Column start number Must be less than the column end number in a range from 1 to column resolution 1 x2 Column end number Must be greater than the column start number in a range from 2 to sensor resolution Notes If x2 x1 then x2 is forced to b...

Page 41: ...he data Values returned are in 12 bit DN Available in TDI Mode only Related Commands css roi Example gla 10 20 Temperature Measurement The internal temperature of the camera can be determined by using the vt command This command will return the internal chip temperature in degrees Celsius For proper operation this value should not exceed 75 C Note If the camera s internal temperature reaches 75 C ...

Page 42: ... GCP screen returns all of the camera s current settings To read all current camera settings use the command Syntax gcp Returning Camera Settings with Get Commands You can also return individual camera settings by inserting a get in front of the command that you want to query If the command has a tap or pixel number parameter you must also insert the tap number or pixel number that you want to que...

Page 43: ...180 0 90 0 70 9 45 0 IMAGINGCENTER 47 0 IMAGING CENTER 8 5 2X M4x0 7 depth 6 0 4X M72X0 75 depth 4 1 PIXEL1 10 5 2X 10⁹ 0 B C 83 5 2X 81 5 2X Notes 1 Imaging area aligned in X Y with respect to datums B and C 2 Roataion of the CCD imaging area is 0 6 degrees 3 Lens mount position with respect to imaging area X Y 0 175 MM 4 Imaging area position tolerances are to be determined Units MM ...

Page 44: ...e provide a uniform field and longer life span compared to other light sources However they also require a camera with enhanced sensitivity such as the ES Sx camera Halogen light sources generally provide very little blue relative to infrared light IR Fiber optic light distribution systems generally transmit very little blue relative to IR Some light sources age over their life span they produce l...

Page 45: ...face and the mounting plate surface as large as possible Do not use stand off style mounting 3 Design the camera mounting plate so that there is enough surface area to dissipate heat An example of a properly mounted camera is illustrated on the following page 4 Forced air flow to the fins is the most effective way to cool the camera If forced air flow is not available then leave enough space aroun...

Page 46: ... ES Sx User Manual 03 032 20162 00 Teledyne DALSA 46 Heat sink fins Heat sink fins Mounting plate Mounting bracket Front plate Camera full front mounting surface 5047 mm sq 106 mm 45 mm 86 mm Ø75 Mounting hole ...

Page 47: ... If these solutions do not resolve your problem contact support teledynedalsa com for product support LED When the camera is first powered up the LED will glow on the back of the camera Refer to section LED Status Indicator for information on the LED Connections The first step in troubleshooting is to verify that your camera has all the correct connections Power Supply Voltages Check for the prese...

Page 48: ...ing and Digital Video Path Use the test pattern feature to verify the proper timing and connections between the camera and the frame grabber and verify the proper output along the digital processing chain See below Generating Test Patterns The camera can generate test patterns to aid in system debugging Use the command svm 1 or up to svm 4 to activate a test pattern A description of available test...

Page 49: ...intated in 100Ω Line Dropout Bright Lines or Incorrect Frame Rate Verify that the frequency of the internal sync is set correctly or when the camera is set to external sync that the EXSYNC signal supplied to the camera does not exceed the camera s useable frame rate under the current operating conditions Noisy Output Check your power supply voltage outputs for noise Noise present on these lines ca...

Page 50: ...ent operating range Use GCP or GET to see value used Warning 03 Clipped to max Parameter was clipped to the current operating range Use GCP or GET to see value used Warning 04 Related parameters adjusted Internal operating condition is adjusted to accommodate the entered command E g requesting exposure time longer than line time automatically adjusts the line time to meet the exposure time require...

Page 51: ... when in SEM 3 Error 06 Timeout Command not completed in time E g CCF in SEM 3 when no external EXSYNC is present Error 07 Camera settings not saved Indicates that user settings have been corrupted by turning off the power while executing the WUS command Must build up new settings from factory and re save with WUS Error 08 Unable to calibrate tap outside ROI Cannot calibrate a tap that is not part...

Page 52: ...to the selected algorithm The first parameter is the algorithm where i is 2 Calculates the PRNU coefficients using the entered target value as shown below PRNU Coefficient Target AVG Pixel Value FPN i i i The calculation is performed for all sensor pixels but warnings are only applied to pixels in the region of interest This algorithm is useful for achieving uniform output across multiple cameras ...

Page 53: ... Read the firmware version and FPGA version get fpn coeff gfc x Read the FPN coefficient x pixel number to read in a range from 1 sensor pixel count Refer to Returning FPN Coefficients on page 31 for details get help gh Returns a help screen listing all of the get commands get line gl x x Gets a line of raw video no digital processing or test pattern displaying one pixel value after another and th...

Page 54: ...g Settings for details region of interest roi x y x y Sets the pixel range affected by the cag gl gla ccf cpa and commands The parameters are the pixel start and end values x and the column start and end values y in a range from 1 to 4096 Refer to section Setting a Region of Interest for details reset pixel coeffs rpc Reset the pixel coefficients to 0 Refer to section Enabling and Disabling Pixel ...

Page 55: ...RNU value within the range 0 to 65535 set subtract background ssb i Subtract the input value from the output signal i Subtracted value in a range from 0 to 4096 set sync frequency ssf i Set the frame rate to a value from TDI ES S0 1 to 90 822 Area ES S0 1 to 320 Value rounded up down as required Refer to Setting Frame Rate on page 26 for details set system gain ssg i Set the digital gain i Digital...

Page 56: ... internal temperature of the camera verify voltage vv Check the camera s input voltages and return OK or fail write FPN coefficients wfc i Write all current FPN coefficients to EEROM Refer to section Saving and Restoring PRNU and FPN Coefficients for details write PRNU coeffs wpc i Write all current PRNU coefficients to EEROM Refer to section Saving and Restoring PRNU and FPN Coefficients for deta...

Page 57: ...y with the limits for a Class A digital device pursuant to part 15 of the FCC Rules These limits are designed to provide reasonable protection against harmful interference when the equipment is operated in a commercial environment This equipment generates uses and can radiate radio frequency energy and if not installed and used in accordance with the instruction manual may cause harmful interferen...

Page 58: ...Piranha ES Sx User Manual 03 032 20162 00 Teledyne DALSA 58 Appendix C Revision History Revision Change Description Date 00 Preliminary release June 20 2012 ...

Page 59: ...etting 34 command format 19 parameters 20 commands list 52 connectors 12 lemo 13 power 13 power mating 13 D dark patches 49 data bus 15 data rate 8 debugging 47 digital signal processing 31 direction externally controlled 22 web movement 23 E EMC Declaration of Conformity 57 58 error messages 50 exposure modes overview 24 EXSYNC 15 troubleshooting 47 external trigger 15 F fiber optic light sources...

Page 60: ...nals 15 P performance specifications 8 pixel statistics 40 power connectors 13 guidelines 14 mating connectors 13 PRNU 29 R rebooting 38 Region of Interest 26 resolution 8 responsivity 9 roi See Region of Interest S SEE 9 serial interface 19 defaults 19 troubleshooting 48 settings factory 21 statistics 40 T TDI Mode 21 temperature measurement 41 test patterns 39 test patterns 48 timing mode 3 25 m...

Reviews: