Installing and Configuring a DataProbe iBoot G2 for
Street Furniture
DD2594516 Rev 1
31 July 2013
PO Box 5128 201 Daktronics Drive, Brookings, SD 57006-5128
tel: 800-325-8766 fax: 605-697-4700
www.daktronics.com
iBoot Mounting
1.
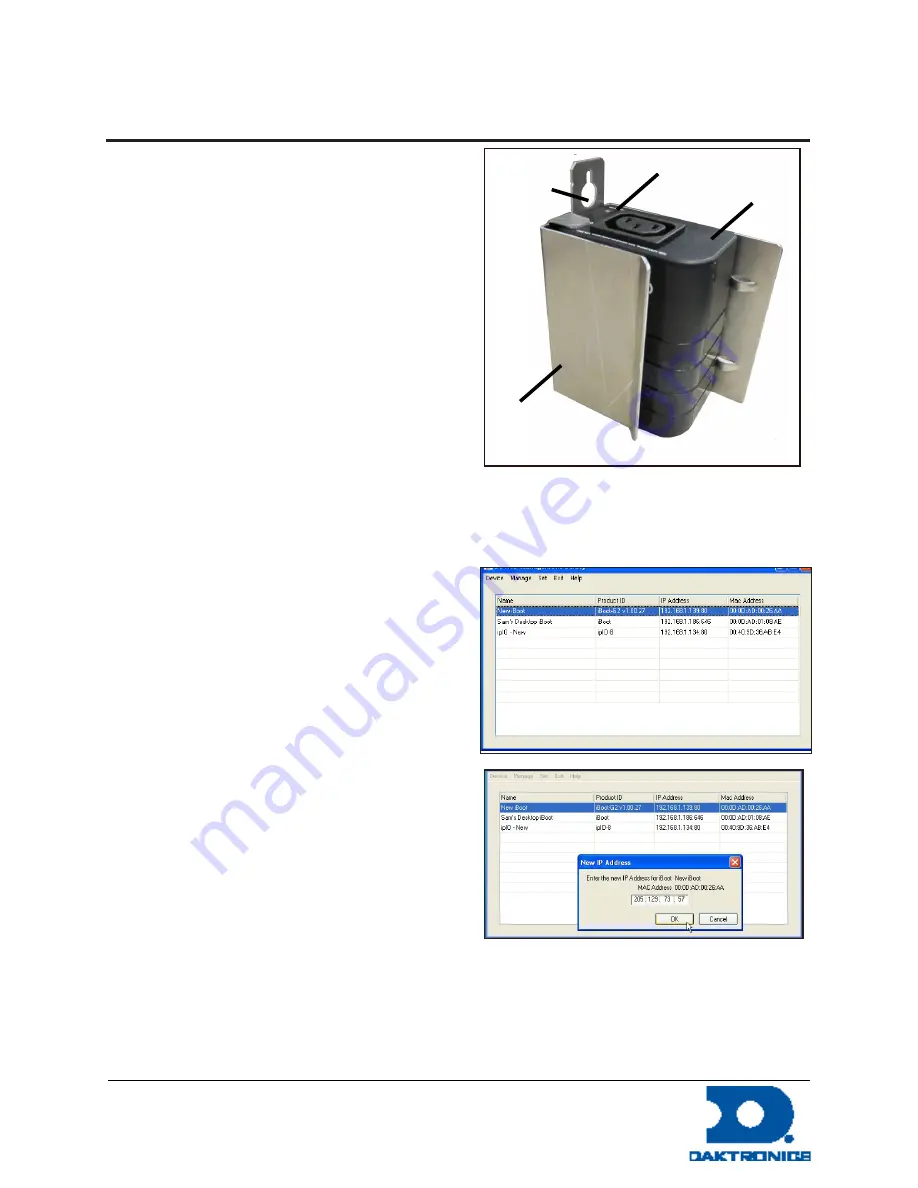
Locate the status LEDs on the top of the iBoot.
2.
Slide the iBoot into the mounting bracket with the
LEDs on the top and with the rounded edge of the
iBoot aligned with the short side of the mounting
bracket.
3.
Verify the iBoot is secure in the mounting bracket.
4.
Slide the flange on the mounting bracket into the
mounting holes on the back wall of the display.
5.
Secure the bracket to the display by screwing it to
the back wall though the keyhole knockout.
6.
Connect the incoming power cable to the bottom of
the iBoot.
7.
Connect the outgoing power cable to the top of the
iBoot.
8.
Plug the devices into the iBoot.
iBoot Configuration
Initial Configuration
The Device Management Utility (DMU), available
online at http://dataprobe.com/support/iboot.html,
provides the easiest means to find and configure your
iBoot-G2+ for use. It can discover all the iBoots on your
network, display the current IP address of each, and
allow setting of any valid IP address.
Install and Run the DMU
1.
Download DMUSetup.exe. from http://dataprobe.
com/support/iboot.html.
2.
Run the DMUSetup.exe. and follow the on screen
instructions.
3.
Run the DMU.
Note:
The IP address can only be set within the first
two minutes of powering up the iBoot. The Setup
Utility will only work with iBoots on the same local
subnets as the PC.
iBoot
LEDs
Mounting
Bracket
Keyhole
Figure 5: iBoot in Mounting Bracket
Figure 6: DMU Discovery
Figure 7: Enter New IP Address
Summary of Contents for DAKT-0204-02
Page 10: ...6 Cabinet Installation...
Page 28: ...24 Maintenance Troubleshooting...
Page 32: ......
Page 34: ......
Page 36: ......
Page 41: ......
Page 61: ......


