12
MACHINE INSTALLATION
1.
Remove the machine from the skid and lift the machine onto the vehicle with the
discharge end of the machine toward the rear of the vehicle.
2.
Pass the remote control unit through an open window and locate it within reach
of the person operating the machine. If permanent vehicle installation is desired,
the remote control cable can be fed through a clearance hole in the vehicle
chassis and then reconnected. When boring holes, ensure that all sharp edges
are removed and covered to prevent premature wear of the remote cable. When
routing the cable to the vehicle cab, do not allow the cable to be exposed to any
sharp edges. Avoid sharp bends when routing the cable. Once the cable has
been routed to the cab, reseal all drilled openings to prevent moisture and/or
exhaust gases from entering the cab.
3.
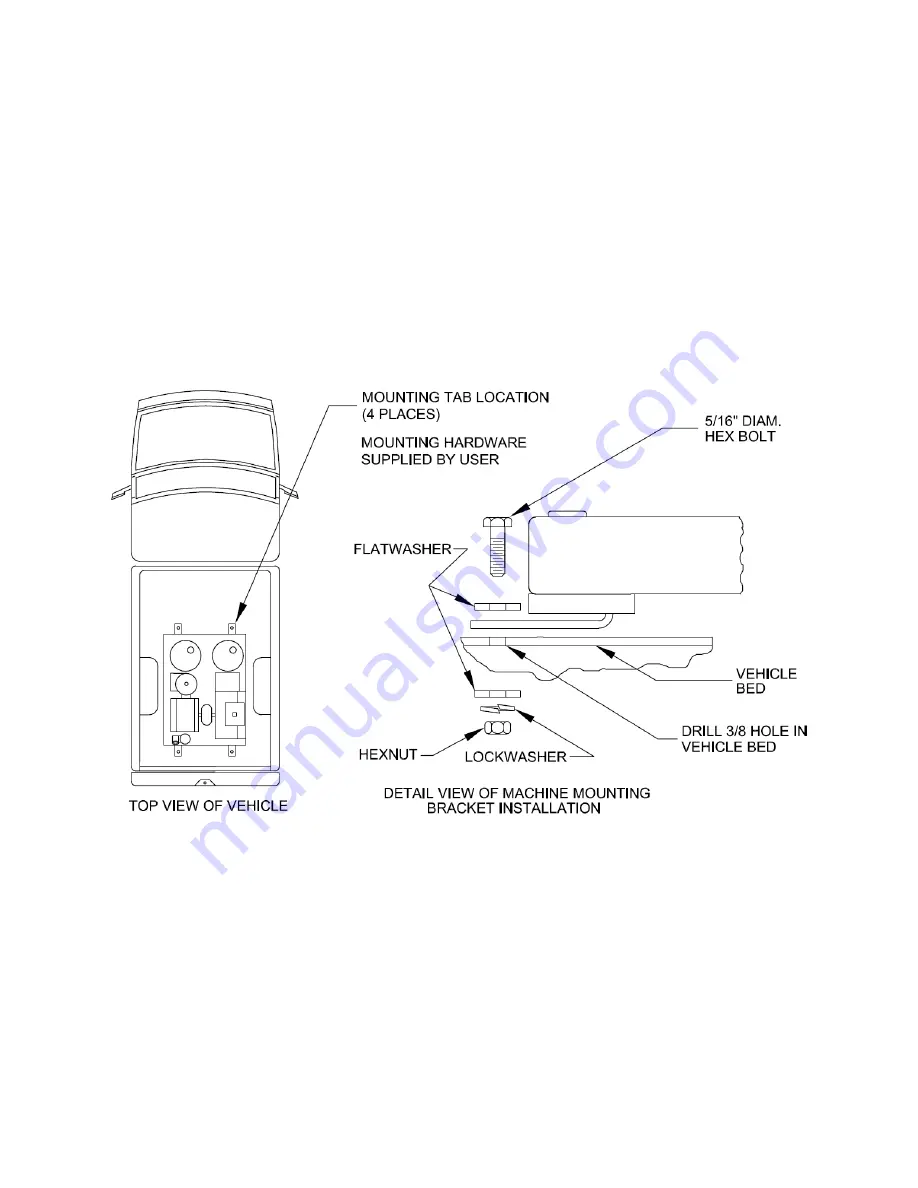
Using the (3) hold-down brackets used for mounting the machine to the
shipping skid, securely mount the machine to the bed of the vehicle (see diagram
below). Depending on the type of bed surface, it may be necessary to use
additional mounting hardware to secure the machine.
WARNING
NEVER ATTEMPT TO OPERATE THE MACHINE WITHOUT FIRST VERIFYING
THAT IT IS SECURELY MOUNTED. FAILURE TO DO SO COULD RESULT IN
SEVERE INJURY.
Summary of Contents for MAXI-PRO 2D ULV
Page 6: ...6 MAJOR COMPONENTS DIAGRAM ...
Page 9: ...9 ...
Page 39: ...39 ...
Page 43: ...43 BOOM ASSEMBLY MAXI PRO 2D P N 64905 ...
Page 50: ...50 ...


