background image

English


Safety Instructions 


Read and understand this entire manual before using this product. Keep these 
instructions for future reference. 
1.  Do not use this product near water.  
2.  This product should be operated only by the type of power source indicated 

on the marking label or in this instruction manual.  

3.  Do not defeat the safety purpose of the polarized plug. A polarized plug has 

two blades with one blade wider than the other. This plug will fit into the 
power outlet only one way. If you are unable to insert the plug fully into the 
outlet try reversing the plug. If the plug should still fail to fit, contact your 
electrician.  

4.  Protect the power cord from being walked on or pinched particularly at plugs, 

convenience receptacles, and the point where they exit from the product. 

5.  Do not overload wall outlets, extension cords, or integral convenience 

receptacles as this can result in a risk of fire or electric shock. 

6.  Never push objects of any kind into this product through openings as they 

may touch dangerous voltage points or short-out parts that could result in a 
fire or electric shock. Never spill liquid of any kind on the product. 

7.  Do not attempt to service this product yourself as opening or removing 

covers may expose you to dangerous voltage or other hazards. Refer all 
servicing to qualified service personnel. 

8.  Changes or modifications to this unit not expressly approved by the party 

responsible for compliance could void the u

ser’s authority to operate the 

equipment. 

9.  Do not use attachments not recommended by the product manufacturer as 

they may cause hazards. 

10.  A product and cart combination should be moved with care. Quick stops, 

excessive force, and uneven surfaces may cause the product and cart 
combination to overturn. 

11.  Slots and openings in the cabinet are provided for ventilation and to ensure 

reliable operation of the product and to protect it from overheating. Do not 
block or cover these openings.  

12.  Unplug the product during lightning storm or when unused for long periods of 

time. 

13.  Risk of explosion if the battery is replaced by an incorrect type 
14.  Do not ingest battery, Chemical Burn Hazard 
15.  This product contains a button cell battery. If the button cell battery is 

swallowed, it can cause severe internal burns in just 2 hours and can lead to 
death. 

16.  Keep new and used batteries away from children. 
17.  If the battery compartment does not close securely, stop using the product 

and keep it away from children. 

18.  If you think batteries might have been swallowed or placed inside any part of 

the body, seek immediate medical attention. 


Summary of Contents for Eclipse CR7014A

Page 1: ...014A Eclipse Entertainment System Instruction Manual Questions problems missing parts Before returning to the store call Customer Service 8 a m 6 p m EST Monday Friday 1 888 CROSLEY www crosleyradio c...

Page 2: ...self as opening or removing covers may expose you to dangerous voltage or other hazards Refer all servicing to qualified service personnel 8 Changes or modifications to this unit not expressly approve...

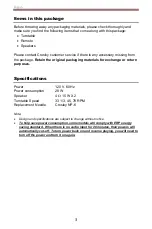
Page 3: ...ing materials for exchange or return purposes Specifications Power 120 V 60Hz Power consumption 28 W Speaker 4 15 W X 2 Turntable Speed 33 1 3 45 78 RPM Replacement Needle Crosley NP 6 Note Design and...

Page 4: ...Screen 3 Bluetooth Indicator 4 Cassette Door 5 Record Button 6 Play Button 7 Rewind Button 8 Fast Forward Button 9 Stop Eject Button 10 Pause Button 11 CD Tray 12 SD Card Slot 13 USB Port 14 Aux In Ja...

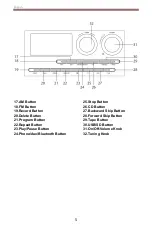
Page 5: ...on 20 Delete Button 21 Program Button 22 Repeat Button 23 Play Pause Button 24 Phono Aux Bluetooth Button 25 Stop Button 26 CD Button 27 Backward Skip Button 28 Forward Skip Button 29 Tape Button 30 U...

Page 6: ...Spindle 34 Turntable Platter 35 45 RPM Adapter 36 Tonearm Lever 37 Auto Stop Switch 38 Hold Down Clip 39 Tonearm Rest 40 Speed Switch 41 Tonearm 42 RCA Jacks 43 Spring Clip Speaker Terminals 44 FM Wir...

Page 7: ...er outlet Remote Control Prepare the Remote Control First time use The unit has a pre installed lithium CR2025 battery Remove the protective tab to activate the remote control battery Replace the Remo...

Page 8: ...unit press the Phono AUX button to set to Aux In mode and start playing Note The aux in connection will automatically override the turntable or Bluetooth function To resume using the turntable or Blu...

Page 9: ...lly when the record plays to the end In some rare occasion if the turntable stops playing before the end of the record set the switch to OFF position the turntable should overcome this issue Needle Re...

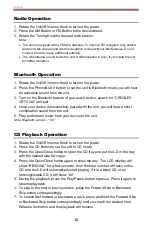
Page 10: ...h the unit you will hear a short confirmation sound from the unit 5 Play and stream music from your device to the unit Note Bluetooth version 5 0 CD Playback Operation 1 Rotate the On Off Volume Knob...

Page 11: ...e which is to be edited 4 Repeat steps 2 3 for additional sound tracks that you would like to play The tracks can be in any number and repeated A maximum of 20 tracks can be programmed at one time 5 P...

Page 12: ...Press the USB SD button to set the unit to USB or SD mode 2 Insert a cassette tape and press the RECORD and PLAY button to record the sounds from USB SD Note To prevent accidental recording break off...

Page 13: ...rding break off the cassette tab from side A or B 4 To pause recoding press the Pause button Press it again to resume playback 5 To stop recording press the Stop Eject button Bluetooth to TAPE 1 Press...

Page 14: ...evice Note To prevent accidental recording break off the cassette tab from side A or B 4 To pause recoding press the Pause button Press it again to resume playback 5 To stop recording press the Stop E...

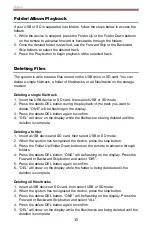
Page 15: ...lete DEL button again to confirm 4 DEL will show on the display while the file track are being deleted until the deletion is complete Deleting a folder 1 Insert a USB device and SD card then select US...

Page 16: ...Forward Skip button to select USB or SD for recording and press the record button to confirm the desired media 4 Lower the tone arm to start playback of the record 5 When you have finished recording p...

Page 17: ...eshooting There is no power No power at the power outlet To help save power consumption some models will comply with ERP energy saving standard When there is no audio input for 20 minutes their powers...

Page 18: ...ption which can be determined by turning the equipment off and on the user is encouraged to try to correct the interference by one or more of the following measures Reorient or relocate the receiving...

Reviews: