©2015 Cradlepoint. All Rights Reserved.
|
+1.855.813.3385
|
cradlepoint.com
76
User Manual
/
AER3100/AER3150
NAT
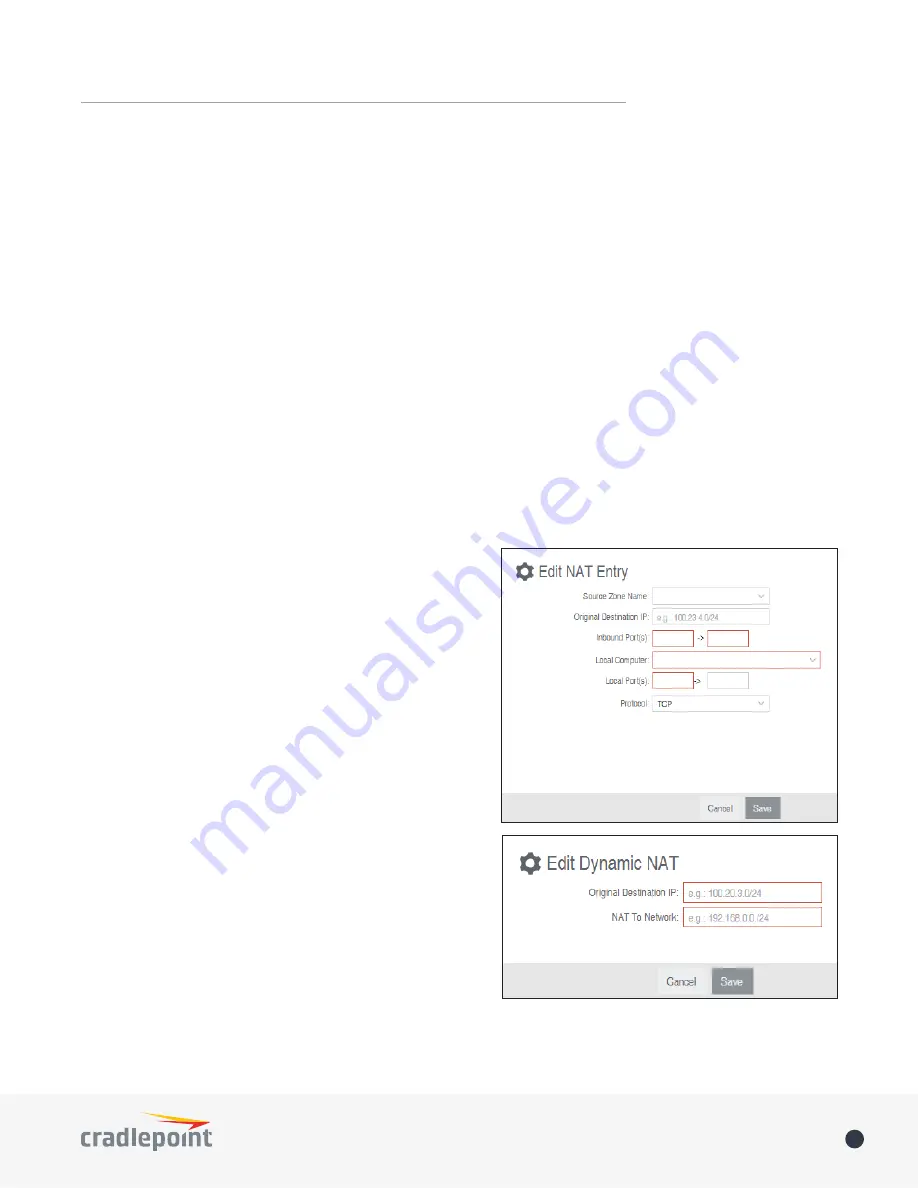
Zone NAT is similar to Port Forwarding and provides that functionality by mapping ports available on interfaces
associated with the Zone to ports available on local clients. Zone NAT also has the ability to map many types
interfaces selectable via a Zone. For example, GRE interfaces can be used to port forward traffic from the GRE
endpoints to local client thereby limiting exposure to the
local LAN while still gaining the benefits of GRE.
Click
Add
to create a Zone NAT.
•
Source Zone Name:
The Zone created in Zone Firewall.
Select the Zone to NAT.
•
Original Destination IP:
Specify which inbound traffic to
this router will have the destination IP translated to an
internal network.
•
Inbound Port(s):
Specify the IP port(s) on the inbound
traffic to forward to a local computer.
•
Local Computer:
Specify the local computer to receive
forwarded traffic.
•
Local Port(s):
Specify the IP port (first if a range) on the
local computer to receive forwarded traffic.
•
Protocol:
Select the IP protocol traffic to forward.
Dynamic 1:1 NAT
Dynamic NAT allows translating the destination ip of
incoming network traffic to a local network. All ports and
protocols will be forwarded. Netmasks should generally
match. If the local network range is larger than the incoming
destination range then network traffic will begin using
port overloading. One-to-One NAT can be accomplished by
specifying a host address or a /32 cidr address.
Click
Add
to create a Dynamic 1:1 NAT.
•
Name
: Name your rule.
•
Enabled
: Toggle whether your rule is enabled. Selected by default.
•
Use Port Range
: Check this box to create a rule which proxies a contiguous range of ports instead of a
single port. The remote port(s) will require the same number of contiguous ports.
•
Local Port(s)
: Specify the IP port(s) on the LAN to proxy to a remote computer.
•
Remote Computer
: Specify the remote computer to receive proxied traffic.
•
Remote Port(s)
: Specify the IP port (first if a range) on the remote computer to receive proxy traffic.
•
Protocol
: Select the IP protocol traffic to proxy from the following options in the dropdown menu:
•
TCP
•
UDP
•
TCP & UDP
Click
Save
to save your completed port proxying rule.


