


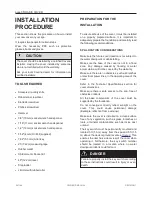


OASIS COVER page-
25
pivot point see
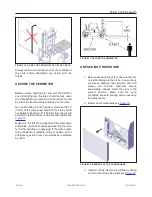
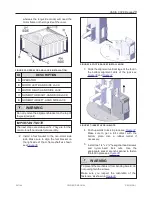
CAUTION
Dropping the crate could damage the cover.
FIGURE 27: LAY THE CRATE ON ITS BACK
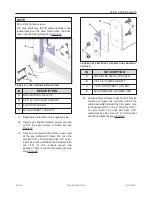
15. Remove the cardboard top and sides by
simply unfolding them on the ground see
.
16. If the cover was delivered with roller shades,
remove the cardboard cylinders from the
holes in the side panels and keep them in a
safe location.
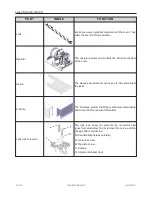
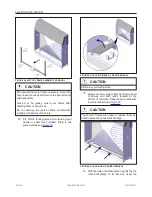
17. Gently hammer off the last wood furring strips
on the front of the crate. Consider hammering
the side panel in an outward direction to
prevent damaging the cover see
.
CAUTION
Be careful not to damage the cover during this
process see
FIGURE 28: WOOD FURRING STRIP REMOVAL
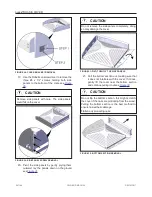
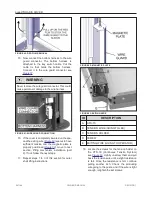
18. This step is divided in 3 substeps:
Substep 1: Use a Phillips screwdriver to
remove the two M6 x 20 mm screws.
Substep 2: Use a 3/8″ (10 mm) socket
wrench to remove the two other lag bolts.
Substep 3: Repeat steps 1 and 2 for all four
corners see
.
CAUTION
Carefully remove all four brackets. Failure to do so
might damage the cover when removing the crate
sides.
Flatten any protruding nails.
241146
OWNER'S MANUAL
REVISION 1
Summary of Contents for OASIS COVER
Page 1: ......
Page 2: ......
Page 54: ......
Page 59: ...OASIS COVER page 57 241146 OWNER S MANUAL REVISION 1...
Page 61: ...OASIS COVER page 59 241146 OWNER S MANUAL REVISION 1...
Page 63: ...OASIS COVER page 61 241146 OWNER S MANUAL REVISION 1...
Page 65: ...OASIS COVER page 63 241146 OWNER S MANUAL REVISION 1...