


Setup Guide
Top Panel & Functions
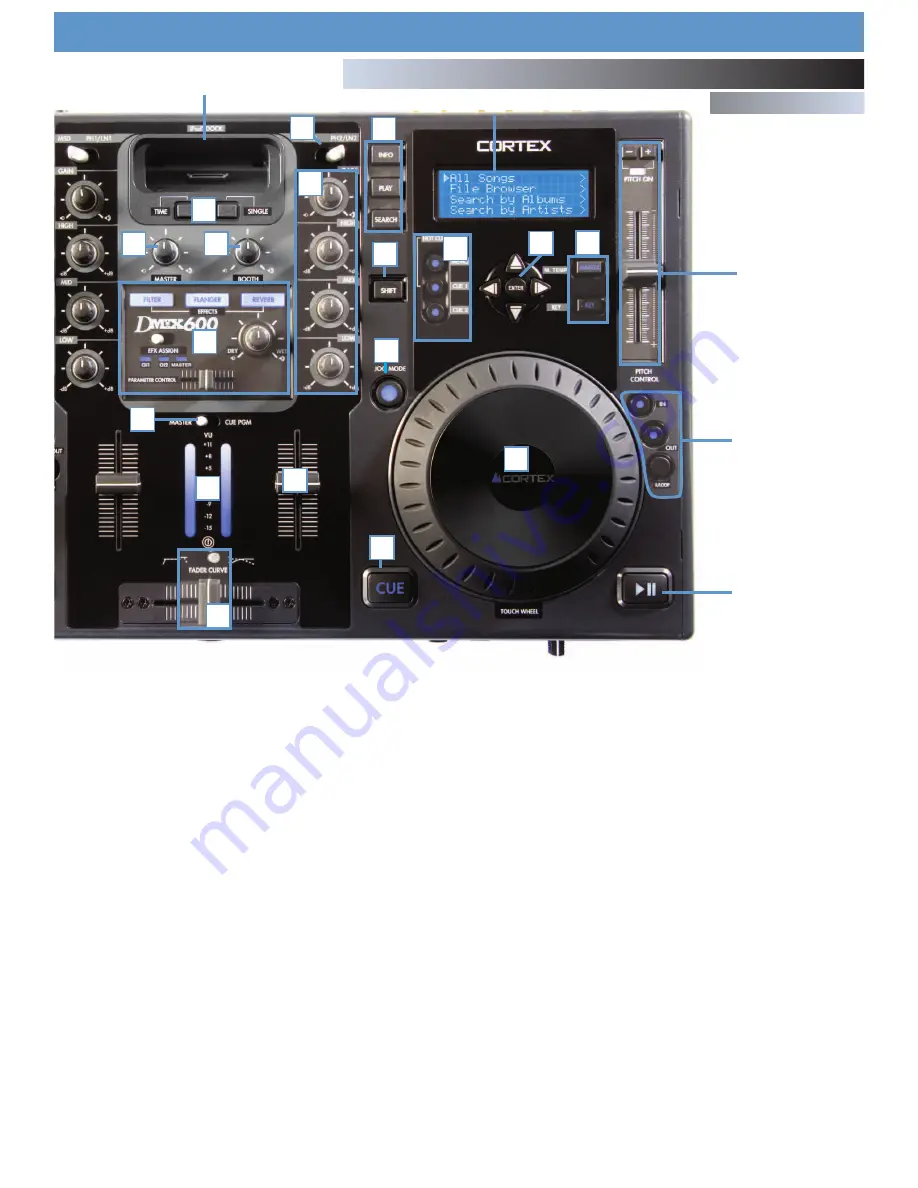
Top Panel
8
1. iPod Dock
This can be used to dock any Ipod (Gen 3 and above) to the unit. As well, when
used together with the USB type B connector on the rear of the unit the Ipod can
be connected to a PC through the Dmix 600 for file transfers.
2. Time and Single buttons
Press the TIME button to toggle between Time Remaining and Time Elapsed on
the Play screen when playing an audio file. Use the Single button to toggle
between Single and Continuous play modes.
3. Master Volume
Use this knob to change the volume of the Master output on the rear of your unit.
4. Booth Volume
Use this knob to change the volume of the Booth output on the rear of your unit.
5. Effects Controls
This section controls the three on board effects FILTER, FLANGER and REVERB.
The effects can be assigned to either channel individually or to the master out-
put mix. You can also adjust the parameter and the DRY/WET mix of the effect.
6. Master/Cue VU meter switch
The Master/Cue switch located above the VU meter is used to choose what is
displayed on the VU meter. Switch to the MASTER position to have the LEDs dis-
play the volume of the Master output. Switch to the Cue position to monitor the
volume of channels One and Two in relation to each other.
7. VU meter
The VU meter displays the current volume of either the Master output or Cue out-
put, depending on the position of the Master/Cue switch.
8. Crossfader/Fader Curve
The Crossfader is used to fade between channels one and two. The crossfader
is user replaceble from the top panel. FADER CURVE settings, positioning the
switch to the right will give you a gradual CROSSFADE and positioning the
switch to the left will give you a quick CROSSFADE.
9. MSD/Line-Phono switch
This switch toggles between the MSD (Ipod/USB) and Line/Phono inputs on your
mixer.
10.Gain and EQ knobs
Use the High, Mid and Low knobs to effect the tone of your music. Use the Gain
knob in conjunction with your Channel fader to change the volume of your music..
11.Line Fader
The Line Faders on each channel are used to control volume. Use these in con-
junction with the Gain and EQ on each channel to control the Volume and Tone
of each channel.
12.Info/Play/Search Buttons
Use the INFO button to view the information of a playing file. Use the SEARCH
button to enter the search menu. Use the PLAY button to re-enter the Play screen.
13.SHIFT button
Holding down the SHIFT button extends the use of certain buttons on the unit, by
providing alternate functions.
14.JOG MODE button/indicator
This button controls alternately whether the JOG WHEEL will function as PITCH
BEND or FF/REW. When the LED indicator is lit, it indicates that the JOG WHEEL
will function as FF/REW. When not lit the JOG WHEEL functions as a PITCH
BEND.
1
2
3
4
5
7
9
11
13
14
16
15
18
19
20
22
21
23
17
6
10
12
8


