4
5.2 How to Install ArcSoft® Software
PC
Introduction to the Software
PhotoStudio
®
4.0
PhotoStudio
®
4.0 is a full-featured, easy-to-use digital
image-editing program that provides a complete set of photo editing
and retouching tools, plus a wide selection of special effects and enhancements. Its powerful features include a wide variety
of input and output options, layers, multiple undo and redo functions, image management tools, editable text, multiple file
format support and a lot more.
ArcSoft Funhouse™ 1.0
ArcSoft Funhouse™ is an image entertainment application that enables users to create “fun photo” by combining their
personal photos with a wide variety of mask templates. Users can get their own images from digital cameras, scanners, disk
drives and Photo CDs, and seamlessly combine them with just a few clicks of the mouse. Photo mask includes sports, role
play, time warp, trading cards, in print, cartoon and surreal.
ArcSoft PhotoPrinter® 2000
ArcSoft PhotoPrinter® is an easy-to-use printing utility that enables the user to layout and print multiple images in different
sizes quickly and easily on a single sheet of paper. The program offers a large selection of printing templates, including Kodak
Digital Science Inkjet Photo Paper Templates and Avery-brand paper products. It also includes commonly used image-editing
tools and a wide selection of templates for frames, edges and backgrounds for enhancing images.
ArcSoft VideoImpression™ 1.6
ArcSoft VideoImpression™ is an easy-to-use video and image editing software program. The program enables users to create
and edit new videos using existing video and image files - making desktop video presentations for home, business, and the
Web.
Visit http://www.arcsoft.com for all your FAQ’s, tips and technical support see Section 12 for more details.
5.2.1 How to Install ArcSoft® Software
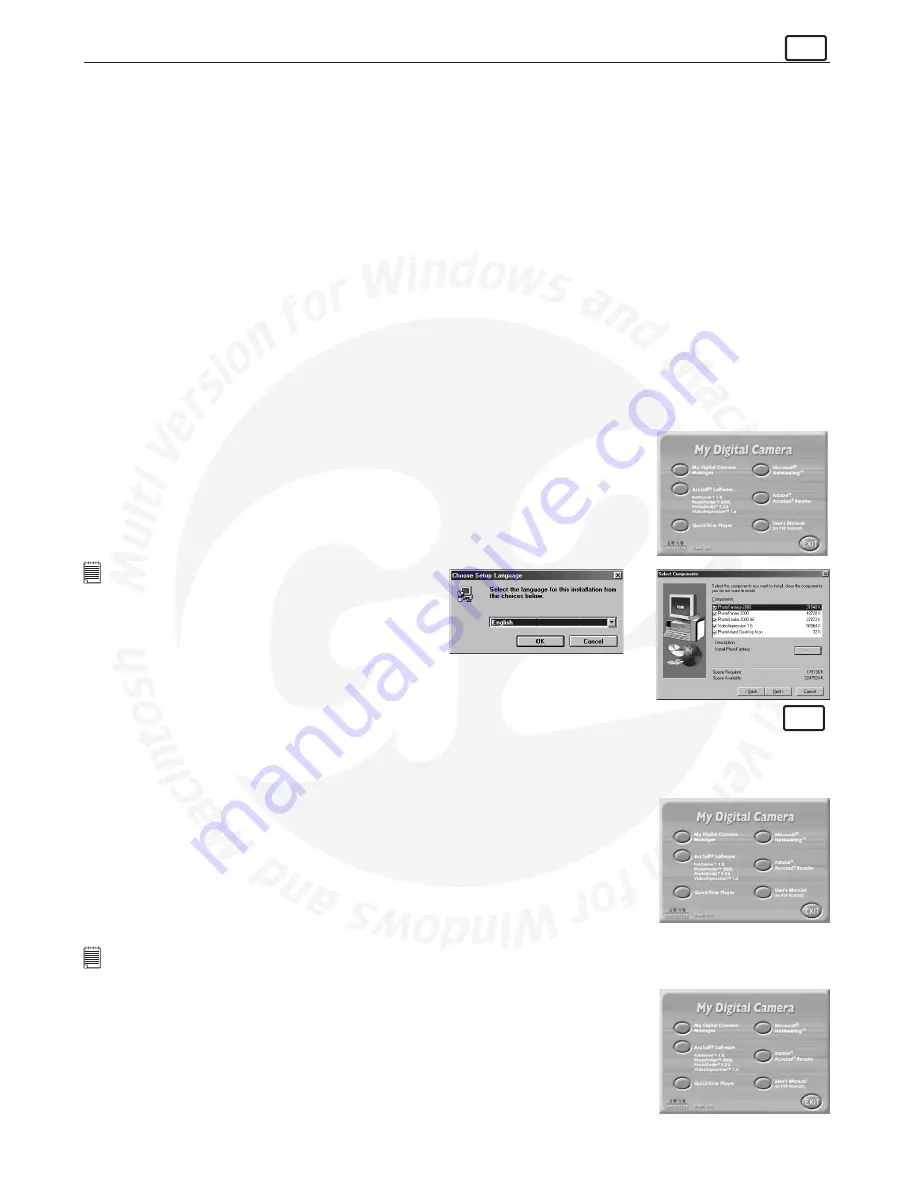
1. Reinsert the CD-ROM disc into the CD-ROM drive and close the CD ROM draw.
2. An installation wizard will automatically launch.
3. Click the “ArcSoft® Software” icon.
4. Select the language for the installation and click “OK”.
5. Follow the on-screen prompts.
6. Select the software you want or you do not want installed by clicking on the tick boxes
next to the software title. Click “Next >” to continue.
7. Follow the instructions presented on the screen to complete the installation.
Notes:
Don’t worry if you made a mistake and want to add in ArcSoft®
titles you did not tick. Reinsert the CD-ROM and follow steps 1 -
6 ticking only the software you want to add.
Please note that images saved in your computer memory
are able to be accessed via the ArcSoft® Suite software.
To access images in ArcSoft® from your
G2
you must upload your images to your computer
as described in Section 10.1 for PC and 10.2 for Mac. See Section 11 for how to use
ArcSoft® software.
5.3 How to install Microsoft® NetMeeting™
PC
NetMeeting™ provides the most complete conferencing solution for the Internet and corporate intranet. Powerful features let
you communicate with both audio and video, collaborate on virtually any Windows-based application, exchange graphics on
an electronic whiteboard, transfer files, use the text-based chat program, and much more. Using your PC and the Internet,
you can now hold face-to-face conversations with friends and family around the world.
To install the Microsoft® NetMeeting™:
1. Insert the CD-ROM disc into the CD-ROM drive and close the CD ROM draw.
2. An installation wizard will automatically launch.
3. Click the “Microsoft® NetMeeting™” icon.
4. Follow the instructions presented on the screen to complete the installation.
5. You will have a choice during installation to place a desktop icon on your desktop for easy
access directly to the software.
6. For further installation details, please visit the following website:
http://www.microsoft.com/windows/netmeeting
Notes:
• You need to enter your name, your e-mail address and country details during installation.
• You need to adjust the playback volume and your record volume.
5.4 How to install Adobe® Acrobat® Reader
Adobe® Acrobat® Reader lets you view and print Adobe Portable Document format (PDF)
files on all major computer platforms, as well as fill in an submit Adobe PDF forms online.
To install the Adobe® Acrobat® Reader:
1. Reinsert the CD-ROM disc into the CD-ROM drive and close the CD ROM draw.
2. An installation wizard will automatically launch.
3. Click the “Adobe® Acrobat® Reader 4.05” icon.
4. Follow the instructions presented on the screen to complete the installation.
Visit http://www.adobe.com/ for all your FAQ’s, tips and technical suppor
t.


