3
3. System Requirements
For Windows® Users
PC
For Macintosh® Users
MAC
• PowerPC® Processor
• Mac® OS version 8.6 - 9.2
• USB port
• 128MB RAM
• 150MB Free disk space
• Color Monitor with High Color (16-bit) graphic capability
or higher
• CD-ROM Drive
• Standard mouse and keyboard
• Compatible with Microsoft® Windows® 98SE and Me, XP
• Pentium® 200MHz or higher recommended
• 128MB RAM or higher
• USB Port
• 200MB free disk space
• CD-ROM Drive
• Color Monitor with High Color 16-bit graphics capability or
higher
• Standard mouse and keyboard
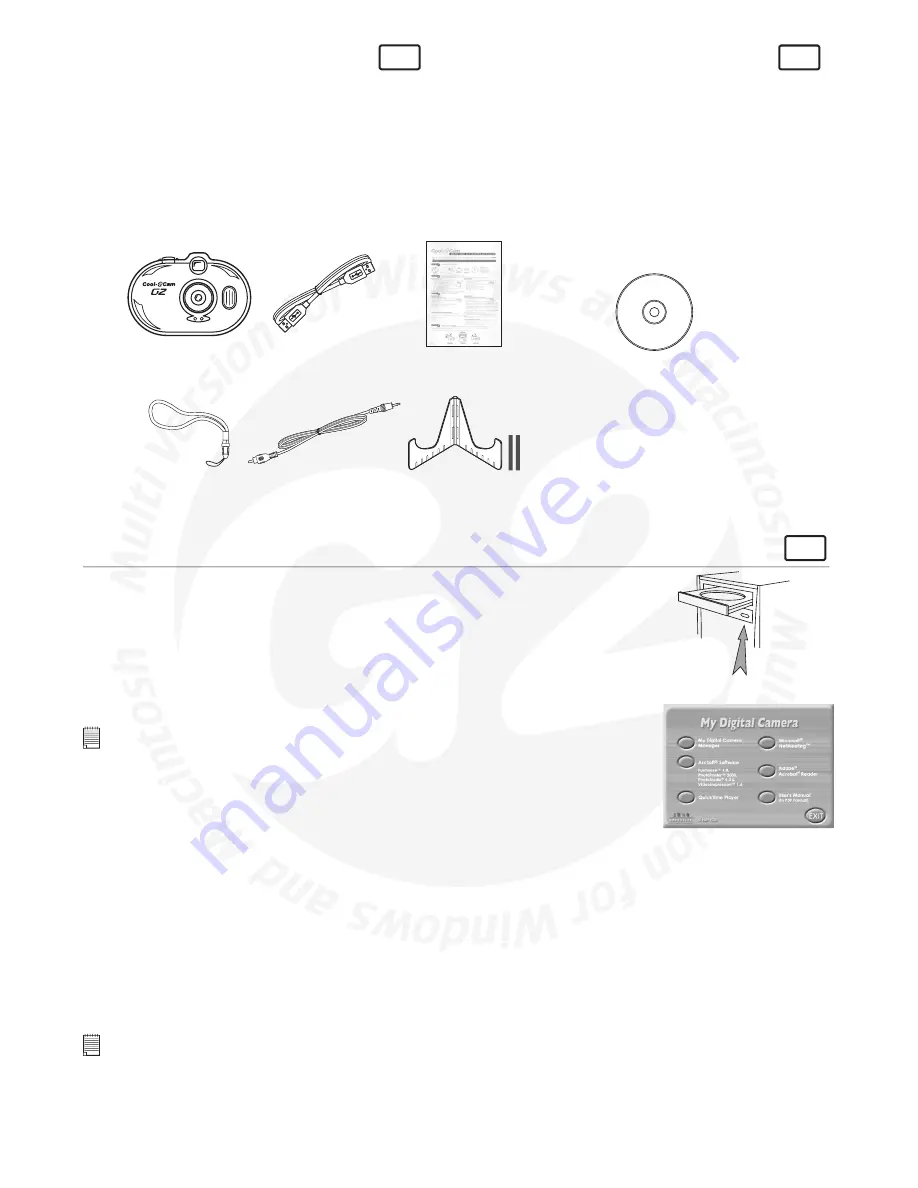
4. Package Contents
USB Cable
Wrist Strap
with Clip
G2
Stand
(plus rubber stickers x 2)
(for customer assembly to
prevent slipping of
G2
)
G2
Software CD-ROM
(includes
My Digital Camera
,
PhotoStudio® 4.0 (PC & Mac),
ArcSoft Funhouse™ 1.0 (PC & Mac),
ArcSoft PhotoPrinter® 2000 (PC & Mac),
ArcSoft VideoImpression™ 1.6 (PC),
Microsoft® NetMeeting™ (PC),
Adobe® Acrobat® Reader (PC & Mac),
QuickTime™ 4 (PC & Mac),
User’s Manual (PC & Mac)).
,
G2
Quick Setup
Instructions
Video Out Cable
5. Software Installation
For Windows® Users:
PC
5.1 How to Install My Camera Software
Open & Close
5.1.1 How to Install My Camera Software
Your “
My Digital Camera
” should be installed first.
1. Insert the CD-ROM disc into the CD-ROM drive and close the CD-ROM drawer.
2. An installation wizard will automatically launch.
3. Click “
My Digital Camera
” icon.
4. Follow the instructions presented on the screen to complete the installation.
5. You will be asked to select between 50hz/60hz lighting frequency settings. Refer to the
note below and the troubleshooting guide.
6. Click “OK” to restart your computer and wait for your PC to restart automatically.
Notes:
If the setup screen doesn’t appear after loading the CD, then you can manually start it by double-clicking
the “My Computer” Icon on your desktop, then double-clicking the icon for the CD-ROM drive. When the
CD-ROM window opens, double-click the “digital camera” icon.
Frequency settings differ from country to country and some countries utilise both 50hz and 60hz. Note
for country with both settings test both settings. Follow 5.1.2 and 5.1.1 to uninstall and reinstall your
My
Digital Camera
software.
5.1.2 Creating a Desktop Icon
Double click on “My Computer” on your computer desktop. Right click on the icon “My Camera” and select “create shortcut”.
Select “Yes” and this will place “My Camera” icon on your computer desktop.
5.1.3 Creating a Desktop Folder to Hold your Images in
Right click on your computer desktop, select “New”. Select “Folder” and a new folder will appear on your computer desktop
and it will be waiting for you to name it by flashing. Call it “My Images”.
Now go to Section 5.2.
5.1.4 Uninstalling your My Digital Camera
To uninstall
My Digital Camera
, click the “Start Menu” -> “Settings” -> “Control Panels” -> “Add/Remove Programs”. Select
“My Camera” and click the “Add/Remove” button.
Notes:
Uninstalling your
My Digital Camera
does not delete your album folders and therefore all images transferred into your default or created albums
will be preserved. You will be able to access these folders on your system desktop.


