Setup
CNT24-4(PCI)
8
Setting up the Board
(For Use under MS-DOS or Windows 3.1)
The board setup method for the CNT24-4(PCI) is different
depending on each OS. Set up the board using the appropriate
method depending on the OS used. This section describes the
procedure and notes for using the board under MS-DOS or
Windows 3.1.
Procedure
(1) Set the board ID.
(2) Be sure to check that the personal computer is off, then plug
the board into a PCI bus slot in the personal computer.
(3) Turn the personal computer on to start up MS-DOS.
(4) Setting up the board is completed when MS-DOS gets and
running. When setting up the board has been completed,
be sure to check the assigned resources.
Checking resources
Before operating the CNT24-4(PCI) board, be sure to check the
personal computer resources (I/O addresses and interrupt level)
assigned to the board. For PCI compatible (Plug and Play
compliant) boards, free resources among the personal computer
resources are assigned automatically upon activation of the personal
computer. Follow the steps below to check the assigned resources.
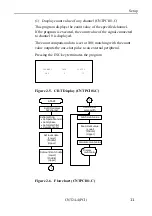
(1) Run the resource check program "CNTPCI.EXE" stored in the
DOS directory on the supplied floppy disk (FD).
(2) Check the I/O addresses and interrupt level (IRQ) displayed on
the screen.
Once the CNT24-4(PCI) has been set up correctly, it can be used
under MS-DOS and Windows 3.1.


