background image

Setup

BUF-PCI(PC), BUF-PCI(98)

33

Procedure for Use under Windows 95 Version 4.00.950 or
4.00.950a :

(1) Turn the personal computer ON to start up Windows 95.

(2) Windows 95 will come up with the [New Hardware] detection

dialog box.  Select [Multimedia Device: Select which driver you
want to install for your new hardware.] and then [Driver from disk
provided by hardware manufacturer].

(3) In the [Install From Disk] dialog box, insert BUF-PCI Driver

Install Disk 1 into the disk drive, enter the drive name: \Win95 in
the [Copy Distributed File From] field, then click on [OK].  This
completes installation of the BUS-PCI(PCI) board.
The "Checking resources" part of this section explains you how to
do it.

Procedure for Use under Windows 95 Version 4.00.950B or
4.00.950C :

(1) Turn the personal computer on to start up Windows 95.

(2) Windows 95 will come up with the [New Hardware] detection

dialog box.  In the [Device Driver Wizard] that appears next,
check that "CONTEC Co., Ltd. - Multimedia Device" has been
listed, then select [Next>].

(3) In the next dialog box, select [Specify Location...].

(4) Insert BUF-PCI Driver Install Disk 1 into the disk drive, enter the

drive name: \Win95 in the [Location] field, then click on [OK].

(5) In the next dialog box, check the "Updated driver found for this

device" message, then select [End].  This completes installation of
the BUS-PCI(PCI) board.
After finishing installing the board, confirm the assigned resources.
The "Checking resources" part of this section explains you how to
do it.

Summary of Contents for BUF-PCI(98)

Page 1: ... SERVICE CENTER REPAIRS Experienced engineers and technicians on staff at our full service in house repair center WE BUY USED EQUIPM Sell your excess un We also offer credit www artisantg com REMOTE INSPECTION Remotely inspect equipment before purchasing with our interactive website at www instraview com LOOKING FOR MORE I Visit us on the web a information on price specifications manu Contact us 8...

Page 2: ...BUF PCI PC BUF PCI 98 Bus Expansion User s Guide ...

Page 3: ...o change without notice All relevant issues have been considered in the preparation of this document Should you notice an omission or any questionable item in this document please feel free to notify CONTEC CO LTD Regardless of the foregoing statement CONTEC assumes no responsibility for any errors that may appear in this document nor for results obtained by the user as a result of using this prod...

Page 4: ... is specially packed in an anti static bag to prevent damage in shipping Check the contents to make sure that you have everything listed above If you do not have all the items contact your distributor or CONTEC group office where you purchased Note Do not remove the board from its protective packaging until the computer case is open and ready for installation Electrical static can cause damage to ...

Page 5: ...etting Whether or not to Use Interrupt Resources 8 Setting the Board ID 9 Mounting the BUS PCI PCI Board 9 Setting Up and Mounting the BUS PCI PC or BUS PCI 98 Board 10 Setting Up I O Expansion Unit Power Control 10 Mounting the BUS PCI PC or BUS PCI 98 Board 11 Connecting the PC to the I O Expansion Unit 12 Turning Power On 13 Installing the BUF PCI Driver Software 14 Installing for Windows XP 14...

Page 6: ...ogramming Interruption 46 Programming Self testing 48 Function Reference 48 BufPciOpen 49 BufPciClose 51 BufPciSetBusSignal 52 BufPciInPortB 54 BufPciInPortW 55 BufPciOutPortB 57 BufPciOutPortW 58 BufPciSetIrqEvent 60 BufPciStopEvent 62 BufPciRestartEvent 64 BufPciGetIrqStatus 65 BufPciSetProgramWait 67 BufPciSelfTest 68 List of Return Values 70 Sample Program for Windows 73 Programming in an OS o...

Page 7: ...BUF PCI 98 I O Expansion Slot Signals 88 Software BUF PCI Driver Specifications 89 5 Troubleshooting 91 The Product cannot be Set Up Properly 91 The PC and or the I O Expansion Unit does not Start Up 91 The BUF PCI Driver cannot be Installed 91 Self testing does not Result in OK 91 Board Mounted in the I O Expansion Unit cannot be Accessed 92 No Input or Output can be Performed on I O Ports 92 No ...

Page 8: ...ess Programming Procedure 48 List of Table Table 2 1 Specifying Whether or not to Use Interrupt Resources 8 Table 2 2 Setting Board IDs 9 Table 3 1 List of Functions 44 Table 4 1 BUF PCI PC System Specifications 85 Table 4 2 BUF PCI 98 System Specifications 85 Table 4 3 BUS PCI PCI Board Specifications 85 Table 4 4 BUS PCI PC Board Specifications 86 Table 4 5 BUS PC 98 Board Specifications 86 Tabl...

Page 9: ...ansion unit Please read this document thoroughly before starting building a system including creating application programs and connecting with external devices This product consists of the following BUS PCI PCI board to be mounted in the PCI bus expansion slot in the PC BUS PCI PC board or BUS PCI 98 board to be mounted in CONTEC s I O expansion unit Cable for connecting the above two products In ...

Page 10: ...ble for Windows XP Windows 2000 Windows NT Windows Me Windows 98 and Windows 95 The I O access wait and the refresh signal for the I O expansion unit can be enabled or disabled Comes with a self diagnostic feature Functions General purpose I O accessing Allows you to access an added expansion slot for I O The I O wait can be specified with software Interruption An interrupt can be generated with a...

Page 11: ...cable if the device has been tampered with or damaged through abuse mistreatment neglect or unreasonable use or if the original invoice is not included in which case repairs will be considered beyond the warranty policy How to Obtain Service For replacement or repair return the device freight prepaid with a copy of the original invoice Please obtain a Return Merchandise Authorization Number RMA fr...

Page 12: ...verify the specifications of the board you will be mounting in the I O expansion unit The following boards cannot be used A board that uses specific I O port addresses a board that does not allow its I O port addresses to be reset such as a PnP board A board that uses memory accessing a memory expansion board or a board that uses an extended ROM area A board that uses DMA A board that outputs cont...

Page 13: ... before mounting the board in the slot Set the switches and jumpers on the board as designated Setting them otherwise will cause failures Connect only designated signals to the connectors on the board Connecting otherwise will cause failures Mount the board only in the designated expansion slot Do not insert or remove the board with the PC or the I O expansion unit turned on Inserting or removing ...

Page 14: ...rocedures and switch setting procedures for using this product Chapter 3 Programming Explains programming procedures needed to use this product Chapter 4 System Reference Explains the specifications of this product Chapter 5 Troubleshooting Refer to this chapter when you have trouble with setting up the product or when it does not function normally Chapter 6 Index ...

Page 15: ...used Setup Procedure Set up the product following these steps 1 Setting up and mounting the BUS PCI PCI board 2 Setting up and mounting the BUS PCI PC or BUS PCI 98 board 3 Connecting the PC to the I O expansion unit 4 Turning power on 5 Installing the BUF PCI driver 6 Mounting a board to be used in the I O expansion unit ...

Page 16: ...r or not to use interrupt resources with DIP switch SW1 1 When using the interrupt function of the board mounted in the I O expansion unit set SW1 1 to ON This allows an interrupt request to be sent to the PC through the PCI bus using one interrupt resource assigned to the BUS PCI PCI board If SW1 1 is set to OFF no interrupt resource is assigned from the PC to the BUS PCI PCI board Table 2 1 Spec...

Page 17: ... ON OFF OFF OFF 8 OFF OFF OFF ON 1 ON OFF OFF ON 9 OFF OFF ON OFF 2 ON OFF ON OFF 10 OFF OFF ON ON 3 ON OFF ON ON 11 OFF ON OFF OFF 4 ON ON OFF OFF 12 OFF ON OFF ON 5 ON ON OFF ON 13 OFF ON ON OFF 6 ON ON ON OFF 14 OFF ON ON ON 7 ON ON ON ON 15 Notes For the BUF PCI PC set SW1 2 to ON For the BUF PCI 98 set SW1 2 to OFF Set SW1 3 and SW1 4 to OFF Mounting the BUS PCI PCI Board After making sure th...

Page 18: ...ompliance with ATX specifications When using with an I O expansion unit having an ATX power supply source connecting each terminal to 5VSB PS ON and GND of the ATX power supply source allows you to interlock the I O expansion unit power with the turning ON OFF of the PC CN3 on the BUS PCI PC board is the connector that connects to the power LED on the I O expansion unit Figure 2 2 Mounting Diagram...

Page 19: ...from the socket on the equipment Next mount the BUS PCI PC or BUS PC 98 board in the I O expansion unit For information about mounting either board follow instructions in the manual that came with the expansion unit Note Before mounting the BUS PCI PC or BUS PC 98 board be sure to disconnect the I O expansion unit power plug from the socket on the equipment ...

Page 20: ... the BUS PCI PCI to the BUS PCI PC or BUS PCI 98 using the cable that came with the product A connector of the identical model is attached to either end of the cable Connect the cable firmly to each connector Figure 2 3 Connection Diagram Note When connecting do not apply excessive force to prevent failures ...

Page 21: ...it 2 Connect the receptacle on the PC 3 Turn the I O expansion unit on At this time be sure that the LED is lit on the BUS PCI PC or BUS PCI 98 board 4 Turn the PC on At this time be sure that the LED is lit on the BUS PCI PC Be also sure that the PC starts up normally If it does not see troubleshooting described later in this manual Next install the BUF PCI driver software ...

Page 22: ...an be used under Windows XP the OS must recognize the I O address and interrupt level IRQ to be used for BUS PCI PCI board Use the appropriate procedure to install the BUS PCI PCI board 1 Start Windows XP with Administrator 2 Insert BUF PCI Driver Install Disk 1 into the disk drive 3 Windows XP will come up with the New Hardware detection dialog box 4 In the Welcome to the Found New Hardware Wizar...

Page 23: ...oard a board ID that is different from the ID assigned to the first board 4 Turn the personal computer on again and start up Windows XP with Administrator 5 Windows XP will come up with Insert Disk dialog box Insert the disk and select OK This completes installation of the BUS PCI PCI board After finishing installing the board be sure to check the assigned resource again For installing the third b...

Page 24: ... driver software Install the BUF PCI driver software following these steps 1 Start Windows XP with Administrator 2 Exit all other running applications 3 Insert BUF PCI Driver Install Disk 1 into the disk drive 4 Start Explorer 5 Click the disk drive into which BUF PCI Driver Install Disk 1 is inserted 6 Select and double click the SETUP EXE file 7 Follow the instructions displayed on the screen by...

Page 25: ...BUS PCI PCI board DOSST EXE as the self diagnostic program for DOS cannot run under the Command prompt If self testing results are not OK see troubleshooting described later in this manual Checking Resources Follow the steps below to check the assigned resources managed by the OS 1 Open Control Panel from My Computer 2 Double click on the System to open the System Properties property sheet 3 Selec...

Page 26: ...board Use the appropriate procedure to install the BUS PCI PCI board 1 Start Windows 2000 with Administrator 2 Windows 2000 will come up with the New Hardware detection dialog box In the Welcome to the Found New Hardware Wizard that appears next select Next 3 In the Install Hardware Device Driver dialog box Check Search for a suitable driver for my device recommended and select Next 4 In the Locat...

Page 27: ...n of the BUS PCI PCI board After finishing installing the board be sure to check the assigned resource again For installing the third board and any additional boards follow the same steps as those for installing a second board Before you can install a third or additional boards all BUS PCI PCI board that are already installed must be in PCI bus slots Notes A second BUS PCI PCI board cannot be prop...

Page 28: ...drive 4 Start Explorer 5 Click the disk drive into which BUF PCI Driver Install Disk 1 is inserted 6 Select and double click the SETUP EXE file 7 Follow the instructions displayed on the screen by the setup program 8 When the setup program ends the installation of the BUF PCI driver software is complete Note If you need to uninstall the BUF PCI driver software uninstall it using Add Remove Program...

Page 29: ... BUS PCI PCI board DOSST EXE as the self diagnostic program for DOS cannot run under the Command prompt If self testing results are not OK see troubleshooting described later in this manual Checking Resources Follow the steps below to check the assigned resources managed by the OS 1 Open Control Panel from My Computer 2 Double click on the System to open the System Properties property sheet 3 Sele...

Page 30: ...lling the BUF PCI driver software Install the BUF PCI driver software following these steps 1 Start Windows NT with Administrator 2 Exit all other running applications 3 Insert BUF PCI Driver Install Disk 1 into the disk drive 4 Start Explorer 5 Click the disk drive into which BUF PCI Driver Install Disk 1 is inserted 6 Select and double click the SETUP EXE file 7 Follow the instructions displayed...

Page 31: ...I Notes The IRQ Level item is not displayed if you disable the use of interrupt resources with DIP switch SW1 on the BUS PCI PCI board DOSST EXE as the self diagnostic program for DOS cannot run under the Command prompt If self testing results are not OK see troubleshooting described later in this manual Checking Resources Follow the steps below to check the assigned resources managed by the OS 1 ...

Page 32: ...about 5 10 minutes to detect the hardware 1 Turn the personal computer ON to start up Windows Me 2 Windows Me will come up with the New Hardware detection dialog box After making sure that PCI Multimedia Device is displayed insert the floppy disk into the drive select Automatic search for a better driver Recommended and press Next 3 The wizard will automatically detect the INF file on the floppy d...

Page 33: ...Windows Me will come up with the New Hardware detection dialog box After making sure that CONTEC CO LTD BUS PCI PCI is displayed insert the floppy disk into the drive select Automatic search for a better driver Recommended and press Next 6 The wizard will automatically detect the INF file and complete the registration 7 In the next dialog box you will find a message of Windows has finished install...

Page 34: ...sets of resources previously assigned to the two boards is assigned to the re mounted board In this case re check the resource settings Installing the BUF PCI driver software Install the BUF PCI driver software following these steps 1 Exit all other running applications 2 Insert BUF PCI Driver Install Disk 1 into the disk drive 3 Start Explorer 4 Click the disk drive into which BUF PCI Driver Inst...

Page 35: ... MS DOS prompt If self testing results are not OK see troubleshooting described later in this manual Checking Resources Follow the steps below to check the assigned resources managed by the OS 1 Double click on the System option in Control Panel to open the System Properties property sheet Select the Device Manager tab 2 Click on the Multi function adapters folder 3 Click on the CONTEC Co Ltd BUS ...

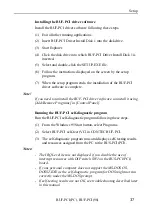
Page 36: ... Device has been listed then select Next 3 In the next dialog box select a radio button of Search for the best driver for your device Recommended then select Next 4 In the next dialog box select two check box both of Floppy disk drives and Specify Location then enter the drive name Win95 in the Location field Insert BUF PCI Driver Install Disk 1 into the disk drive then select Next 5 In the Window...

Page 37: ...p with the New Hardware detection dialog box In the Add New Hardware Wizard that appears next check that CONTEC Co Ltd BUS PCI PCI has been listed then select Next 6 In the next dialog box select a radio button of Display a list of all the drivers in a specific location so you can select the driver you want then select Next 7 In the next dialog box select CONTEC Co Ltd BUS PCI PCI from Models then...

Page 38: ... PCI PCI boards that have already been installed and then re mount one of them on the computer it is unknown which one of the sets of resources previously assigned to the two boards is assigned to the re mounted board In this case re check the resource settings Installing the BUF PCI driver software Install the BUF PCI driver software following these steps 1 Exit all other running applications 2 I...

Page 39: ... MS DOS prompt If self testing results are not OK see troubleshooting described later in this manual Checking Resources Follow the steps below to check the assigned resources managed by the OS 1 Double click on the System option in Control Panel to open the System Properties property sheet Select the Device Manager tab 2 Click on the Multi function adapters folder 3 Click on the CONTEC Co Ltd BUS ...

Page 40: ...edure to install the BUS PCI PCI board Checking the OS version Note that the procedure for installing the BUS PCI PCI board depends on which version of Windows 95 you are using Check the version of Windows 95 on your system as follows before installing the BUS PCI PCI board 1 Open Control Panel from My Computer 2 Double click on the System option to open the System Properties property sheet 3 Chec...

Page 41: ...s part of this section explains you how to do it Procedure for Use under Windows 95 Version 4 00 950B or 4 00 950C 1 Turn the personal computer on to start up Windows 95 2 Windows 95 will come up with the New Hardware detection dialog box In the Device Driver Wizard that appears next check that CONTEC Co Ltd Multimedia Device has been listed then select Next 3 In the next dialog box select Specify...

Page 42: ...r on again to start up Windows 95 5 Windows 95 will come up with the New Hardware detection dialog box In Multimedia Device Select which driver you want to install for your new hardware select Select from List 6 The Select Hardware Type dialog box will then appear In Select Hardware Type to Install select Other Devices 7 In the Select Device dialog box that appears select CONTEC from Manufacturers...

Page 43: ...rmine what PC resources are free The resources used for each BUS PCI PCI board do not depend on the location of the PCI bus slot or the board itself If you remove two or more BUS PCI PCI boards that have already been installed and then re mount one of them on the computer it is unknown which one of the sets of resources previously assigned to the two boards is assigned to the re mounted board In t...

Page 44: ...second board After finishing installing the board confirm the assigned resources again For installing the third board and additional boards follow the same steps as for installing a second board Before you can install the third board or additional boards all BUS PCI PCI boards that are already installed must be in PCI bus slots Notes A second BUS PCI PCI board cannot be properly installed unless t...

Page 45: ...iver software uninstall it using Add Remove Programs in Control Panel Running the BUF PCI self diagnostic program Run the BUF PCI self diagnostic program following these steps 1 From the Windows 95 Start button select Programs 2 Select BUF PCI self test VC in CONTEC BUF PCI 3 The self diagnostic program runs and displays self testing results and resources assigned from the PC to the BUS PCI PCI No...

Page 46: ... adapters folder 3 Click on the CONTEC Co Ltd BUS PCI PCI folder to display its properties 4 Select the Resources tab to check the device type resource settings and the conflicting device list 5 If you want to change a resource setting uncheck the Use automatic settings option in advance To change the I O address range Input Output Range change the configuration name in the Setting based on field ...

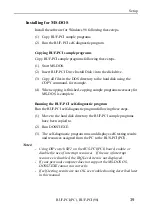
Page 47: ...DOS is complete Running the BUF PCI self diagnostic program Run the BUF PCI self diagnostic program following these steps 1 Move to the hard disk directory the BUF PCI sample programs have been copied to 2 Run DOSST EXE 3 The self diagnostic program runs and displays self testing results and resources assigned from the PC to the BUS PCI PCI Notes Using DIP switch SW1 on the BUS PCI PCI board enabl...

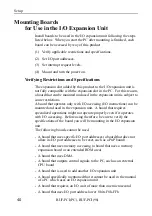
Page 48: ...uctions can be mounted and used in the expansion unit A board that requires specialized operations might not operate properly even if it operates with I O accessing Before using therefore be sure to verify the specifications of the board you will be mounting in the I O expansion unit The following boards cannot be used A board that uses specific I O port addresses a board that does not allow its I...

Page 49: ...e an I O port address dedicated to one board for another board Setting Interrupt Request Levels The Interrupt Requests IRQ of a board that can be mounted and used in the I O expansion unit are as follows For BUF PCI PC IRQ 3 4 5 6 7 9 10 11 12 14 15 For BUF PCI 98 INT 0 1 2 3 4 5 6 Do not use an IRQ level allocated to one board for another board Note The IRQ level of a board mounted and used in th...

Page 50: ...nstructions included in the manual that came with the I O expansion unit you are using When you are finished with mounting turn the power on following these steps 1 Connect the receptacle on the I O expansion unit 2 Connect the receptacle on the PC 3 Turn the I O expansion unit on 4 Turn the PC on Notes Before mounting any board be sure to disconnect the I O expansion unit power plug At this time ...

Page 51: ...nctions provided by the BUF PCI driver software provided with the product If you will not use the BUF PCI Driver or if your OS is other than Windows XP Windows 2000 Windows NT Windows Me Windows 98 and Windows 95 create a program by referring to the BUS PCI PCI board I O address and the sample program for MS DOS or the function reference in the BUF PCI Driver software The following sections explai...

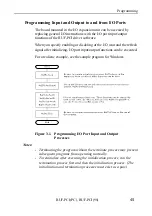
Page 52: ...g processes corresponding to interrupt request signals from the board Function List Table 3 1 List of Functions Function name Function Initialization BufPciOpen Initializes and termination BufPciClose Exits Bus signal setup BufSetBusSignal Sets up I O wait and refresh signal BufPciInPortB Input bytes BufPciInPortW Inputs words BufPciOutPortB Output bytes Input output to from I O ports BufPciOutPor...

Page 53: ...d the refresh signal after initializing I O port input output functions can be executed For a realistic example see the sample program for Windows Figure 3 1 Programming I O Port Input and Output Processes Notes Terminating the program without the terminate process may prevent subsequent programs from operating normally To reinitialize after executing the initialization process run the termination...

Page 54: ... PCI PCI board The features of these two methods and programming procedures are explained below Both of these two methods cannot be used in one program For a realistic example see the sample programs for Windows Using event messages Entry of an interrupt request is identified using Windows message processing The program is the same as typical Windows message processing In this method response to a...

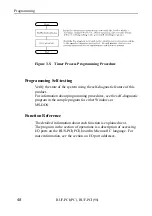
Page 55: ...hod monitors the BUF PCI interrupt request status using the Windows timer for example and implements necessary processes when the interrupt request status is set Having to use a timer and to process a read status may complicate the program However no interrupt request is missed within a specified timing range unlike the method of using event messages Figure 3 4 Main Routine Programming Procedure ...

Page 56: ... information about programming procedures see the self diagnostic program in the sample program for either Windows or MS DOS Function Reference The detailed information about each function is explained next The program in the section of operations is a description of accessing I O ports on the BUS PCI PCI board in Microsoft C language For more information see the section on I O port addresses ...

Page 57: ...E_VALUE 1 if the function terminates abnormally To learn about the error call GetLastError and check the error code For more information see List of Return Values Supplement The device handle is a number by which the driver software is identified When executing another BufPciXxxx function specify the handle acquired here Execute function BufPciOpen only once in one program for one BUS PCI PCI boar...

Page 58: ... If the BUS PCI PCI board for the specified board ID does not exist return an error When executing function BufPciOpen initialize the bus signal in the I O expansion unit Set the I O wait to 2 wait and the refresh signal to No output At the initial Open when using with multiple programs set the interrupt request mask register and reset the interrupt request status outpw BufPciIoAddress 0xf8 0xffff...

Page 59: ...r other than 0 For more information see the section List of Return Values Supplement After implementing the termination process each function of the BUF PCI driver software cannot be run until reinitialized Description of accessing I O ports on the BUS PCI PCI board At the last Close when using with multiple programs set the interrupt request mask register and reset the interrupt request status Us...

Page 60: ...Dim hDevice As Long Dim bIoWait As Byte Dim bRefreshOn As Byte Dim dwRet As Long dwRet BufPciSetBusSignal hDevice bIoWait bRefreshOn Argument hDevice Specify the device handle Acquire this device handle with BufPciOpen bIoWait Specify I O wait 0 7 bRefreshOn Specify whether or not to output the refresh signal TRUE or FALSE Return value dwRet Termination information Normal termination 0 Error other...

Page 61: ...iod the cycle is forced to terminate If the I O wait is set to 0wait the I O wait request signal is ignored After implementing the termination process each function of the BUF PCI driver software cannot be run until reinitialized Description of accessing I O ports on the BUS PCI PCI board Use the BufPciIoAddress secured during execution of BufPciOpen Actual operations are as follows outpw BufPciIo...

Page 62: ...ess Specify the I O port address to input data to bInData Specify the area to store input data by passing its pointer Return value dwRet Termination information Normal termination 0 Error other than 0 For more information see the section List of Return Values Supplement After implementing the termination process each function of the BUF PCI driver software cannot be run until reinitialized Descrip...

Page 63: ...tW hDevice wIoAddress wInData Argument hDevice Specify the device handle Acquire this device handle with BufPciOpen wIoAddress Specify the I O port address to input data to wInData Specify the area to store input data by passing its pointer Return value dwRet Termination information Normal termination 0 Error other than 0 For more information see the section List of Return Values Supplement BufPci...

Page 64: ...e BUS PCI PCI board Use the BufPciIoAddress secured during execution of BufPciOpen Actual operations are as follows if wIoAddress 2 outp BufPciIoAddress 0xfd wIoAddress 8 0xff wInData inpw BufPciIoAddress wIoAddress 0xff For more information see the section on I O port addresses ...

Page 65: ... BufPciOpen wIoAddress Specify the I O port address to output data to bOutData Specify the output data Return value dwRet Termination information Normal termination 0 Error other than 0 For more information see the section List of Return Values Supplement After implementing the termination process each function of the BUF PCI driver software cannot be run until reinitialized Description of accessi...

Page 66: ...g dwRet BufPciOutPortW hDevice wIoAddress wOutData Argument hDevice Specify the device handle Acquire this device handle with BufPciOpen wIoAddress Specify the I O port address to output data to wOutData Specify the output data Return value dwRet Termination information Normal termination 0 Error other than 0 For more information see the section List of Return Values Supplement BufPciInPortW to an...

Page 67: ... BUS PCI PCI board Use the BufPciIoAddress secured during execution of BufPciOpen Actual operations are as follows if wIoAddress 2 outp BufPciIoAddress 0xfd wIoAddress 8 0xff outpw BufPciIoAddress wIoAddress 0xff wOutData For more information see the section on I O port addresses ...

Page 68: ...g Dim dwMessage As Long Dim dwRet As Long Dim bBufIrqNo As Byte dwRet BufPciSetIrqEvent hDevice hWnd dwMessage bBufIrqNo Argument hDevice Specify the device handle Acquire this device handle with BufPciOpen hWnd Specify the handle of the window for receiving the message by the event dwMessage Specify the message number to identify the event with bBufIrqNo Specify the numeric value 0 15 representin...

Page 69: ...is function does not work unless the DIP switch on the board of the BUS PCI PCI board is enabled INT USE set to ON default setting After implementing the termination process each function of the BUF PCI driver software cannot be run until reinitialized ...

Page 70: ...dle Acquire this device handle with BufPciOpen bBufIrqNo Specify the numeric value 0 15 representing an interrupt request level in IRQ notation Return value dwRet Termination information Normal termination 0 Error other than 0 For more information see the section List of Return Values Supplement This function stops the event started by BufPciSetIrqEvent The suspended event can be restarted using B...

Page 71: ...t the interrupt request mask register of the BUF PCI PCI board Use the BufPciIoAddress secured during execution of BufPciOpen Actual operations are as follows wIrqMask inpw BufPciIoAddress 0xf8 outpw BufPciIoAddress 0xf8 wIrqMask 0x01 bIrqNo For more information see the section on I O port addresses ...

Page 72: ...eturn value dwRet Termination information Normal termination 0 Error other than 0 For more information see the section List of Return Values Supplement This function restarts the event stopped by BufPciStopEvent After implementing the termination process each function of the BUF PCI driver software cannot be run until reinitialized Description of accessing I O ports on the BUS PCI PCI board Set th...

Page 73: ...errupt request status by passing its pointer The bit corresponding to the interrupt request an interrupt request level in the FA PAC being set to 1 indicates that an interrupt request has been generated for that request wIrqReset Specify the interrupt request to be reset When the bit corresponding to the interrupt request is set to 1 that request is reset and until the next interrupt request comes...

Page 74: ...tatus of the BUF PCI PCI board If the interrupt request status register is set reset that register Use the BufPciIoAddress secured during execution of BufPciOpen Actual operations are as follows wIrqStatus inpw BufPciIoAddress 0xfa outpw BufPciIoAddress 0xfa wIrqReset For more information see the section on I O port addresses ...

Page 75: ... dwRet BufPciSetProgramWait hDevice dwWaitTime Argument hDevice Specify the device handle Acquire this device handle with BufPciOpen dwWaitTime Specify the duration of the wait in milliseconds Specifiable range 1 100000 Return value dwRet Termination information Normal termination TRUE Error FALSE For more information see the section List of Return Values Supplement After implementing the terminat...

Page 76: ... PCI PCI board ID wIoAddress Specify the area to store the BUS PCI PCI board I O port address by passing its pointer bIrqNo Specify the area to store the BUS PCI PCI board interrupt request level by passing its pointer wStatus Specify the area to store the statuses of BUS PCI I O wait input register self test IOCS16EN input register Refresh Enable input register bus type input register target type...

Page 77: ...rmation about wStatus see the section on I O port addresses After implementing the termination process each function of the BUF PCI driver software cannot be run until reinitialized Description of accessing I O ports on the BUS PCI PCI board See the sample self diagnostic program for MS DOS For more information see the section on I O port addresses ...

Page 78: ...on s return value or by executing function GetLastError Function GetLastError is a Win32 API function ex Visual C hDevice BufPciOpen bBoardId if hDevice INVALID_HANDLE_VALUE wsprintf szBuffer BufPciOpen Error x GetLastError MessageBox hWnd szBuffer Error information MB_ICONEXCLAMATION ex Visual Basic hDevice BufPciOpen bBoardId If hDevice 1 Then dwErrorStatus Err LastDllError szBuffer BufPciOpen E...

Page 79: ...he driver using Administrator 2C000002H BUFPCI_ERROR_PARAMETER Indicates that the argument value passed to the function is not within the specified range Change the value given as an argument in the program This also applies to odd port word accessing 2C000003H BUFPCI_ERROR_RESOURCE Indicates either that the I O port address and interrupt request level assigned from the PCI BIOS cannot be acquired...

Page 80: ...rrectly when both BUF PCI PC and BUF PCI 98 are in use 2C000009H BUFPCI_ERROR_CONNECTOR Indicates that either the cable is not connected or that there is a problem with the cable or the connector 2C00000AH BUFPCI_ERROR_IRQCONFLIC Indicates that the interrupt request level specified in BufPciSetIrqEvent is already in use 2C00000BH BUFPCI_ERROR_APLINUM Indicates that more than 16 applications have b...

Page 81: ...s are provided for each language InOut Input output BufPciInPortB BufPciInPortW BufPciOutPortB BufPciOutPortW Event Interrupt request process using messages by events BufPciSetIrqEvent Polling Interrupt request process monitoring interrupt request status SelfTest Self diagnostic program These sample programs are designed to run when you press buttons from the top down in sequence ...

Page 82: ...1 First with the control port of the BUS PCI PCI board enable or disable the I O wait and the refresh signal for the I O expansion unit 2 Next with the control port of the BUS PCI PCI board specify the eight highest bits of the I O port address on the I O expansion unit 3 Next access the general purpose access port At this time the eight highest bits of the I O port address on the I O expansion un...

Page 83: ...as been issued by the BUS PCI PCI board in the interrupt handler In order to allow making this decision and verifying the level at which the interrupt request is generated on the I O expansion unit there are a status register to verify whether or not there is an interrupt request signal and a port to reset that status register 1 In the main routine set the interrupt request mask register 2 In the ...

Page 84: ...in routine and undo the PC settings as they were The interrupt request signal status register can detect reset per interrupt request signal Since this register is not dependent on mask settings all interrupt request signals generated on the I O expansion unit can be masked to not generate actual interrupts and they can still be processed the same as interrupts by monitoring interrupt request signa...

Page 85: ...3 FBh Reset Reset Reset Reset Reset Reset Reset 252 Refresh Self test FCh Enable IOCS16EN 253 I O Address I O Address I O Address I O Address I O Address I O Address I O Address I O Address FDh 15 14 13 12 11 10 09 08 254 Self test Self test Self test Self test Self test Self test Self test Self test FEh Do 07 Do 06 Do 05 Do 04 Do 03 Do 02 Do 01 Do 00 255 Self test Self test Self test Self test Se...

Page 86: ...atus Status Status Status 252 Target Target Bus Refresh Self test FCh Power Type Type Enable IOCS16EN 253 I O Address I O Address I O Address I O Address I O Address I O Address I O Address I O Address FDh 15 14 13 12 11 10 09 08 254 Self test Self test Self test Self test Self test Self test Self test Self test FEh Di 07 Di 06 Di 05 Di 04 Di 03 Di 02 Di 01 Di 00 255 Self test Self test Self test ...

Page 87: ... output D7 D6 D5 D4 D3 D2 D1 D0 248 IRQ7 IRQ6 INT2 IRQ5 INT1 IRQ4 IRQ3 INT0 F8h Mask Mask Mask Mask Mask 249 IRQ15 IRQ14 INT6 IRQ12 INT5 IRQ11 IRQ10 INT4 IRQ9 INT3 F9h Mask Mask Mask Mask Mask Mask Mask 1 1 1 1 Set the mask for an interrupt request signal from a board in the I O expansion unit Also input the mask status of the interrupt request signal which has been set up An interrupt request sig...

Page 88: ... to the PC be sure to verify the bit that caused the generation in the interrupt handler When the power is turned on the register is undefined Parentheses indicate notation of the C bus interrupt request signal Interrupt request status reset register FAh through FBh output D7 D6 D5 D4 D3 D2 D1 D0 250 IRQ7 IRQ6 INT2 IRQ5 INT1 IRQ4 IRQ3 INT0 FAh Reset Reset Reset Reset Reset 251 IRQ15 IRQ14 INT6 IRQ...

Page 89: ... the I O wait request signal is ignored When the power is turned on the I O wait defaults to 0 wait 000 Self test IOCS16EN This setting is for self testing of the BUF PC PCI Specify whether the I O register for self testing is to be accessed with the 16 or 8 bit cycle Output of 1 results in the 16 bit cycle For other than self testing use this setting at 8 bit cycle 0 When the power is turned on t...

Page 90: ...D2 D1 D0 253 I O Address I O Address I O Address I O Address I O Address I O Address I O Address I O Address FDh 15 14 13 12 11 10 09 08 Set the eight highest bits of the I O address in the I O expansion unit Also input the setting status When the power is turned on the address defaults to 00h Self test input and output register FEh FFh input and output D7 D6 D5 D4 D3 D2 D1 D0 254 Self test Self t...

Page 91: ...sses DOSINT Interrupt process IBM PC AT compatibles DOS V machines or NEC PC98 NX series DOSINT98 Interrupt process NEC PC 9800 series DOSPOL Interrupt request process interrupt request status monitoring method DOSST Self testing program DOSINT runs only on IBM PC AT compatibles DOS V machines or NEC PC98 NX series DOSINT98 runs only on the NEC PC 9800 series ...

Page 92: ...Programming BUF PCI PC BUF PCI 98 84 ...

Page 93: ...98 System Specifications Item Specification Accessible I O address I O addresses except for lower 8 bits F8h FFh I O wait setting 0wait to 7wait Accessible memory space None memory access not allowed Available DMA channel None DMA transfer not allowed Available interrupt level INT 0 1 2 3 4 5 6 Note For a list of available expansion slot signals see Table 4 8 Specifications of Each Board Table 4 3...

Page 94: ...quivalence External dimensions 134 2 x 10⁷ 0 x 18 5mm Table 4 5 BUS PC 98 Board Specifications Item Specification Current consumption 5VDC 300 mA supplied from I O expansion unit Temperature 0 to 50 C Operating conditions Humidity 10 to 90 RH No condensation Interface connector PCR E96LMD equivalence External dimensions 169 4 x 148 7 x 24mm Cable Specifications Table 4 6 Cable Specifications Item ...

Page 95: ...ow level A28 SA03 O B28 BALE O A29 SA02 O B29 5V FA PAC 5V A30 SA01 O B30 OSC O A31 SA00 O B31 GND FA PAC GND Pin No Signal Name I O Note Pin No Signal Name I O Note C01 SBHE O D01 MEMCS16 I Unconnected C02 LA23 O Unconnected D02 IOCS16 I C03 LA22 O Unconnected D03 IRQ10 I C04 LA21 O Unconnected D04 IRQ11 I C05 LA20 O Unconnected D05 IRQ12 I C06 LA19 O Unconnected D06 IRQ15 I C07 LA18 O Unconnecte...

Page 96: ...ted B30 IR131 INT6 I A31 GND FA PAC GND B31 GND FA PAC GND A32 IOCHK0 I Unconnected B32 12V FA PAC 12V A33 IOR0 O B33 12V FA PAC 12V A34 IOW0 O B34 RESET0 O A35 MRC0 O Unconnected B35 DACK00 O Always set to high level A36 MWC0 O Unconnected B36 DACK30 O Always set to high level A37 INTA0 I O Unconnected B37 DREQ00 I Unconnected A38 NOWAIT I Unconnected B38 DREQ30 I Unconnected A39 SALE1 O Unconnec...

Page 97: ...ations of the I O expansion unit in use Software BUF PCI Driver Specifications Table 4 9 Software Specifications Item Specification Windows XP Professional Windows XP Home Edition Windows 2000 Professional Windows NT Ver 4 0 Windows Me Windows 98 Second Edition Windows 98 Compatible OS Windows 95 Microsoft Visual C Ver 5 0 or later Compatible language Microsoft Visual Basic Ver 5 0 or later ...

Page 98: ...System Reference BUF PCI PC BUF PCI 98 90 ...

Page 99: ...connector correctly 3 Is the BUS PCI PCI board mounted correctly 4 Is the BUS PCI PC or BUS PCI 98 board mounted correctly The BUF PCI Driver cannot be Installed 1 Can the floppy disk be accessed properly 2 Did you exit all other applications 3 Is each selection item in the setup program specified correctly Self testing does not Result in OK 1 Is the I O expansion unit turned on 2 Is the cable con...

Page 100: ...unit correct 3 Is any I O port address of the board you mounted in the I O expansion unit unique 4 Is the board you mounted in the I O expansion unit subject to any of the restrictions that apply to this product If multiple boards are mounted in the I O expansion unit verify operations with only one board mounted Verify simple input and output operations using a sample program for example If more ...

Page 101: ...est of the board you mounted in the I O expansion unit unique 4 Is the board you mounted in the I O expansion unit subject to any of the restrictions that apply to this product If multiple boards are mounted in the I O expansion unit verify operations with only one board mounted Verify simple input and output operations using a sample program for example If more than one board of the same type exi...

Page 102: ...Troubleshooting BUF PCI PC BUF PCI 98 94 ...

Page 103: ...fPciStopEvent 62 C Checking resources 17 21 23 27 31 38 D DIP Switch 8 F Feature 2 Function List 44 Functions 2 H Handling Precautions 5 I I O Expansion Slot Signals 87 88 I O Port Addresses 41 Installing for MS DOS 39 Installing for Windows XP 14 Installing for Windows 2000 18 Installing for Windows 95 32 Installing for Windows 98 28 Installing for Windows Me 24 Installing for Windows NT 22 Inter...

Page 104: ... PCI PC BUF PCI 98 96 O Obtain Service 3 P Product Configuration ii R Restrictions 4 Return Values 70 S Sample Program 73 83 Software Specifications 89 System Specifications 85 T Troubleshooting 91 W Warranty 3 ...

Page 105: ...A 41 901 LZF6231 021010 980713 ...

Page 106: ...Kuro ku Seoul Korea Tel 82 2 2636 4277 8 Fax 82 2 2636 4279 E mail product conteck com CHINA INTERNATIONAL CONTEC TECHNOLOGY CO LTD B 8F Hua Tong Building No B19 Che Gong Zhuang West Road Hai Dian District Beijing 100044 China Tel 86 10 8801 8228 Fax 86 10 8801 8209 E mail ict ict com cn SHANGHAI CONTEC MICROELECTRONICS CORP No 481 Gui Ping Road Cao He Jing Hi Tech Park Shanghai 200233 China Tel 8...

Page 107: ... SERVICE CENTER REPAIRS Experienced engineers and technicians on staff at our full service in house repair center WE BUY USED EQUIPM Sell your excess un We also offer credit www artisantg com REMOTE INSPECTION Remotely inspect equipment before purchasing with our interactive website at www instraview com LOOKING FOR MORE I Visit us on the web a information on price specifications manu Contact us 8...

Reviews: