125
ENABLE NAT
If the LAN is configured with a private IP address, the user should select this
checkbox
. The NAT submenu will appear in the Advanced Setup menu after reboot.
On the other hand, if a private IP address is not used on the LAN side (i.e. the LAN
side is using a public IP), this checkbox
should not be selected to free up system
resources for better performance.
ENABLE FIREWALL
If this checkbox
is selected, the Security submenu will be displayed on the
Advanced Setup menu after reboot. If firewall is not necessary, this checkbox
should not be selected to free up system resources for better performance.
USE STATIC IPv4 ADDRESS
Unless your service provider specially requires it, do not select this checkbox
. If
selected, enter the static IP address in the
IP Address
field. Also, don’t forget to
adjust the IP configuration to Static IP Mode as described in
3.2 IP Configuration
.
ENABLE PPP DEBUG MODE
When this option is selected, the system will put more PPP connection information
into the system log. This is for debugging errors and not for normal usage.
Retry PPP password on authentication error
This feature will redirect users to another WEB page for PPP username/password
re-entry if PPP authentication fails.
Tick the box to select.
ENABLE IGMP MULTICAST PROXY
Tick the checkbox
to enable Internet Group Membership Protocol (IGMP)
multicast. IGMP is a protocol used by IPv4 hosts to report their multicast group
memberships to any neighboring multicast routers.
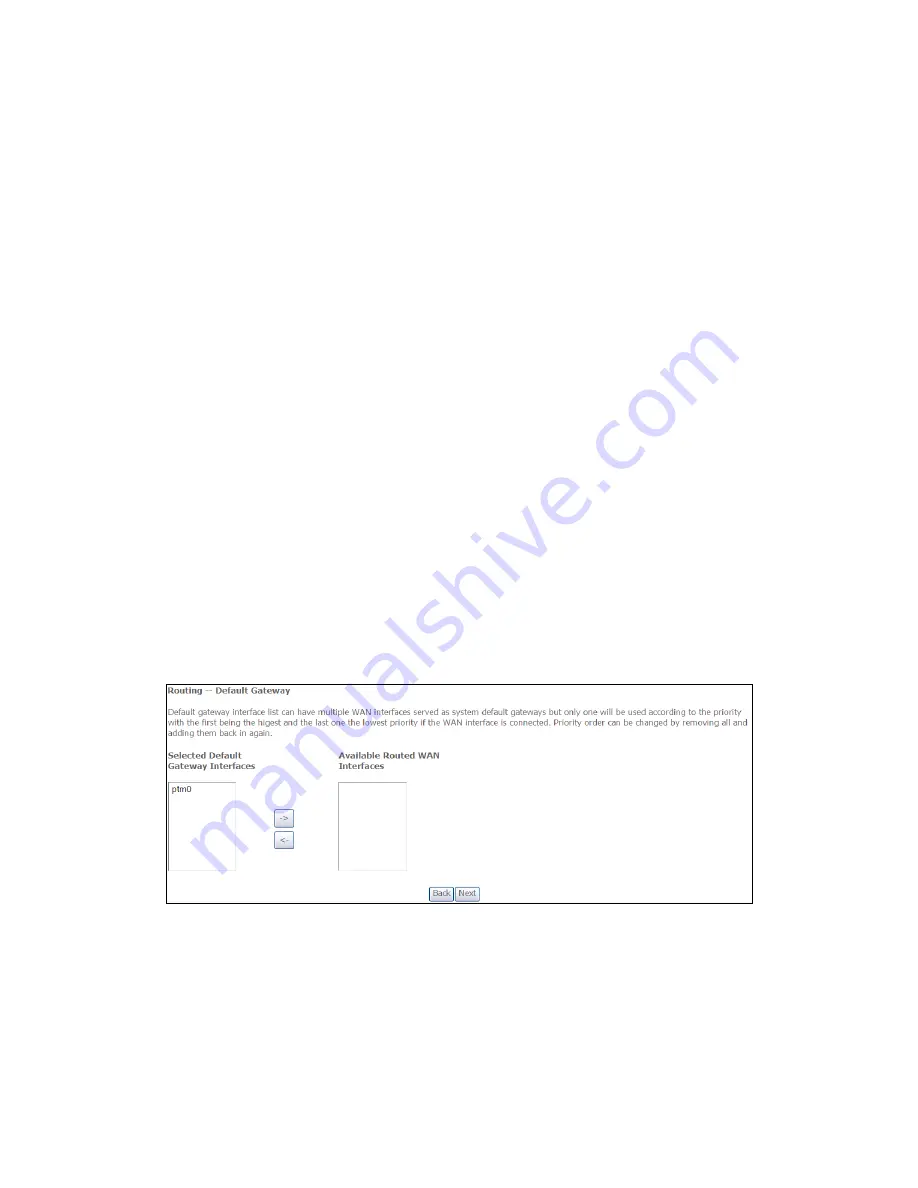
STEP3:
Choose an interface to be the default gateway.
Click
Next
to continue or click
Back
to return to the previous step.
Summary of Contents for AR-5382u
Page 1: ...AR 5382u ADSL2 WLAN Router User Manual Version A1 0 June 11 2010 261056 049...
Page 7: ...6 1 2 Application The following diagrams depict typical applications of the AR 5382u...
Page 8: ...7 Chapter 2 Installation 2 1 Hardware Setup BASE STAND ATTACHMENT...
Page 17: ...16 STEP 3 After successfully logging in for the first time you will reach this screen...
Page 56: ...55 5 11 UPnP Select the checkbox provided and click Apply Save to enable UPnP protocol...
Page 57: ...56 5 12 DNS Proxy...
Page 106: ...105 STEP 9 Choose Yes or No for default printer setting and click Next STEP 10 Click Finish...


