User instructions
EN
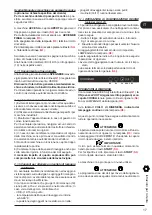
Draining function for machines with drainage pump
(optional upon request of the client)
When the unit is fitted with a drain pump, it is possible
to activate the pump and empt the tank as follows:
OPEN the hood with the unit turned ON, unhook the
overflow without removing tank filters, press and hold
button (
S3
) for 3 seconds.
The lamp (
H3
) lights up when the machine is draining.
Once the drain cycle has been completed, the lamp
(
H3
) goes out
To stop the cycle, press the button (
S3
) or the main
switch (
Q1
).
When the tank is empty, it is necessary to turn off the
unit before closing the hood.
At the end of the cycle, place back the filters (14/15)
and the overflow (13) into the dishwasher.
2.1.f Switching off at the end of the day
At the end of the working day
SWITCH OFF
the machine
by pressing the power switch (
Q1
); the internal signaler
to the switch it becomes GREEN.
Switch off the mains switch feeding the machine and
close the water supply taps.
For any repairs, contact only assistance centres author-
ised by the manufacturer.
2.1.g Warnings during the operation
1) Avoid immersing bare hands in the detergent-filled
water; if this should happen, rinse immediately and
thoroughly with running water;
2) Use only anti-foaming detergents, specifics for use
in industrial machines;
3) Deactivate the machine in case of break-down or
malfunction.
For any repairs, contact only assistance centres autho-
rised by the manufacturer, and insist on the use of
original parts.
4) In no case should you change the the original for-
mulations without first consulting an authorised
assistance centre;
5) When the machine is operating, do not open the
hood too rapidly.
6) Wash tank water should be changed at least twice a
day or according to daily wash requirements.
Failure to follow the above warnings may compromi
se the safety of the washing machine.
2.1.h Useful advice for better washing results
Any unsatisfactory results from washing can be seen
when traces of dirt are left on dishes or other items; any
water marks may be caused by insufficient rinsing liited
detergent, ineffective detergent.
In this case, where insufficient, ensure that the rinsing
nozzles (19) are clean
and that there is pressure in the water system.If there
are traces of waste, ensure that:
- The filter (14/15) are clean;
- the water temperature is around 55-60°C;
- items are correctly positioned in the basket;
- the washing/rinsing nozzles are clean;
- the arms (16/17) rotate freely.
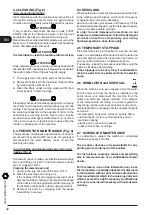
2.1.g RESIN REGENERATION OPERATION
(for model A only)
We recommend that you carry out regeneration when
all work is finished.
First of all, ensure that there is coarse cooking salt in
the salt container, and proceed as follows:
1. unscrew the salt container plug and pour in 1 Kg of
coarse cooking salt.
2. Screw the plug down tight, to ensure that the con-
tainer is completely sealed.
On reaching the set number of cycles,
The lamp (
H3
) will flash;
this indicates that it is time to carry out regeneration.
The signal that the set number of cycles has been
reached can only be deactivated by starting the rege-
neration cycle (regenerate button
(
S4
)
).
REGENERATION OPERATIONS
With the machine SWITCHED ON (the power switch
(
Q1
) in the
ON
position), and the tank EMPTY (rele-
ase the overflow) and the hood CLOSED, press and
hold the regenerate button
(
S4
)
,until the the lamp (
H3
)
FLASHES
.
The REGENERATION CYCLE will begin, and the
the
lamp (
H3
)
will flash continuously.
The machine will now automatically carry out all the
necessary operations.
ATTENTION
Opening the hood during the cycle will stop the regene-
ration cycle; The lamp (
H3
) will start to flash RAPIDLY;
on closing the hood the cycle will resume from where
it was stopped.
IMPORTANT
The cycle can be stopped at any time by pressing and
holding the regenerate button START
(
S3
).
To restart the cycle, press the regenerate button START
(
S3
)
again; (the cycle will resume from where it was
stopped).
The machine is now ready for use again.
ATTENTION
Programming of cycles for the start-up of regeneration
should be carried out by authorised technicians only.
S4
Q1
S3
H2 H3
S9
31
Summary of Contents for RC07
Page 11: ...IT ITALIANO ITALIANO ISTRUZIONI ORIGINALI 11...
Page 14: ...Spazio lasciato bianco intenzionalmente IT 14...
Page 15: ...Istruzioni per l utente IT ISTRUZIONI PER L UTENTE ISTRUZIONI PER L UTENTE 15...
Page 24: ...Spazio lasciato bianco intenzionalmente IT 24...
Page 25: ...EN ENGLISH ENGLISH TRANSLATION OF ORIGINAL INSTRUCTIONS 25...
Page 28: ...Space intentionally left blank EN 28...
Page 29: ...User instructions EN USER INSTRUCTIONS USER INSTRUCTIONS 29...
Page 38: ...Space intentionally left blank EN 38...
Page 39: ...FR FRAN AIS FRAN AIS TRADUCTION DES INSTRUCTIONS ORIGINALES 39...
Page 42: ...Espace laiss en blanc intentionnellement FR 42...
Page 52: ...Espace laiss en blanc intentionnellement FR 52...
Page 53: ...DE DEUTSCH DEUTSCH BERSETZUNG DER ORIGINALANLEITUNG 53...
Page 56: ...Absichtlich leer gelassene Seite DE 56...
Page 57: ...Anweisungen f r den Benutzer DE ANWEISUNGEN F R DEN ANWEISUNGEN F R DEN BENUTZER BENUTZER 57...
Page 66: ...Absichtlich leer gelassene Seite DE 66...
Page 67: ...ES ESPA OL ESPA OL TRADUCCI N DE LAS INSTRUCCIONES ORIGINALES 67...
Page 70: ...Espacio dejado en blanco intencionalmente ES 70...
Page 80: ...Espacio dejado en blanco intencionalmente ES 80...
Page 81: ...PORTUGU S PORTUGU S TRADU O DAS INSTRU ES ORIGINAIS POR 81...
Page 84: ...Este espa o em branco intencionalmente deixado da p gina POR 84...
Page 85: ...Instru es para o usu rio POR INSTRU ES PARA O USU RIO INSTRU ES PARA O USU RIO 85...
Page 94: ...Fig 2 Fig 3 Fig 5 Fig 4 1 Lift Lift 2 3 4 Prime STAR T 94...
Page 95: ...18 16 17 19 13 Fig 7 Fig 6 8 5 6 7 11 12 9 10 Fig 8 13 14 15 95...
Page 96: ...NOTE 96...
Page 98: ...900887 04 2022...

