


EN
User instructions
2.2 CLEANING (Fig. 8)
2.2.a General information
Strict compliance with the maintenance instructions in
this section will keep your machine in a good working
condition and will notably reduce the need for repairs.
ATTENTION
If any machine component becomes faulty, FIRST
CHECK that all the instructions given in the previous
paragraphs have been complied with during use.
Repairs must be carried out immediately, as soon as the
f
ault occurs. This will prevent the trouble from becoming
worse and damaging other parts.
ATTENTION
It is forbidden to clean the machine with water jets.
ATTENTION
Daily operations to carry out when work has ended, with
the machine OFF , the main circuit-breaker disconnected,
the water cocks off and the washing tub empty.
1.
Thoroughly clean the inside parts of the machine.
2.
Remove the filter (14) from the bottom of the machine
by releasing the overflow (13).
3.
Wash the filters under running water and fit them
correctly back in their housings.
ATTENTION
Frequently check and clean the spraying units, removing
them from their housings and eliminating any dirt and
fouling. The frequency with which this operation must
be carried out depends on the quantity of dirt or on the
unsatisfactory washing results. Never use corrosive
products like sodium hypochlorite (bleach) or hydroch-
loric acid, wire wool or steel brushes to clean either the
inside or outside parts of the machine.
2.3. PREVENTION MAINTENANCE (Fig. 8)
The preventive maintenance operations must be carri-
ed out with the machine OFF, the main circuit-breaker
disconnected, the water delivery cocks off and the
washing tub empty.
2.3.a Checking and cleaning the spray arms and
nozzles (Fig. 8)
Periodically check to make sure that the lower washing
arm and rinsing arm (16/17) and their relative nozzles
are not clogged (18/19).
Cleaning the lower/upper unit
1.
Unscrew the ring nut and lift the arm (16/17).
2.
Wash the washing and rinsing arm.
If the nozzles (18/19) are clogged, unscrew them to
demount and clean, taking care to prevent the shape
of the nozzle from being deformed. After cleaning, fit
the nozzles exactly back in their original positions.
3.
Remount all parts by complying with the above
instructions in reverse.
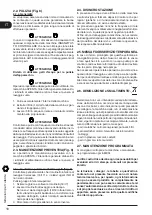
2.4 DESCALING
Where hard water is present lime scale deposits will for
in the machine and on dishes, which must, for reasons
of hygiene, be removed by descaling.
Advice on operation procedures and frequency for this
treatment are generally given by the detergent supplier,
who can provide suitable products.
In order to avoid damaging the machine, do not
exceed recommended doses, follow the detergent
producer’s directions scrupulously and, having
finished operations, rinse thoroughly.
2.5 TEMPORARY STOPPAGE
If the machine is to be left inactive for a period of some
weeks, it is advisable beforehand to load the tank and
run a few empty cycles with clean water then drain, so
as to avoid the formation of unpleasant odours.
If necessary, repeat the process several times until the
water is still clean after washing.
If the stoppage is to be very long, it is advisable to
drain the water from the boiler and from the electric
pump.
2.6 DEMOLITION and DISPOSAL
When the machine is to be scrapped, drain the water
from the tank and from the boiler, as indicated in the
points above, and disconnect the machine from the
water and electricity supply networks, then dispose
of the components according to current regulations,
respecting national and local ecological and environ-
mental legislation, and taking care to separate the parts
as follows:
- metallic parts: body work, surfaces, panels, filters;
- electrical parts: motors, remote switches, micro-
switches, cabling;
- plastic parts: connectors, baskets;
- rubber parts: tubes, couplings
2.7 SCHEDULED MAINTENANCE
It is advisable to subject the machine to scheduled
maintenance every 6 months.
The producer declines all responsibility for any
printing errors contained in this booklet.
The instructions, drawings, tables and everything
else in this manual are of a confidential technical
nature.
For this reason, none of the information may be ei-
ther completely or partially duplicated or disclosed
to third parties without prior written authorization
from manufacturer which is the sole proprietor and
which reserves the right to make any modifications
as may be considered necessary without advance
warning.
32
Summary of Contents for RC07
Page 11: ...IT ITALIANO ITALIANO ISTRUZIONI ORIGINALI 11...
Page 14: ...Spazio lasciato bianco intenzionalmente IT 14...
Page 15: ...Istruzioni per l utente IT ISTRUZIONI PER L UTENTE ISTRUZIONI PER L UTENTE 15...
Page 24: ...Spazio lasciato bianco intenzionalmente IT 24...
Page 25: ...EN ENGLISH ENGLISH TRANSLATION OF ORIGINAL INSTRUCTIONS 25...
Page 28: ...Space intentionally left blank EN 28...
Page 29: ...User instructions EN USER INSTRUCTIONS USER INSTRUCTIONS 29...
Page 38: ...Space intentionally left blank EN 38...
Page 39: ...FR FRAN AIS FRAN AIS TRADUCTION DES INSTRUCTIONS ORIGINALES 39...
Page 42: ...Espace laiss en blanc intentionnellement FR 42...
Page 52: ...Espace laiss en blanc intentionnellement FR 52...
Page 53: ...DE DEUTSCH DEUTSCH BERSETZUNG DER ORIGINALANLEITUNG 53...
Page 56: ...Absichtlich leer gelassene Seite DE 56...
Page 57: ...Anweisungen f r den Benutzer DE ANWEISUNGEN F R DEN ANWEISUNGEN F R DEN BENUTZER BENUTZER 57...
Page 66: ...Absichtlich leer gelassene Seite DE 66...
Page 67: ...ES ESPA OL ESPA OL TRADUCCI N DE LAS INSTRUCCIONES ORIGINALES 67...
Page 70: ...Espacio dejado en blanco intencionalmente ES 70...
Page 80: ...Espacio dejado en blanco intencionalmente ES 80...
Page 81: ...PORTUGU S PORTUGU S TRADU O DAS INSTRU ES ORIGINAIS POR 81...
Page 84: ...Este espa o em branco intencionalmente deixado da p gina POR 84...
Page 85: ...Instru es para o usu rio POR INSTRU ES PARA O USU RIO INSTRU ES PARA O USU RIO 85...
Page 94: ...Fig 2 Fig 3 Fig 5 Fig 4 1 Lift Lift 2 3 4 Prime STAR T 94...
Page 95: ...18 16 17 19 13 Fig 7 Fig 6 8 5 6 7 11 12 9 10 Fig 8 13 14 15 95...
Page 96: ...NOTE 96...
Page 98: ...900887 04 2022...