background image

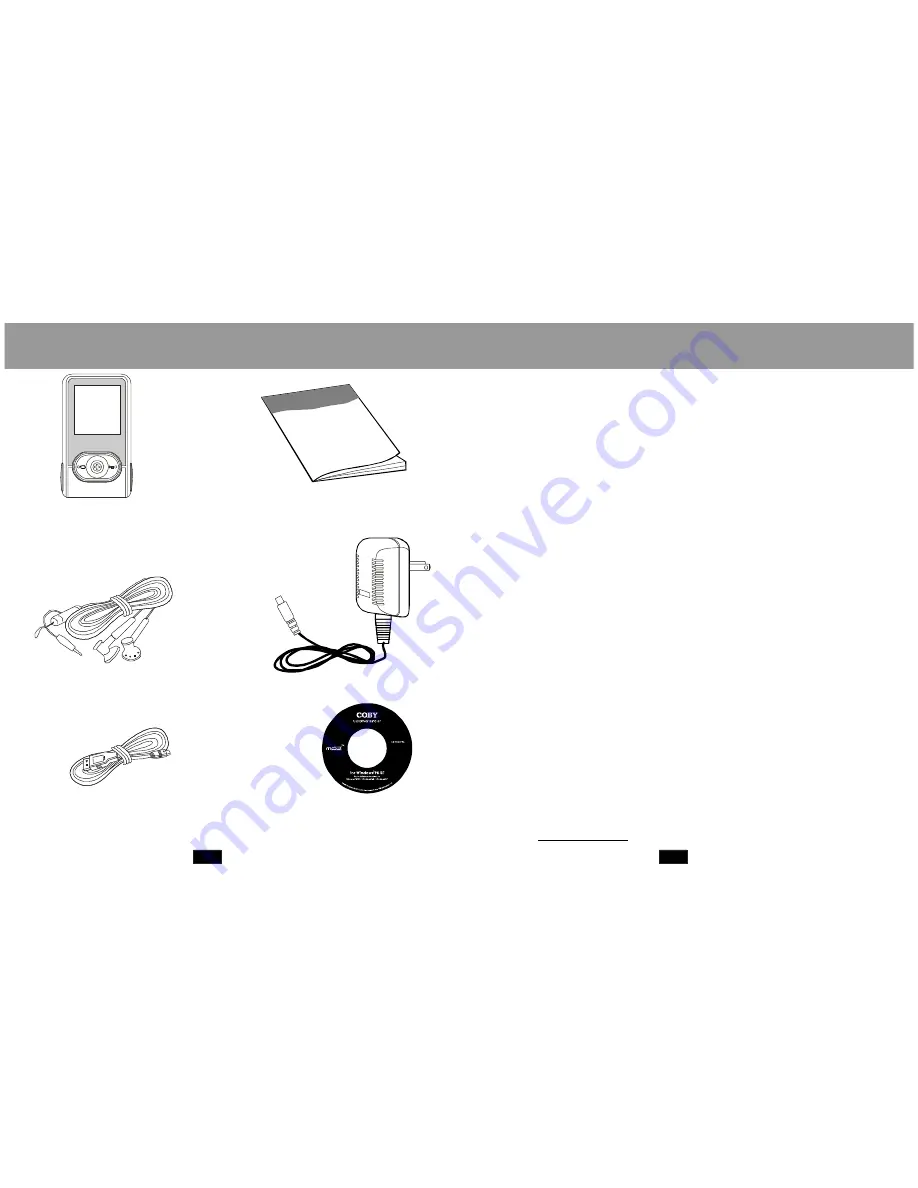
PACKAGE CONTENTS

SAFETY INSTRUCITONS

Mp3 player

User's Man ual

Earpho nes w/neck strap

USB Cable

Insta llation C D

A/C Adapter

3

4

1.Read these instructions carefully.

2.Keep these instructions for future reference.
3.Heed all warnings.
4.Follow all instructions.
5.Do not expose device to wate r or moisture.
6.Clean only with a dry cloth.
7.Do not place device near any heat so urces such as stoves,

radiators, amplifiers or any apparatus that produces heat.

8.Do not force the power plug into the wall outl et. A polarized p lug

has two blade s with one wider than th e other; the wid er blade is
provid ed for your safety. If the plug provided does not fit into your

outlet, consult an electrician for replacement of the obsolete outlet.

9.Position the power cord so tha t it is protected from being walked

on, pinched b y objects, or torn and exposed to liquids (espec ially at
plugs, conven ience receptacles, and at the point which they exit

from the product).

10.Only use atta chments/accessories specified by the manufacturer.

Use of attachments/accessories not recommended by the

product manufacturer may b e hazardous.

11.Unpl ug the device during lightning storms or when unused fo r

long periods of time.

12.Do not use this device near water.
13.Refer all servicing to authoriz ed service personnel.

Protect your ears:

Hearing experts advise against the constant use of personal
stereo equipme nt played at hi gh volumes. Constant h igh-vol ume
use can lead to hearing loss. If you experience ringing in your
ears or hearing loss, dis continue use an d seek medical advice .

For recycling or disposal information about this product, please

contact your local authorities or the El ectronics Industries

Alliance: www.eiae.or g

Summary of Contents for MPC758 - 512 MB Digital Player

Page 1: ...t Maspeth NY 11378 www cobyusa c om www ecoby com USER S MANUAL R DIGITAL AUDIO VIDEO PLAYER Technical Support Hours Monday Friday 8 30AM 8 30 PM EST 1 800 681 2629 or 718 416 3197 Saturday Sunday 9 0...

Page 2: ...RD PHOTO FM Radio SETUP E BOOK 2 3 4 5 6 7 7 8 9 9 9 10 10 11 11 11 12 12 16 17 19 20 21 24 25 26 28 29 512 MB Built in Flash Memory 65 000 Colo r LCD Display Video Playback Mobile Music Data Document...

Page 3: ...ord so that it is protected from being walked on pinched by objects or torn and exposed to liquids especially at plugs convenience receptacles and at the point which they exit from the product 10 Only...

Page 4: ...e lamp will dim or turn off When charging your player make sure that the POWER ON OFF switch is set to the ON position and that the automatic Power off option in the Setup menu is set to 0 Charge thro...

Page 5: ...izer Setting Bit Rate Time Elap ed s Battery level icon Track Title Filename Volume level Progress bar Total 010 Remaining Time Bit rate File typ e RECORD button ON OFF switch LCD screen REPEAT button...

Page 6: ...rom the computer Transferring Files 1 2 3 Deleting Files 1 2 3 Note To transfer files between your player and a computer Do not disconnect your player while it is transferring files If you delete file...

Page 7: ...r player is paused press the JOYSTICK SELECT key to access the submenu Highlight then select Local folder Highlight then select the folder you would like to change to The following player modes may be...

Page 8: ...rder once Repeat One repeats current track Fo lder plays all tracks in the current folder once Repeat Folder repeats tracks in current folder Repeat All repeats all tracks Random plays tracks in curre...

Page 9: ...es between loops in Replay gap see below for more information Replay times Replay gap 5 AMV Video Player To enter the AMV mode From the Main menu highlight and select the item AMV To access the Main m...

Page 10: ...nge the recording quality i e bitrate filetype options press the JOYSTICK SELECT key while the recorder is stopped 1 Highlight then select REC type 2 Highlight then select one of the following recordi...

Page 11: ...nually press while a photo is being displayed Press the JOYSTICK SELECT key to access the submenu Highlight then select play set Highlight then select Manual play Manual mode is now set Highlight then...

Page 12: ...When you are in Clock setup mode the LCD will display the information illustrated below To change the selected field press the key or the key To change the value of a selected field press or To retur...

Page 13: ...line mode setup allows you to choose between Multi drive Normal Only and Encrypted Only modes A partitioning encryption software tool not included is necessary to use these features The memory info sc...

Page 14: ...layer Upgrade Tool utility from the START menu on your computer this utility can be found on the installation CD FIRMWARE UPGRADE The software utilities allow you to convert sound and video files to f...

Page 15: ...ocess SOFTWARE UTILITIES External size Weight Display screen Connection to PC Memory Power supply Recording MP3 WMA FM radio Temperature 76 42 18mm 28g OLED 65K color USB 1 1 512M Li ion Battery SP LP...

Page 16: ...r headphones are attached securely to the headphone jack 3 Poor sound quality may result from corrupt or poorly encoded music files Try downloading the music file again or encoding the file at a highe...

Reviews: