2
Setting Up Network Remote Control
2-20
HPF-9000 PRODUCT MANUAL
HPF9000-OM (V1.8)
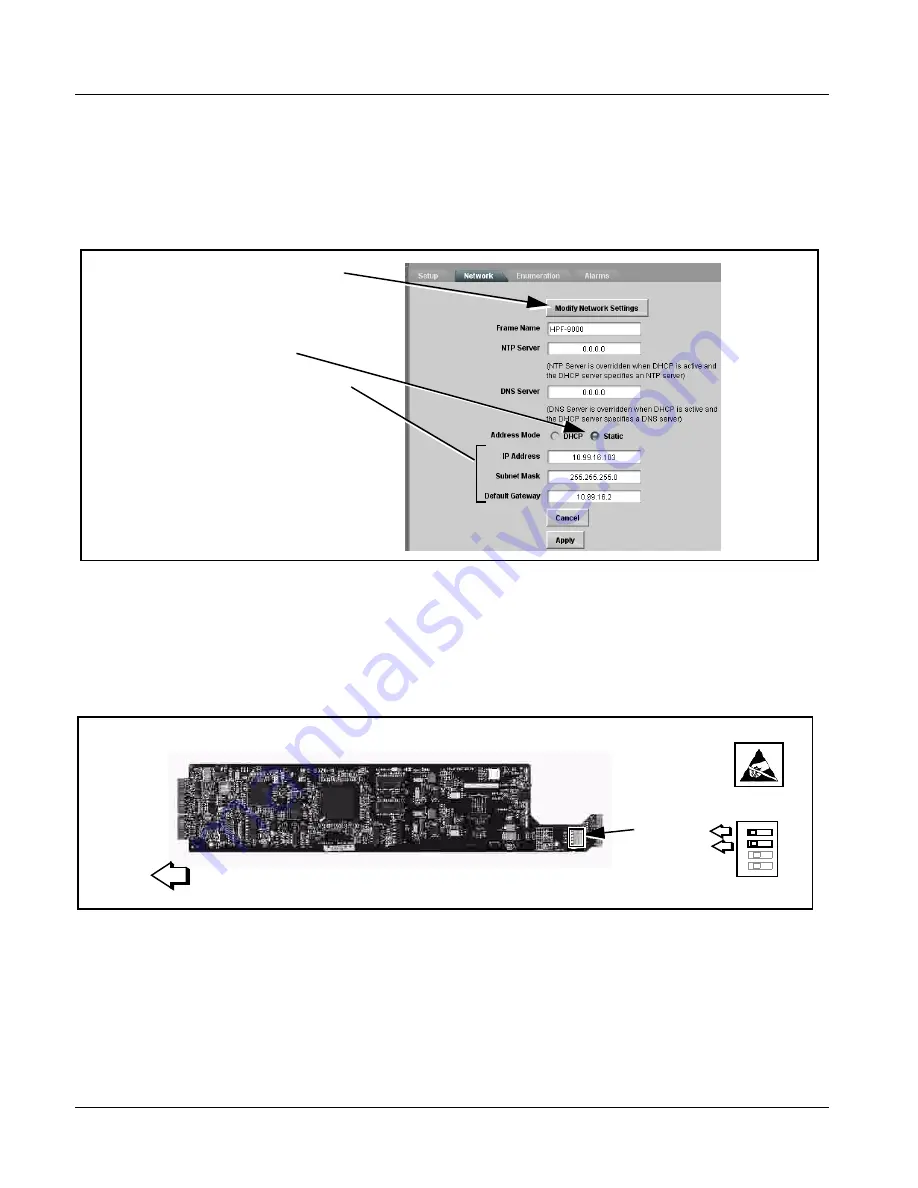
Set Network Controller Card to Desired Unique Static IP Address
Note:
If target network is different than that of network card factory default
192.168.2.x, host computer must also be configured for same target network.
8.
On Network Controller Card
Network
configuration pane, perform the
settings shown below.
Note: Do not leave the IP address as the factory default 192.168.2.1. If other
frame are to be installed later, the IP address being left at default will
conflict with subsequent frames installed as described here.
9.
On
Network
configuration pane, click Apply.
10.
Remove the card from its slot and set DIP switches as shown below.
Note: Time required for card to come back online depends upon amount of
frames connected to DashBoard™.
11.
Re-insert the card. When the card again comes online, the frame now
shows connection to DashBoard™ with the assigned static IP address
(“10.99.16.103” as shown in the example on the next page).
2. Set Addressing Mode to Static.
3. Set IP Address, Subnet Mask, and Default
Gateway fields as appropriate.
In the IP address: field, enter a desired static
IP address other than the card factory fixed
default (“10.99.16.103” in this example)
making certain the selected address is in the
same subnet as the network controller card
and LAN computer.
Note: At this point, the Network Controller
Card can be set for any network that is
available on the host computer.
1. Click Modify Network Settings to open the
dialog.
Rear of Card
12
IP address
assigned by
user
34


