background image

VinciLab User’s Guide 

| 47


in 

Connections

 on VinciLab). Accept with 

OK

4.2. Typical measurement procedure in Coach 7

9


Turn VinciLab on by pressing its power button. Wait until the Home Screen appears.  


Start Coach 7 (or Coach 7 Lite) on your computer/tablet.  


If needed set the connection for VinciLab communication, see the previous chapter 

4.1. Communication with Coach 7

.  


In  Coach  open  an  Activity/Result  for  measurement  or  create  a  new  measurement 
Activity/Result (Author mode only).  


Connect sensor(s) to the sensor input(s) on VinciLab.   


VinciLab automatically detects the connected sensor(s) and displays the sensor icons 
of the identified sensors on the VinciLab screen panel. The sensors,  which are not 
automatically identified, have to be selected from the Coach Sensor Library.  


The  measurement  is  executed  according  to  the  given  measurement  settings.  Click 

 to check these settings: measurement type, measuring time, sampling frequency 

and number of collected samples. Notice that the max. sampling frequency is 1 MHz 
and the max. number of collected measurement points is 500 000 per input. 


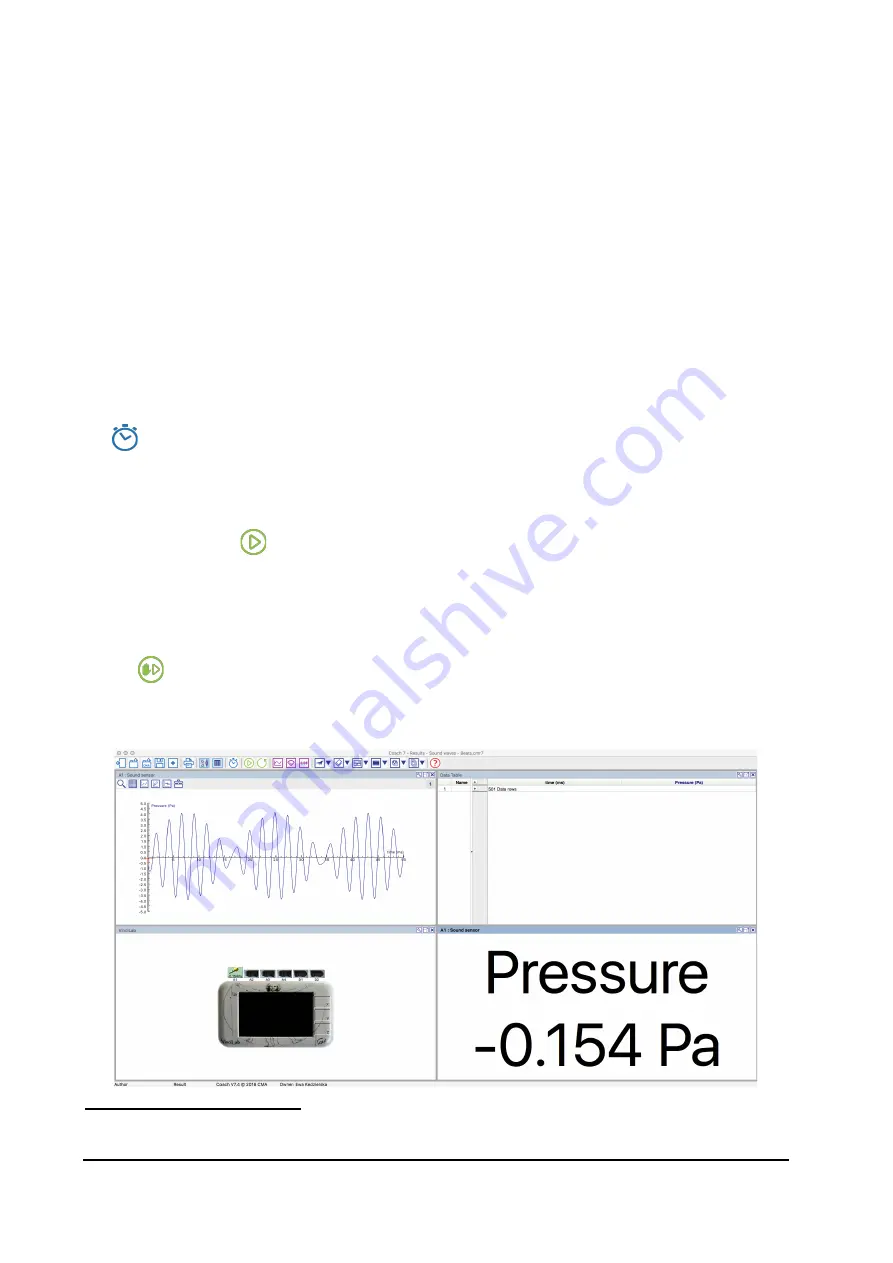
Follow the instructions in the Activity or directly start the measurement by clicking 
the 

Start

 button

.   

-


In most cases, Coach automatically starts the measurement.  

-


If triggering is enabled then the measurement is started automatically when the 
trigger conditions are met. 

-


When the type of measurement is set to 

Manual

 then the 

Manual Start

 button 

 appears  in  the  Toolbar.  Click  this  button  to  collect  a  single  measurement. 

When  keyboard  input(s)  is  specified  then  the  value  of  one  or  more  quantities 
have to be typed in. 


9

 This procedure does not describe the Event-based type of measurement.  


Summary of Contents for VinciLab data-logger 001

Page 1: ...VINCILAB DATA LOGGER 001 USER S GUIDE CENTRE FOR MICROCOMPUTER APPLICATIONS https cma science nl...

Page 2: ...l For our international users Check the CMA website https cma science nl for the latest version of this manual and updates of Coach programs and apps Aan onze Nederlandse gebruikers VinciLab wordt sta...

Page 3: ...r 13 7 Using VinciLab with computers and tablets 13 III VINCILAB APPLICATIONS 14 1 Coach 14 2 My Files 14 3 Settings 16 3 1 Device Settings 16 3 2 System Settings 16 4 Connections 17 4 1 Wi Fi 18 4 2...

Page 4: ...TABLET 44 1 Connecting VinciLab via the USB cable 44 2 Problems with communicating to VinciLab 44 3 Transferring files between VinciLab and a computer 45 4 Using VinciLab for data collection with com...

Page 5: ...Lab has four analog BT inputs which allow very fast data collection up to 1000000 samples per second and two digital BT inputs for Motion Detectors It also has built in a 3 axis accelerometer and a mi...

Page 6: ...ew Capacitive Color Touch Screen for viewing and controlling Power Button for turning VinciLab On or Off and for turning the screen On when it is timeout Analog Inputs A1 A2 A3 A4 for connecting analo...

Page 7: ...or the internal lithium ion rechargeable battery supplied with VinciLab Speaker for playing audio Mini USB Port for connecting a USB cable for charging or for communication with computer Audio Out Por...

Page 8: ...the operation and return to the Home Screen Note Holding the Power button for about 8 seconds causes VinciLab to shut down Use this possibility only in case of emergency when your VinciLab does not re...

Page 9: ...harging cycles Exposure to temperature over 35o C will significantly reduce battery life A replacement battery can be ordered separately CMA art code 001bat Notes VinciLab can be used while the batter...

Page 10: ...at the bottom of the Home screen give information about VinciLab Icon Name Operation Coach active Appears when Coach is running Tap to switch back to Coach Volume Shows the status of Volume On or Mut...

Page 11: ...mages Touch hold and release Activate onscreen items at the moment of releasing For example used in Coach tap a sensor digital display hold and release to open its menu 4 Sensor inputs 4 1 Analog sens...

Page 12: ...nt sensor then the sensor name becomes red tap Exchange to change the sensor to the connected one does not identify it then its name remains grey tap Confirm to accept the pre defined sensor or tap Cl...

Page 13: ...omputers 1 As a lab interface to collect data the Coach 7 or Coach 7 Lite program running on a MAC or Windows computer controls the data collection via USB or Wi Fi 2 To transfer files between the My...

Page 14: ...he My Files Screen displays folders and files located in the My Files folder This folder is meant to store user s files Note that in the folder Coach DataRecovery you can find backups of measurements...

Page 15: ...wse to the location where you want to move the selected items and tap to paste the items in the selected location To delete selected items First select items as described above Tap to delete the selec...

Page 16: ...ing Settings Select a screen timeout the length of time delay between the last key press or screen touch and the automatic screen timeout Tap and select the desired time interval Note To reactivate th...

Page 17: ...iLab Applications 4 1 Wi Fi Tap Software Update or The Software Update screen appears and automatically lists all installed software packages grey and new available updates black Tap an update package...

Page 18: ...d enter the network name security type and password and confirm with When VinciLab is successfully connected to the selected network the assigned to VinciLab IP address appears in the Connections scre...

Page 19: ...To turn Bluetooth On or Off To turn Bluetooth On drag the Bluetooth slider to the position ON VinciLab automatically searches for Bluetooth devices nearby From the list of scanned devices tap the targ...

Page 20: ...folder My Files Media Images To start tap Images The Images Screen displays the thumbnails of images located in My Files Media Images To browse and display an image Tap a desired image thumbnail to se...

Page 21: ...Play to resume playback Pause to pause playback Mute to mute the sound Tap and drag the Volume slider to set the playback sound volume 8 Calculator Use the Calculator application to perform simple mat...

Page 22: ...o go to the Home Screen of your VinciLab tap to switch back to Coach 2 Coach Activities and Results Coach works with Activities cma files and Results cmr files Coach Activities and Results contain exp...

Page 23: ...p and select Open to open any Activity Result The Open an Activity dialog opens Browse and select the desired Activity Result file and tap To create a new Result cmr file Tap or and select New or New...

Page 24: ...oach Application5 Turn VinciLab on by pressing its power button Wait until the Home Screen appears Ensure VinciLab has sufficient battery power or is connected to a power supply On the Home Screen tap...

Page 25: ...ined in the Activity red and the sensor identified by VinciLab Connect the defined sensor or change it into the detected sensor by tapping Exchange This feature is not available for sensors which cann...

Page 26: ...file will be done each minute in case of new data The last saved file can be found in My Files DataRecovery last_result cmr 4 Activity Screen The Activity Screen gives an overview in the form of a tre...

Page 27: ...elow Save the current Result Close the current Activity Result Exit Coach ACTIVITY SCREEN TOOL MENU New to open a new Result New Sound Only to open a new Result with the internal sound sensor Open to...

Page 28: ...4 for analog sensor inputs D1 D2 for digital sensor inputs and X Y Z for the internal 3 axis Accelerometer Tap a tab e g A1 to display the current settings of the sensor connected to this input As lon...

Page 29: ...to indicate which voltage range is used by a new sensor Tap Create New Select the voltage range of your new sensor By default the sensor settings are filled like for a Voltage sensor Enter the sensor...

Page 30: ...Tap the selected mode to choose another mode Specify the conversion settings for Counter Digital sensor 1 bit Frequency meter and Time interval meter Use Set to zero or Set to value to shift the provi...

Page 31: ...will be connected and detected its new calibration will be used To add a new calibration range for a predefined sensor Connect a sensor or choose a sensor from the CMA Library Select a range from the...

Page 32: ...ngs Tap to accept The sensor can be overwritten or added as a new self defined sensor 5 3 Measurement Settings The Measurement Settings dialog specifies how VinciLab has to measure Select the measurem...

Page 33: ...the graph When scan is started use Stop Scan to stop the scan Erase all Values only for a diagram with data to remove all data Sketch to draw a prediction graph or a graph which can be converted to re...

Page 34: ...Screen The Table Screen is used to display measured or calculated data in tables Here you can also manage table rows create new tables import data from and export data to csv file and perform data pro...

Page 35: ...REEN TOOL MENU Erase all Values only for a table with data to remove all data from the activity Import Table to import data from csv text file after this action a new table with data will be added New...

Page 36: ...that can be used to add and to browse to web pages This browser works only when VinciLab is connected to a Wi Fi network By default there is no web page in a new Result created on VinciLab the Web pa...

Page 37: ...owing direct typing of student notes Tap to go to the Student Texts Screen Tap to see all available texts and to select another text To type in notes tap the Text Screen a virtual on screen keyboard a...

Page 38: ...ssing save your data before starting a processing tool 12 1 Select Remove Data With the Select Remove Data tool either a range of data or single points can be selected for removal or retention To sele...

Page 39: ...In the next drop down list select the smooth method Specify the smoothing parameters For Moving average enter the desired Filter width For Spline leave the automatically calculated Smoothing factor o...

Page 40: ...lculate the integral In the Initial value field type in the constant of integration This is the value assigned to the quantity along the vertical axis for x 0 When desired change the name of the Quant...

Page 41: ...area The diagram shows two boundary lines between which the area is calculated Drag the boundary lines to the required position or type the x values for the boundary lines in the Begin and End fields...

Page 42: ...y spectrum of a periodical signal The resulting values are presented as amplitudes plotted versus the frequency To determine a frequency spectrum Select Process Analyze Signal Analysis In the top left...

Page 43: ...tion of the data distribution The range of the variable column is divided into equal size bins for which the frequency of occurrence is counted The height of the diagram bar is equal to the frequency...

Page 44: ...am Files x86 CMA Coach7 Common EthernetCableDriver location7 Click Next The driver software will be installed After successful installation the message Device driver software installed successfully wi...

Page 45: ...les between VinciLab and a computer are only possible via the USB connection To get access to the VinciLab s user folder My Files in Windows Explorer and Mac Finder VinciLab needs to be first mounted...

Page 46: ...mputer tablet via a USB cable or communicates wirelessly via Wi Fi The collected data are transferred in real time to the computer tablet and the course of the measurement can be followed directly on...

Page 47: ...lected from the Coach Sensor Library The measurement is executed according to the given measurement settings Click to check these settings measurement type measuring time sampling frequency and number...

Page 48: ...inciLab s screen on a computer or a mobile device VinciLab offers Data Share via Virtual Network Computing VNC which makes it possible to monitor the VinciLab screen and to control VinciLab from any c...

Page 49: ...oltage signals between 5 5V only on VinciLabs sold starting February 2019 SENSOR INPUTS 4 analog BT right hand inputs each can work as a counter 2 digital BT left hand inputs BUILT IN SENSORS Micropho...

Page 50: ...ectly on VinciLab When replacing the battery only use a VinciLab replacement battery pack supplied by CMA When charging the battery always use the provided USB power adapter 3 Factory reset To perform...

Page 51: ...ature locations such as direct sunlight Doing so may cause the battery to generate heat explode or ignite or generate a toxic gas if placed in contact with fire In the event the battery leaks and the...

Page 52: ...52 VinciLab User s Guide This product is to be used for educational purposes only It is not appropriate for industrial medical research or commercial applications...

Reviews: