


ClientPOS
PT6300 User Manual
Version: 2.0
24 | 95
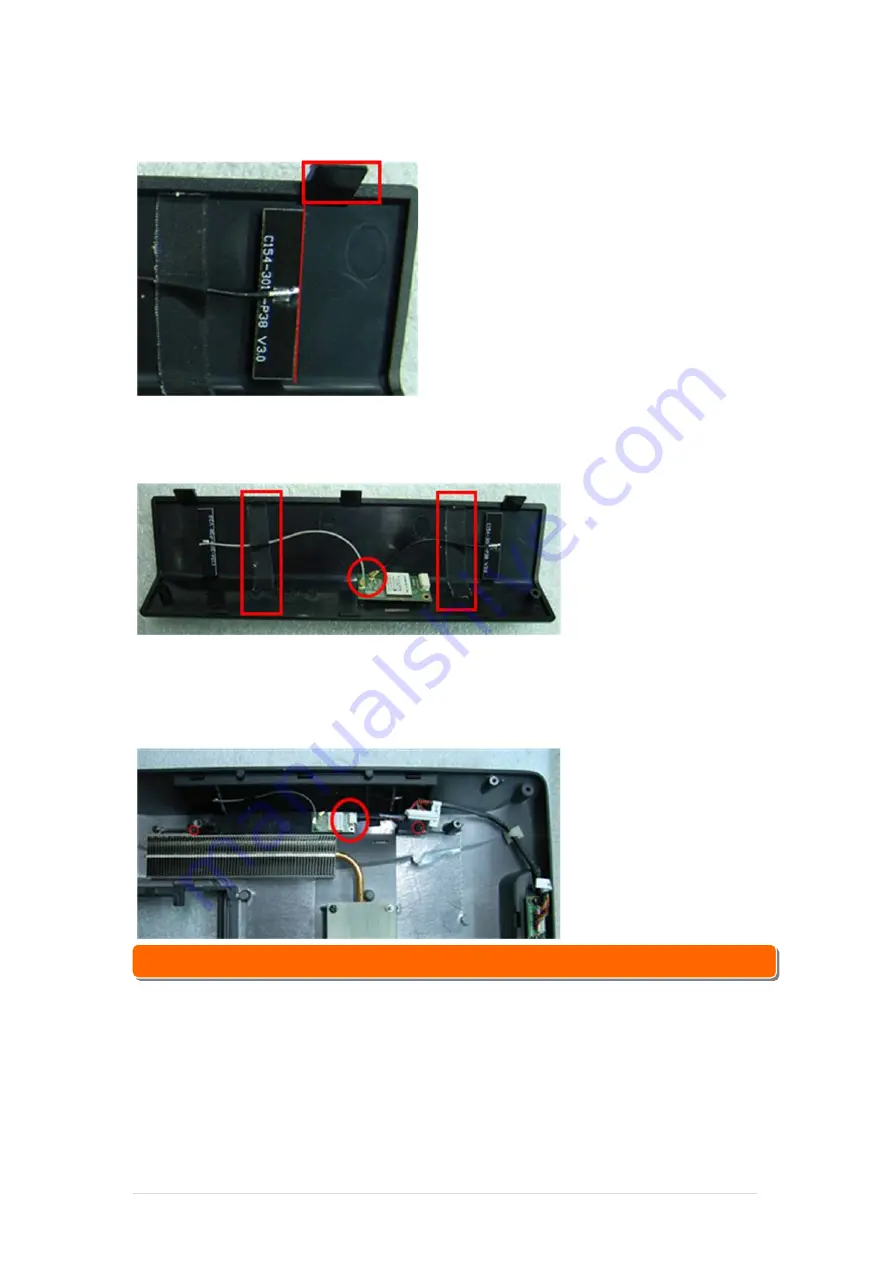
3.
Fasten antenna (Part No.: 35D510530-000B) to the right side of VFD cover. Antenna is
vertical to the left snap (as the red frame) as shown in the figure below.
4.
Fasten antenna cable connector to Wi-Fi module terminal. Then fasten antenna cable to
the cover by adhesive tapes
5.
Fasten the VFD cover to the rear lid. Push the snap of the top VFD cover into the slot of
rear lid and fasten the bottom cover with 2 screws (Part No.: 64D430088-000T). Then
connect Wi-Fi /MSR cable (Part No.:35D510522-000B) to Wi-Fi module
☆
Alternative of WiFi or Internal VFD.
Summary of Contents for PT6300
Page 1: ...1 95 PT6300 User Manual Version 2 0 P N Cover page ...
Page 5: ...ClientPOS PT6300 User Manual Version 2 0 5 95 7 5 Save Exit 8 LCD Surface Cleaning P93 P94 ...
Page 9: ...ClientPOS PT6300 User Manual Version 2 0 9 95 2 3 Internal Layout ...
Page 33: ...ClientPOS PT6300 User Manual Version 2 0 33 95 8 Click Next 9 Click Next ...
Page 42: ...ClientPOS PT6300 User Manual Version 2 0 42 95 3 Run Setup exe 4 Click Next ...
Page 44: ...ClientPOS PT6300 User Manual Version 2 0 44 95 7 Click Next 8 Click Install ...
Page 45: ...ClientPOS PT6300 User Manual Version 2 0 45 95 9 Click Finish 10 Restart systems ...
Page 47: ...ClientPOS PT6300 User Manual Version 2 0 47 95 13 Select COM ActiveX 14 Select Samples ...
Page 48: ...ClientPOS PT6300 User Manual Version 2 0 48 95 15 Select VB6 16 Select Enrollment Sample ...
Page 55: ...ClientPOS PT6300 User Manual Version 2 0 55 95 1 3 2 Click Next 1 3 3 Click Next ...
Page 56: ...ClientPOS PT6300 User Manual Version 2 0 56 95 1 3 4 Click Giga TMS Next 1 3 5 Click Next ...
Page 63: ...ClientPOS PT6300 User Manual Version 2 0 63 95 ...
Page 64: ...ClientPOS PT6300 User Manual Version 2 0 64 95 ...
Page 65: ...ClientPOS PT6300 User Manual Version 2 0 65 95 ...
Page 70: ...ClientPOS PT6300 User Manual Version 2 0 70 95 3 Run Setup exe 4 Click Yes ...


