32
EN
DEX Next S
2. How to use
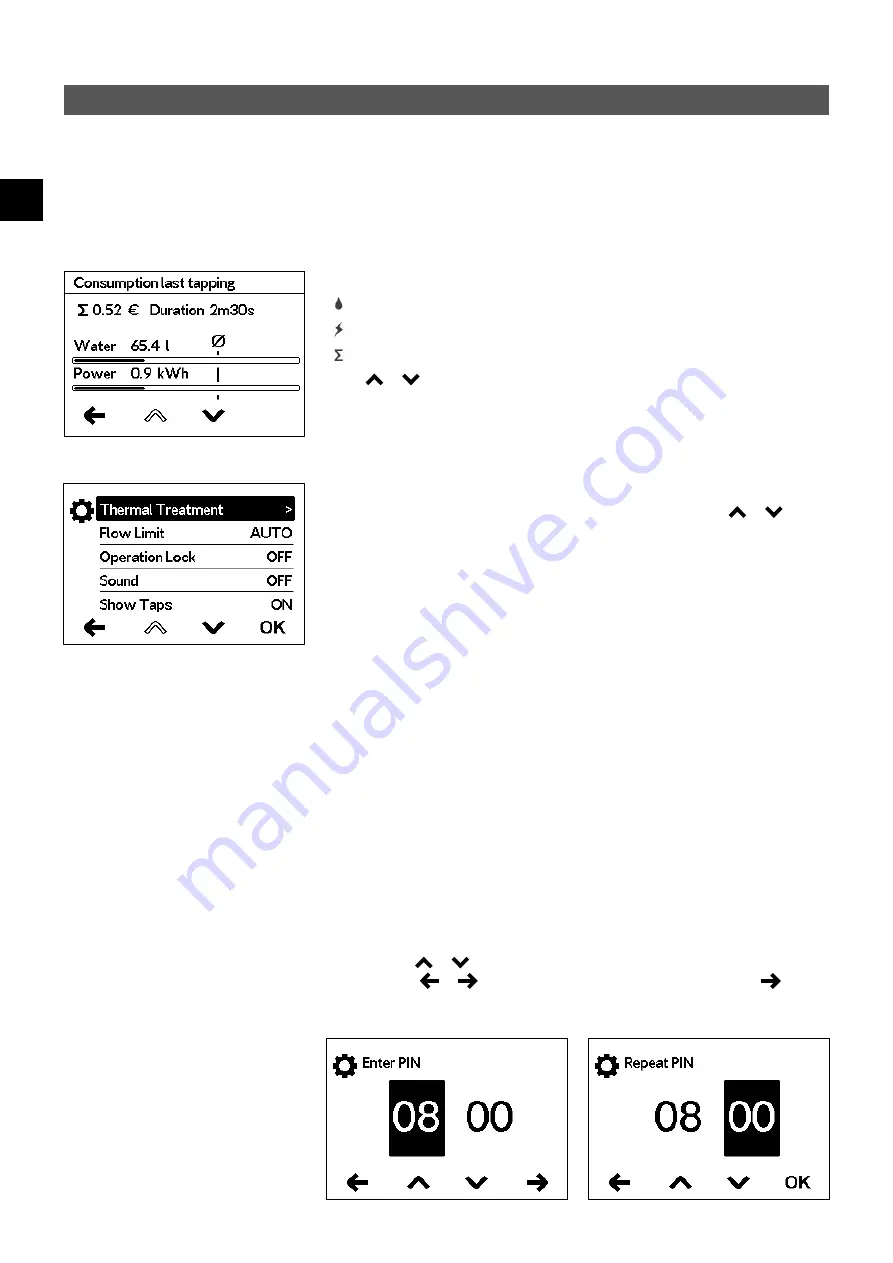
Statistics
In the statistics the consumption and usage data are captured by the appliance and dis-
played in graph format:
Water consumption
Power consumption
Total consumption costs
Select or to scroll through the different periods. The consumptions are dis-
played in diagrams over a period from the last drawing of water or the total consump-
tion.
Note: The consumption data are not suitable for billing purposes.
Settings
This menu is used for the basic configuration on the appliance. Select or to
scroll through the different menu items and tap “
OK
” to change settings directly or go
to submenus.
Language:
Select the menu language.
Sound:
Activate / deactivate operating sounds.
Note: Alarm signals and instruction sounds can not be disabled.
ECO indicator:
ECO mode indicates when the unit is operating in an energy efficient
range. After each tapping, the statistics for the last tapping are displayed.
Currency:
Select a currency symbol.
Temperature Limit:
The temperature limit can be activated / deactivated in this menu
and the maximum warm water temperature can be limited to a desired value within the
temperature setting range.
Note: If the instantaneous water heater supplies a shower, then the maximum tem-
perature was limited during the installation of the appliance and can not be changed.
Operation Lock:
Secure your settings with a four-digit PIN.
Note: The operation lock can only be deactivated with the correct PIN under
“Operation lock”. If you should forget your PIN, please contact Customer Services.
PIN Entry: Use or to select digits from 00 to 99. To move to the next or previ-
ous digit, select
or
. Once you have selected both digits, confirm by
. The
PIN must be reentered and confirmed by “
OK
” as a security measure.
If both entries match, the range of the control lock can be set.
Note: In the event of a power cut whilst the automatic is running according to the fill
quantity, the water flow is stopped by the motor valve. After power is restored the
valve remains closed a prompt appears on the display until the prompt is acknowl-
edged by tapping on “OK”.
Summary of Contents for 3200-36450
Page 186: ...186 RU DEX Next S C 20 C 60 C 1 C 35 C 43 C 0 5 C 20 C A3 35 C 38 C 40 C 48 C PIN 2 e Paper 60...
Page 187: ...CLAGE 187 RU ECO ECO ECO 2 Automatic OK Duration Start OK 10 Fill Up Start...
Page 191: ...CLAGE 191 RU 2 1 2 3 4 5 10...
Page 194: ...194 RU DEX Next S 3 FX3 AAA...
Page 198: ...198 RU DEX Next S DEX Next S 1 STB SDB...
Page 201: ...CLAGE 201 RU RDX3 36100 IP IP25 IP24 5 RDX3 VDX UDX VDX 34120 RDX RDX3 UDX 34110 RDX RDX3...
Page 202: ...202 RU DEX Next S 2 1 12 12 14 2 6 3 4 30 5...
Page 203: ...CLAGE 203 RU 1 3 1 2 3 5 a 4 5...
Page 204: ...204 RU DEX Next S 6 6...
Page 205: ...CLAGE 205 RU VDE 0100 7 1 2 3 4 5 1 2 5 3 4 3 L2 CLAGE 82250 OK 0 1 2 8 0 1 2 1 35 C 2...
Page 206: ...206 RU DEX Next S A 7 1 6 2 3 4 5 1 S 2 3 4 5 6 7 8 9 IP25 S...
Page 208: ...208 RU DEX Next S EN 60900 55 C 55 C 55 C E1 8 1 2 3 1 4 1 2 3 1...
Page 209: ...CLAGE 209 RU 9 a c b 1 2 3 4 b 5 6 7 8 9 1 2 3 4 5 6 7 8 9...
Page 264: ...264 BG DEX Next S C 20 C 60 C 1 C 35 C 43 C 0 5 C 20 C 35 C 38 C 40 C 48 C 2 E Paper 15...
Page 265: ...CLAGE 265 BG ECO Eco ECO 2 Automatic OK Duration Start OK 10 Fill Up Start...
Page 269: ...CLAGE 269 BG 2 1 2 3 4 5...
Page 272: ...272 BG DEX Next S 3 FX3...
Page 276: ...276 BG DEX Next S 1 DEX Next S STB SDB G...
Page 279: ...CLAGE 279 BG 5 RDX3 VDX UDX RDX3 36100 IP IP25 IP24 VDX 34120 RDX RDX3 UDX 34110 RDX RDX3...
Page 280: ...280 BG DEX Next S 5 2 1 12mm 12 14mm 2 6mm 3 4 30mm...
Page 281: ...CLAGE 281 BG 1 2 3 5 a 4 5...
Page 282: ...282 BG DEX Next S 6 6mm...
Page 283: ...CLAGE 283 BG 1 2 5 3 4 7 VDE 0100 1 2 3 SDB 4 5 STB 3mm C CLAGE 82250 L2 OK 0 1 2 0 1 2 1 35 2...
Page 284: ...284 BG DEX Next S A S 1 S 2 3 4 5 6 7 8 9 IP25 7 1 6 cm 2 3 4 5...
Page 286: ...286 BG DEX Next S EN 60900 1 E1 8 55 C 55 C 55 C 1 2 3 1 4 1 2 3...
Page 287: ...CLAGE 287 BG a c b 1 2 3 4 5 6 7 8 9 1 2 3 4 b c 5 6 7 8 9 9...


