


67
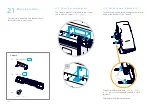
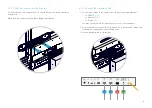
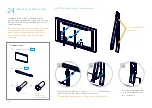
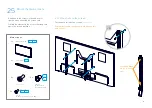
25.3 Move the transport brackets
Each screen mount module has four transport
brackets that are required when there is no screen
hanging on the module.
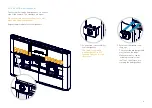
Now that the screen is in place, you must move
the brackets. Otherwise you will not be able to
push the screen fully toward the wall.
Repeat the procedure on both sides of the screen
mount module.
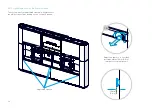
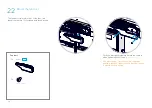
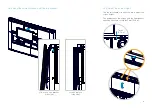
1. Gently pull the screen downward.
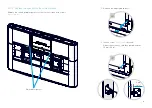
2. Identify the brackets behind the screen. There
are two on each side of the screen mount.
Remove one screw from each bracket.
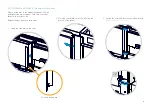
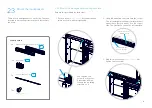
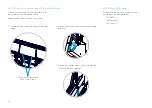
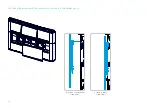
3. Loosen the remaining screw on each bracket,
and rotate the upper bracket down and the
lower bracket up.
×2
×2
×2
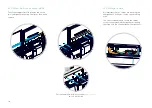
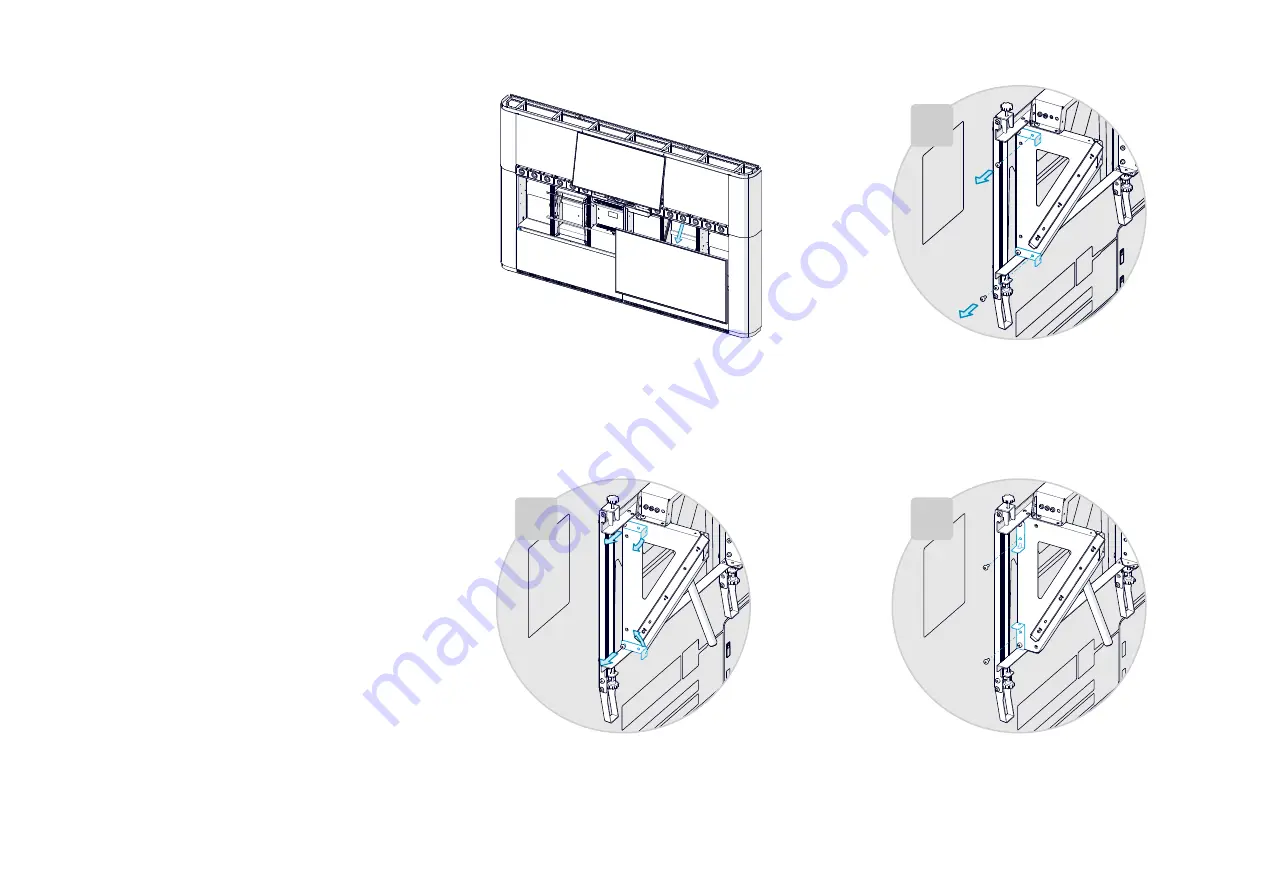
4. Add the two screws that you just removed,
and tighten all screws with the bracket in its
new position.
Summary of Contents for Webex Room Panorama
Page 1: ...Cisco Webex Room Panorama Installation guide ...
Page 2: ......
Page 83: ...81 ...
Page 87: ......