


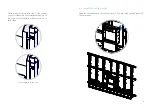
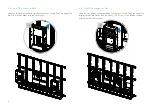
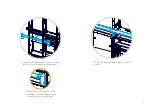

4
1
2
3
4
5
6
7
8
9
Screws and tools
Required tools and equipment
• Two stepladders
• Drill
• Torx 20, Torx 25, and Torx 30 bits
• PH2 and PH3 bits
• Hex 2 mm and 6 mm bits
• Angle chuck
• Appropriate drill bits for your wall material
• Appropriate wall fasteners/anchors for your wall construction
• Laser level (multi axis)
• Small spirit level (about 25 cm / 10 in.)
• Pencil
• Nylon draw tape
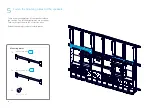
Screws and spacers
The following kit of screws and spacers are shipped with the product. The kit is
in box
A1
.
In addition, the installer must bring the number and type of screws required for
a safe wall mounting of the system (step 1).
1. Washer, 0.9 mm (16 pcs.)
2. Nylon spacer, 5 mm (16 pcs.)
3. FH M4x10, Torx 20 (24 pcs.)
4. PAN10-32x0.312, PH2 (4 pcs.)
5. M5x10, Torx 25 (12 pcs.)
6. M4x12, Torx 20 (100 pcs.)
7. M6x12, Torx 30 (150 pcs.)
8. M8x25, PH3 (8 pcs.)
9. M8x45, Hex 6 mm (4 pcs.)
Summary of Contents for Webex Room Panorama
Page 1: ...Cisco Webex Room Panorama Installation guide ...
Page 2: ......
Page 83: ...81 ...
Page 87: ......