To remove the SuperCap Module you must remove the front mezzanine module.
Note
To replace the SuperCap module, use the following topics:
•
Removing the SuperCap Module, on page 28
•
Installing the SuperCap Module, on page 32
Removing the SuperCap Module
The SuperCap module is part of the Front Mezzanine Module, so the Front Mezzanine Module must be
removed from the compute node to provide access to the SuperCap module.
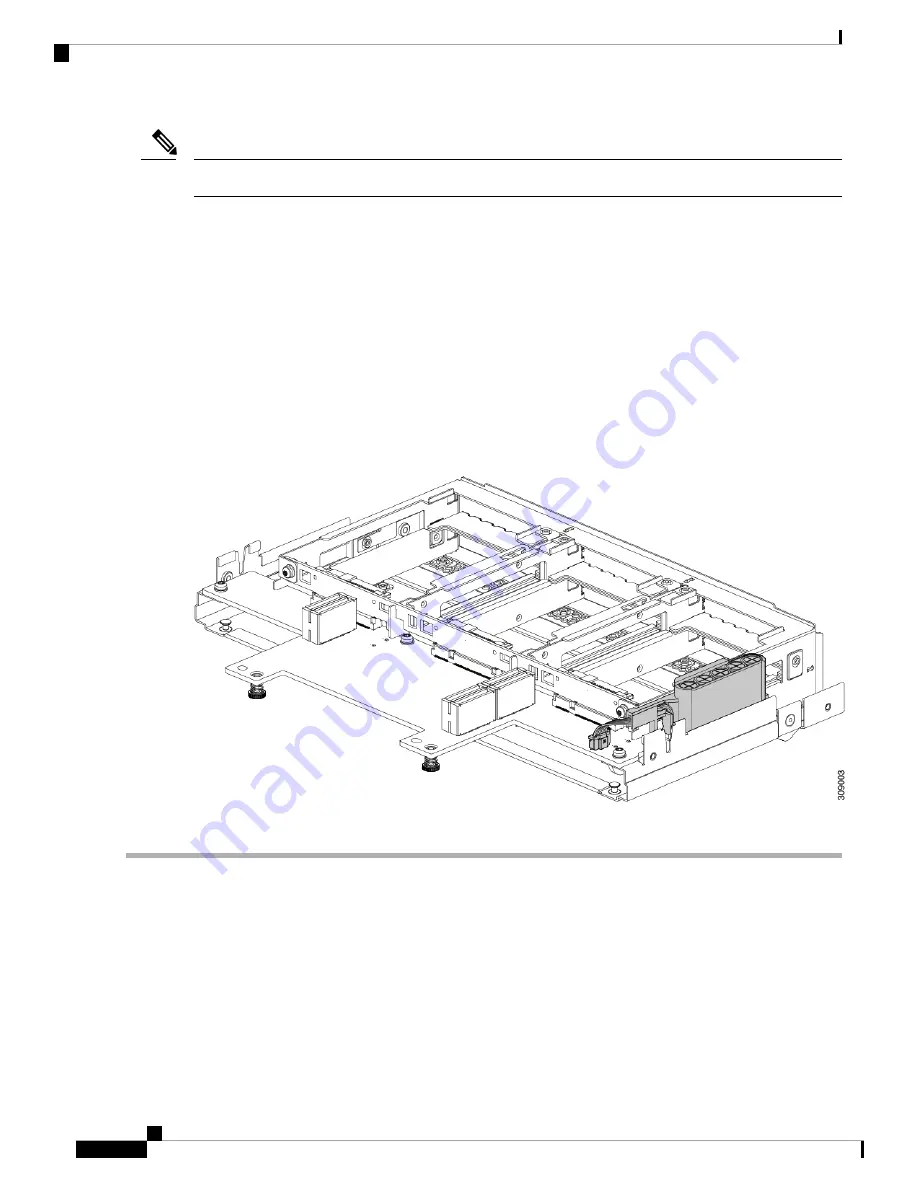
The SuperCap module sits in a plastic tray on the underside of the front mezzanine board. The module connects
to the board through a ribbon cable with one connector to the module.
Figure 8: Location of the SuperCap Module on the UCS X210c M6 Compute Node
To replace the SuperCap module, follow these steps:
Step 1
If you have not already removed the Front Mezzanine module, do so now.
See
Removing the Front Mezzanine Module, on page 23
.
Step 2
Before removing the SuperCap module, note its orientation in the tray as shown in the previous image.
When correctly oriented, the SuperCap connection faces downward so that it easily plugs into the socket on the board.
You will need to install the new SuperCap module with the same orientation.
Step 3
Grasp the cable connector at the board and gently pull to disconnect the connector.
Cisco UCS X210c M6 Compute Node Installation and Service Note
28
Servicing a Compute Node
Removing the SuperCap Module


