background image


Chapter 4      Installation and Maintenance 


Power Supply Overview 


SCE 2000 4xGBE Installation and Configuration Guide 


OL-7824-02 


4-17 


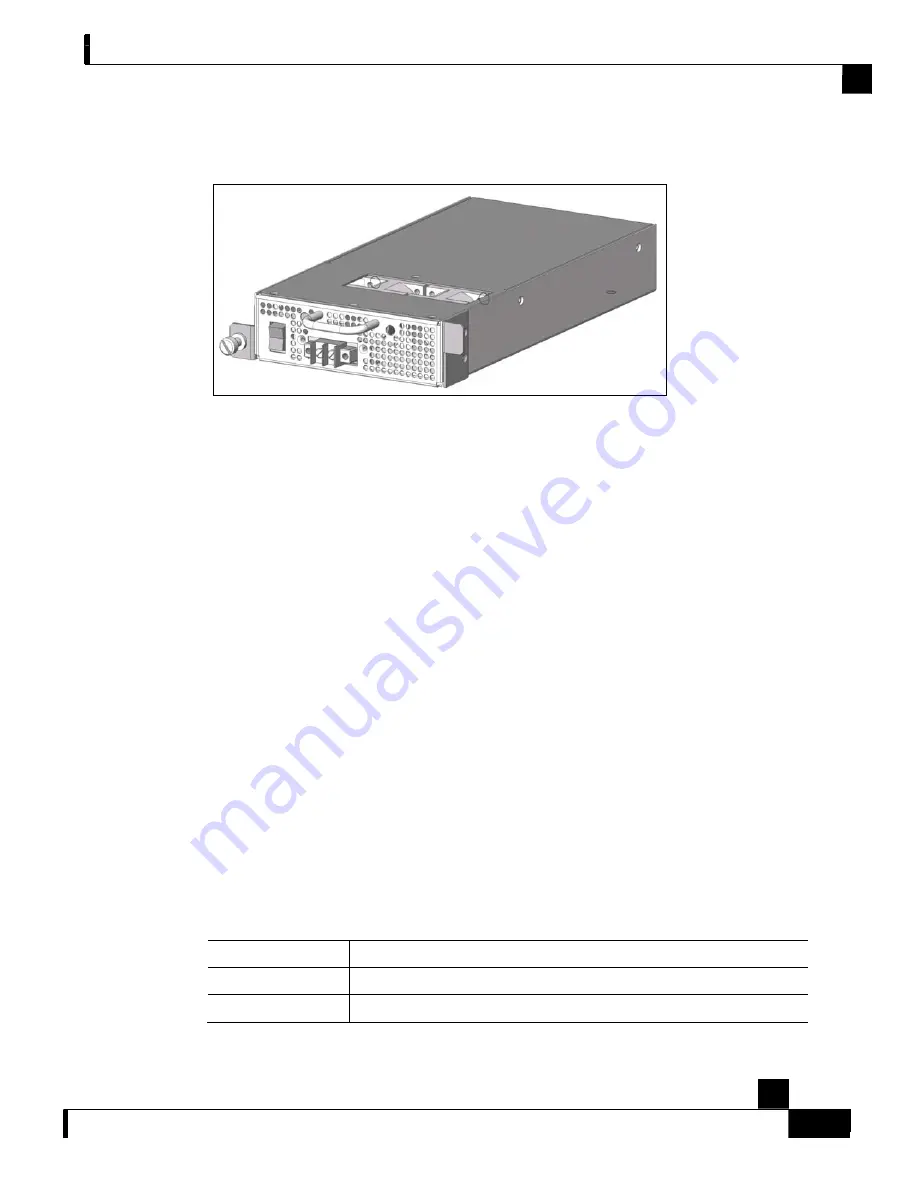
The handle of the DC unit is at the top of the unit. 

Figure 4-13: DC Power Module 


LEDs 

The following LEDs are used to monitor the functioning of the power supply units: 


On the power supply unit (both AC-input and DC-input): 


IN LED (green) 


OK LED (green) 


On the 

Front Panel

 (on page 

2-3

): 


Power LED: There are two Power LEDs on the front panel (Power A and Power B), one 
LED corresponding to each power supply unit 

On both the AC-input and DC-input power supplies, the IN LED is used to monitor the voltages 
received by the platform from the power source. If the input voltages are within normal operating 
ranges, the green IN LED is illuminated. If the input voltages are above or below normal ranges, 
the IN LED is not illuminated. 

On both the AC-input and DC-input power supplies, the OK LED is used to monitor the power 
supply DC output voltages used to power the platform. The normal operating ranges for the 12 
VDC output voltage is between 11.9V and 12.1V. If the output voltages are within normal 
operating ranges, the green OK LED is illuminated. If the 12 VDC output voltages are above 
(more than 12.1V) or below (less than 11.9V) normal ranges, the OK LED is not illuminated. 

The Power A and Power B LEDs on the front panel indicate whether the corresponding power 
supply unit is functioning normally. 

Refer to the following tables for LED status information 

Table 4-4 

IN LED Status for AC-input and DC-input Power Supply Units 

LED State 

Power Supply Unit Condition 

On (green) 

The input voltage is in the required range. 

Off 

The input voltage is not in the required range. 

Summary of Contents for CE 2000 Platform SCE 2000 4xGBE

Page 1: ... Tasman Drive San Jose CA 95134 1706 USA http www cisco com Tel 408 526 4000 800 553 NETS 6387 Fax 408 526 4100 Customer Order Number DOC 7824 02 Text Part Number OL 7824 02 SCE 2000 4xGBE Installation and Configuration Guide Version 2 5 7 OL 7824 02 ...

Page 2: ...adio antenna until the interference stops Move the equipment to one side or the other of the television or radio Move the equipment farther away from the television or radio Plug the equipment into an outlet that is on a different circuit from the television or radio That is make certain the equipment and the television or radio are on circuits controlled by different circuit breakers or fuses Mod...

Page 3: ...equest x Definitions of Service Request Severity x Obtaining Additional Publications and Information x Introduction 1 1 SCE Platform Management Interfaces 1 2 Overview of the SCE 2000 Platform 2 1 Service Control and the SCE Platform 2 1 The SCE Platform 2 1 Service Control Management 2 2 Front Panel 2 3 Back Panel 2 6 Checking the Shipping Container Contents 2 7 SCE 2000 Component List 2 7 SCE 20...

Page 4: ...g the SCE 2000 on a Workbench or Tabletop 4 6 Rack Mounting a SCE 2000 Platform 4 7 Attaching a Chassis Ground Connection 4 13 Power Supply Overview 4 16 LEDs 4 17 Power Supply Specifications 4 18 Removing and Replacing a Power Supply Unit 4 19 Powering Down the Power Supply Unit and Disconnecting Input Power 4 19 Removing the Power Supply Unit 4 21 Replacing the Power Supply Unit 4 21 Reconnectin...

Page 5: ...tivity 5 28 Cabling the Line Ports and Completing the Installation 6 1 Connecting the line ports to the network 6 1 Cabling Diagrams 6 2 Configuring the GBE Interface Parameters 6 7 Connecting the GBE Line Interface Ports 6 8 Testing Connectivity Examining Link LEDs and Counters 6 10 Installing a Cascaded System 6 12 CLI Commands 6 13 Loading and Activating a Service Control Application 6 16 Basic...

Page 6: ...Problems 8 9 Troubleshooting the Power Subsystem 8 9 Troubleshooting the Firmware Package Installation 8 11 Troubleshooting the Management Subsystem 8 12 Troubleshooting the Link Interface Subsystem 8 14 The External Optical Bypass Module A 1 External Optical Bypass Functionality A 2 The External Optical Bypass Module Front Panel A 4 Installing the External Bypass Module A 5 Installing the Module ...

Page 7: ...ctices You should also have experience as an electronic or electromechanical technician This installation guide explains the initial hardware installation and basic configuration procedures for the SCE 2000 It contains procedures for unpacking and installing the device and performing basic configuration via the setup wizard After completing the installation and basic configuration procedures cover...

Page 8: ...ment Interfaces and Performing Initial System Configuration on page 5 1 This chapter explains how to connect the SCE 2000 platform to a local console and perform the initial system configuration via the setup wizard that runs automatically 6 Cabling the Line Ports and Completing the Installation on page 6 1 This chapter provides instructions for cabling the Gigabit Ethernet ports for both one and ...

Page 9: ...public countries_languages shtml For initial installation and startup information refer to the SCE 2000 4xGBE Quick Start Guide For international agency compliance safety and statutory information for wide area network WAN interfaces for the SCE 2000 platform refer to the Regulatory Compliance and Safety Information for the Cisco Service Control Engine SCE For installation and configuration of the...

Page 10: ...ns and information the system displays are in screen font boldface screen font Information you must enter is in boldface screen font italic screen font Arguments for which you supply values are in italic screen font The symbol represents the key labeled Control for example the key combination D in a screen display means hold down the Control key while you press the D key Nonprinting characters suc...

Page 11: ...writing to the following address Cisco Systems Attn Customer Document Ordering 170 West Tasman Drive San Jose CA 95134 9883 We appreciate your comments ObtainingTechnicalAssistance For all customers partners resellers and distributors who hold valid Cisco service contracts the Cisco Technical Assistance Center TAC provides 24 hour a day award winning technical support services online and over the ...

Page 12: ...le online DefinitionsofServiceRequestSeverity To ensure that all cases are reported in a standard format Cisco has established severity definitions Severity 1 S1 Your network is down or there is a critical impact to your business operations You and Cisco will commit all necessary resources around the clock to resolve the situation Severity 2 S2 Operation of an existing network is severely degraded...

Page 13: ...tion examples customer case studies certification and training information and links to scores of in depth online resources iQ Magazine http www cisco com go iqmagazine is the quarterly publication from Cisco Systems designed to help growing companies learn how they can use technology to increase revenue streamline their business and expand services The publication identifies the challenges facing...

Page 14: ......

Page 15: ...low inspection of IP traffic and controlling that traffic based on configurable rules The Service Control Engine platforms provide a real time classification of network usage through programmable stateful inspection of bi directional traffic flows and the mapping of these flows with user ownership The following diagram demonstrates a deployment of an SCE 2000 platform in the network Figure 1 1 SCE...

Page 16: ...atform any configuration changes made through one interface are also reflected through the other interface CLI Command Line Interface The CLI is accessible through the Console port or through a Telnet connection The CLI is the interface described throughout this manual Command Line Interface further discusses the CLI SNMP Simple Network Management Protocol You can use SNMP as an interface for moni...

Page 17: ...s that address various Service Control challenges faced by service providers TheSCEPlatform The Service Control Engine SCE platform which is the hardware component of the Cisco Service Control solution is designed to support observation analysis and control of Internet IP traffic The SCE platform is a purpose built network device making use of ASIC components and RISC processors to go beyond packe...

Page 18: ...olutions Network management complete network FCAPS Management Fault Configuration Accounting Performance Security is provided via either CLI or SNMP Subscriber management subscriber awareness mapping network IDs to subscriber IDs and integration with AAA devices such as Radius or DHCP servers is provided by the Subscriber Manager SM Service Configuration Management ability to configure the general...

Page 19: ... 2000 Platform Front Panel SCE 2000 4xGBE Installation and Configuration Guide OL 7824 02 2 3 FrontPanel The SCE 2000 Front Panel consists of ports and LEDs as shown in the following figure and tables Figure 2 2 SE2000 Front Panel ...

Page 20: ...cting the line ports to the network on page 6 1 for cabling diagrams for various topologies Table 2 3 SCE 2000 LED Groups LED Groups Description Power A Continuous green Power supply A is functioning normally Red Power supply A present but malfunctioning Unlit Power supply A is either not present or has failed Power B Continuous green Power supply B is functioning normally Red Power supply B prese...

Page 21: ...ates normal operation of the SCE 2000 Cascaded topology indicates normal operation of the active SCE 2000 GBE ports The GBE LEDs indicate the operational status of the SCE 2000 line ports as follows Link Green indicates that the port link is up Unlit indicates that the port link is down Rx Flashing Green indicates that there are incoming packets Tx Flashing Green indicates that there are outgoing ...

Page 22: ...ns the following components Two field replaceable power supply units with ON OFF switches A field replaceable fan drawer Ground connections Two connectors to the external bypass module The rear panels of both the AC and DC powered SCE 2000 platforms are shown in the following pair of figures Figure 2 3 SCE 2000 Back Panel AC Power Figure 2 4 SCE 2000 Back Panel DC power ...

Page 23: ...or 19 rack Six screws Philips 8 32 x 3 8 for attaching the brackets to the SCE 2000 chassis supporting mounting brackets for 19 rack Two crossrail supports for 19 rack with front and back posts Management cables Fast Ethernet cable for connecting to the Management port RS 232 serial cable DB 9 to RJ 45 for connecting to a local terminal Power cables Two AC power supply cords if ordered with AC inp...

Page 24: ...ntation and did not receive it we will ship the documents to you within 24 hours To order documents contact a customer service representative SCE2000InstallationChecklist To assist you with your installation and to provide a historical record of what was done by whom photocopy the following SCE 2000 Installation Checklist Indicate when each procedure or verification is completed When the checklist...

Page 25: ...ied Site environmental specifications verified Required passwords IP addresses device names and so on needed for initial configuration available refer to Setup Command Parameters on page 5 3 Required tools available Network connection equipment available SCE 2000 mounted in rack optional AC DC power cables connected to AC DC sources and SCE 2000 platform Console port set for 9600 baud 8 data bits ...

Page 26: ......

Page 27: ...he SCE 2000 supports wire speed processing of full duplex 2 Gigabit Ethernet streams The SCE 2000 can therefore be deployed in a multi link environment either in a single or dual SCE platform topology single SCE 2000 topology Provides increased network capacity and the ability to process both directions of a bi directional flow processing both the upstream and downstream paths of a flow even if th...

Page 28: ...epending on the results of the monitoring functions of the SCE 2000 and the configuration of the Service Control Application for Broadband or Mobile solution In order to perform control functions the SCE 2000 must be physically installed as a bump in the wire and the connection mode must be Inline Monitoring only The SCE 2000 monitors traffic flow but cannot control it Either a bump in the wire in...

Page 29: ...network link while in parallel allowing the SCE 2000 to process the traffic for monitoring only Cutoff There is no forwarding of traffic and the physical link is forced down cutoff functionality at layer 1 Maintaining the Network Links vs Maintaining SCE 2000 Platform Functionality When a single SCE 2000 is deployed the user may decide that in case of a failure maintaining the network link is more...

Page 30: ...Link Receive Only Topology When configuring the SCE 2000 an optical splitter topology is referred to as receive only connection mode Note that in an optical splitter topology the SCE 2000 only enables traffic monitoring functionality Note When implementing receive only topologies with a switch the switch must support SPAN functionality that includes separation between ingress and egress traffic an...

Page 31: ...ed to as inline connection mode Dual link Inline Installation In this topology one SCE 2000 is connected inline in two full duplex GBE links In case the two links are load shared asymmetrical routing might occur and some of the flows may be split i e the upstream packets of the flow go on one link and the downstream packets go on the other link When installed in this topology the SCE 2000 complete...

Page 32: ...nomenon and provides its normal monitoring functionality as if asymmetrical routing were not occurring in the two links This installation supports monitoring functionality only and is configured as receive only connection mode Figure 3 4 Single SCE Platform Dual Link Receive Only Topology Note When implementing receive only topologies with a switch the switch must support SPAN functionality that i...

Page 33: ...ution preserves the SCE 2000 functionality and the network link The two SCE 2000s are simultaneously aware of the subscriber contexts and subscriber states are constantly exchanged between them such that if the primary SCE 2000 fails the secondary can take over with minimum state loss When one SCE 2000 fails depending on the type of failure its link traffic is still bypassed to the functioning SCE...

Page 34: ...f these parameters may be configured via either the setup command or the connection mode command Connection Mode Parameter The connection mode parameter refers directly to the physical topology in which the SCE 2000 is installed The connection mode depends on two factors Inline Receive only Inline The SCE 2000 resides on the data link between the subscriber side and the network side thus both rece...

Page 35: ... supports four different modes The following two modes are possible when the SCE 2000 is not operational due to platform failure or boot Bypass The optical splitter forwards traffic with no intervention of the control application running in the SCE 2000 platform but monitoring functions continue uninterrupted Cutoff There is no forwarding of traffic The link is forced down resulting in traffic cut...

Page 36: ......

Page 37: ...rm 4 1 Installing the SCE 2000 Platform 4 4 Power Supply Overview 4 16 Removing and Replacing a Power Supply Unit 4 19 Fan Module Overview 4 25 Replacing the Battery 4 28 PreparingtoInstalltheSCE2000Platform Before installing your SCE 2000 platform you should consider the power and cabling requirements that must be in place at your installation site the equipment you need to install the platform a...

Page 38: ...tware packages No assembly is required However you need the following tools and equipment to install the SCE 2000 chassis and the rack mount kit if installing the SCE 2000 platform in a rack fan modules and power supplies Number 1 and 2 Phillips screwdriver 1 4 inch flat blade screwdriver Hex Wrench Screws compatible with your rack for mounting the SCE 2000 to the rack 12 AWG or 2 5 mm copper inst...

Page 39: ...is free from dust Planning a proper location for the SCE 2000 and the layout of your equipment rack or wiring closet is essential for successful system operation Equipment placed too close together or inadequately ventilated can cause system over heating In addition chassis panels made inaccessible by poor equipment placement can make system maintenance difficult Airflow Figure 4 2 Airflow Through...

Page 40: ...22 Class A VCCI Class A AS NZS CISPR22 Class A Immunity EN 50082 1 EN 55024 CISPR24 ESD RFI EFT etc Commercial Safety UL CSA 60950 IEC60950 EN60950 AS NZS 60950 NOM 019 IEC EN60825 1 2 21CFR1040 73 23 ECC For more complete information regarding safety and regulatory compliance refer to the Regulatory Compliance and Safety Information for the Cisco Service Control Engine document Warning The DC pow...

Page 41: ...ined If not see Site Requirement Guidelines on page 4 3 and the Site Preparation and Safety Guide When installing the SCE 2000 please observe the following conditions Allow at least 2 inches 5 cm of clearance at its left and right sides for airflow clearance from the inlet and exhaust vents and that no exhaust air from other equipment is drawn into the SCE 2000 For descriptions and illustrations r...

Page 42: ... as the surrounding area Also make sure your path between the SCE 2000 platform and its new location is unobstructed Step 2 Place the SCE 2000 platform on the tabletop or workbench Step 3 View the bottom panel by lifting the SCE 2000 placing your hands around the SCE 2000 sides and lifting the SCE 2000 from underneath To prevent injury avoid sudden twists or moves There are four marked locations i...

Page 43: ...ckets illustrated below the mounting kit includes two crossrail supports that the unit slides onto Mounting Brackets for 2 post Rack Mounting Brackets for 4 post Rack The SCE 2000 mounts to the two front rack posts with brackets that attach to the front of the SCE 2000 The inside width between the two posts or mounting strips left and right must be at least 17 3 inches 44 cm Note Remember to leave...

Page 44: ...llowing figure See Tools and Parts Required on page 4 2 for a listing of the parts and tools required for installing the rack mount To install the rack mount brackets on the SCE 2000 chassis complete the following steps Step 1 Align the rack mount bracket to the side of the SCE 2000 Choose the proper bracket for your installation 2 post rack or 4 post rack as illustrated in Rack Mounting a SCE 200...

Page 45: ... Rack Mounting the System to a Rack Mounting the System to the Rack on page 4 11 If mounting the SCE 2000 in a rack with four posts proceed to the next step to attach the crossrail supports to the rack Attaching the Crossrail Supports to the Rack When mounting in a rack with four posts front and back the two crossrail supports are mounted one on each side of the rack The SCE 2000 then slides into ...

Page 46: ...steps Step 1 Assemble the two crossrail supports as illustrated below Use three screws for each crossrail assembly Make sure that they are oriented so that both crossrails will support the SCE 2000 when they are attached to the rack Figure 4 6 Assembling the Slider Brackets Step 2 Align the crossrail supports with the side of the rack parallel to the floor Step 3 Insert and tighten two screws to t...

Page 47: ...2000 to the rack Mounting the System to the Rack When the appropriate mounting brackets are securely installed the SCE 2000 can be installed into the rack To mount the SCE 2000 to the rack after the brackets are installed complete the following steps Step 1 Make sure that your path to the rack is unobstructed If the rack is on wheels ensure that the brakes are engaged or that the rack is otherwise...

Page 48: ...form SCE 2000 4xGBE Installation and Configuration Guide 4 12 OL 7824 02 A rack with both front and back posts will have the crossrail supports installed Slide the SCE 2000 onto these crossrails and push it all the way back Figure 4 8 Sliding the SCE 2000 into the Rack ...

Page 49: ...ackets support the weight of the entire SCE 2000 chassis be sure to use all four screws to fasten the two rack mount brackets to the rack posts AttachingaChassisGroundConnection Before you connect the power or turn on the power to the SCE 2000 platform it is required that you provide an adequate chassis Ground protective earth connection for the SCE 2000 chassis A Grounding kit is provided with ea...

Page 50: ...yellow colored cable and pairs of hex nuts and spring washers Step 2 On the Rear panel of the SCE 2000 locate the chassis grounding connector refer to the appropriate figure for an AC or DC powered SCE 2000 below Step 3 Attach the grounding cable green and yellow colored cable firmly fastening the enclosed hex nuts and spring washers with a hex wrench refer to the appropriate figure for an AC or D...

Page 51: ... Platform SCE 2000 4xGBE Installation and Configuration Guide OL 7824 02 4 15 Figure 4 11 Grounding the Unit DC This completes the procedure for installing the SCE 2000 chassis Proceed to the next section Connecting to the Power Supply to continue the installation ...

Page 52: ... other power supply Each power supply has fans that cool the power supply unit These fans also help to cool the internal components of the SCE 2000 as they direct the air flow to the outside through vents in the rear of the power supply unit The faceplates of both power supplies have a handle an on off switch and one captive installation screw An AC input power receptacle is available on the AC in...

Page 53: ...LED is illuminated If the input voltages are above or below normal ranges the IN LED is not illuminated On both the AC input and DC input power supplies the OK LED is used to monitor the power supply DC output voltages used to power the platform The normal operating ranges for the 12 VDC output voltage is between 11 9V and 12 1V If the output voltages are within normal operating ranges the green O...

Page 54: ... Protocol SNMP monitors the activity of the power supplies In most cases when a power supply problem occurs an SNMP trap is sent in SNMP and the appropriate message is posted on the SCE 2000 CLI PowerSupplySpecifications The following table lists the AC input and DC input power supply specifications for the SCE 2000 platform Table 4 7 SCE 2000 Power Supply Specifications AC input power 200W maximu...

Page 55: ...lacing the Power Supply Unit on page 4 21 Reconnecting the Power on page 4 22 ESD Warning Do not remove or install modules without using appropriate anti static guard measures The SCE 2000 includes an anti static wrist strap in the accessory kit Attach the copper tape strap to an unpainted metal surface on the chassis You may leave the strap connected to the chassis when your have finished Warning...

Page 56: ...Down a DC Input Power Supply Unit and Removing the DC Input Leads To power down a DC input power supply to the SCE 2000 platform complete the following steps Warning Before completing any of the following steps and to prevent short circuit or shock hazards ensure that power is removed from the DC circuit To ensure that all power to the power supply unit is OFF locate the circuit breaker on the pan...

Page 57: ...er supply from the router This completes the procedure for removing the power supply from a SCE 2000 platform ReplacingthePowerSupplyUnit Warning Do not mix AC input and DC input power supply units in the same SCE 2000 platform To install a new power supply into a SCE 2000 platform complete the following steps Step 1 Grasp the power supply unit handle with one hand and place your other hand undern...

Page 58: ...reconnect the AC or DC power Reconnecting AC Input Power Supply Unit on page 4 22 Reconnecting DC Input Power Supply Unit on page 4 23 Reconnecting AC Input Power Supply Unit The following procedures explain how to reconnect an AC input power to the SCE 2000 platform If you are reconnecting DC input power proceed to Reconnecting DC Input Power Supply Unit on page 4 23 To reconnect the AC input pow...

Page 59: ... Unit The following procedures explain how to reconnect a DC input power to the SCE 2000 platform Warning Before completing any of the following steps and to prevent short circuit or shock hazards ensure that power is removed from the DC circuit To ensure that all power to the power supply unit is OFF locate the circuit breaker on the panel board that services the DC circuit switch the circuit bre...

Page 60: ...ead color coding you choose for the DC input power supply matches lead color coding used at the DC power source Note Use 12 AWG 2 5 mm copper wire only with hex or loop connectors Ring terminals must be UL approved and suitable for 12 AWG wire Step 4 Using the number 2 Phillips screwdriver securely fasten the protective plate to the terminal block Step 5 Connect the DC power line input leads to th...

Page 61: ...lfunctions the fan module should be replaced as promptly as possible Although it is possible for the unit to function for some time with one non functioning fan this is not optimal or recommended Figure 4 16 SE2000 Fan Module When a fan failure occurs the environment monitor will send an error message to the console An SNMP trap indicating that the fan is not functioning properly is also sent Note...

Page 62: ...ing fan blades Let the fan blades stop completely before removing the fan drawer To remove the fan module complete the following steps Step 1 Using a 1 4 inch flat blade screwdriver loosen the two captive screws on the faceplate of the fan module Step 2 Grasp the fan module handle and remove it from the router This completes the procedure for removing the fan module from a SCE 2000 platform Replac...

Page 63: ...n inserting a fan module into the SCE 2000 platform do not use unnecessary force slamming the fan module into the chassis can damage the connectors on the rear of the module Step 4 Seat the fan module in the SCE 2000 platform by tightening the two captive installation screws with a 1 4 inch flat blade screwdriver Note The fan module is not fully seated until you tighten the installation screws on ...

Page 64: ...main circuit board When the battery loses its charge call Cisco Technical Support to replace the battery Warning Do not attempt to replace this battery yourself Warning There is danger of explosion if the lithium battery is incorrectly replaced Replace only with the same or equivalent type recommended by the manufacturer Dispose of used batteries according to the manufacturer s instructions ...

Page 65: ...ection Installing a Cascaded System on page 6 12 This chapter contains the following sections Connecting the Local Console 5 1 Initial System Configuration 5 3 Connecting the Management Interface 5 26 ConnectingtheLocalConsole Even if you will be managing the SCE 2000 from a remote location you must first connect the unit to a local console and configure the initial settings for the SCE 2000 to su...

Page 66: ...rol The above SCE 2000 port parameters are fixed and are not configurable To set up the local console complete the following steps Step 1 Plug the RS 232 serial cable provided with the SCE 2000 into the CON port on the front panel of the SCE 2000 Make sure that you push on the RJ 45 connector attached to the RS 232 serial cable until you hear a click which indicates that the connector is fully ins...

Page 67: ...e other values With the exception of the time settings which take effect immediately when entered the new configuration is applied and saved only at the end of the dialog when approved by the user Therefore if the setup dialog is aborted no change takes place in the configuration other than time settings if entered When the dialog is complete you may review the new configuration before applying it...

Page 68: ...t servers unicast query interval Interval in seconds between unicast requests for update 64 1024 unicast server IP address IP address of the SNTP unicast server DNS Configuration DNS lookup status Enable or disable IP DNS based hostname translation default domain name Default domain name to be used for completing unqualified host names IP address IP address of domain name server maximum of 3 serve...

Page 69: ...CE 2000 is deployed on The options for SCE 2000 are link 0 or link 1 In a single SCE 2000 Platform deployment this parameter is not relevant since one SCE 2000 is deployed on both links In this case the link connected to port1 port2 is by default link 0 and the link connected to port3 port4 is by default link 1 priority cascade topology only If this is a cascaded topology is this SCE 2000 the prim...

Page 70: ... to the question EXAMPLE Would you like to enter the SNMP configuration menu n To abort the setup dialog at any point without making any configuration changes press c All changes already entered will be lost with the exception of time settings Step1 ConfiguringInitialSettings Verify the following initial settings for the SCE 2000 IP address Subnet mask Default gateway All values are Internet addre...

Page 71: ...o returned as the value of the MIB II object sysName The default hostname is SCE 2000 To configure the hostname complete the following steps Step 1 The current hostname is displayed To accept the displayed value press Enter To change the value type any desired character string and press Enter Enter hostname SCE 2000 Step3 SettingthePasswords Configure the passwords as follows Set the password for ...

Page 72: ...esired string and press Enter Step 3 The default Root password is displayed To accept the displayed value press Enter To change the value type the desired string and press Enter Step 4 Configure password encryption By default password encryption is not enabled To disable password encryption press Enter To enable password encryption type y and press Enter EXAMPLE Following is an example of changing...

Page 73: ...ET FRI 01 July 2002 Would you like to set a new time and date no Step 4 If the time and date are correct go to step 5 If the time and date are not correct answer yes to the above question and press Enter Would you like to set a new time and date no y Confirm your response and type the new time and date This change will take effect immediately both on the system clock and the calendar it will also ...

Page 74: ...ew time and date no y This change will take effect immediately both on the system clock and the calendar it will also set the time zone you entered Are you sure yes no y Enter new local time and date 14 35 23 19 July 2002 Time zone was successfully set The system clock and the calendar were successfully set Would you like to enter the SNTP configuration menu no y Enable SNTP broadcast client no y ...

Page 75: ...server and press Enter Enter Primary DNS IP address Note that there is no default for this parameter Step 5 You may configure up to three domain servers Would you like to add another Name Server no To exit the DNS settings dialog press Enter To add another domain server type y and press Enter You are asked to enter the IP address of the next domain name server Enter Secondary DNS IP address Step 6...

Page 76: ...ation menu Would you like to enter the RDR formatter configuration menu no y Type y and press Enter The RDR formatter destination dialog begins Step 2 Type the IP address of the RDR formatter destination and press Enter Enter RDR formatter destination s IP address Note that there is no default for this parameter Step 3 Type the TCP port number of the RDR formatter destination and press Enter Note ...

Page 77: ...g ACLs to the management interfaces Entry Formats Each ACL may permit deny access to any IP address one or more ranges of IP addresses or one or more individual IP address Three entry formats are available to support these options Any IP address Type the word any Any IP address will be permitted or denied access Range of IP addresses Type the beginning IP address in the desired range then enter th...

Page 78: ...cess Control List matches the connection or if the Access Control List is empty the default action is deny To create the access control lists complete the following steps Step 1 Enter the Access Control Lists configuration menu Would you like to enter the Access lists configuration menu no y Type y and press Enter The Access Control Lists configuration dialog begins Step 2 You have the option of c...

Page 79: ...r up to 20 entries as described in step 5 and step 6 When all entries have been added press Enter Would you like to add another entry to this list no Step 8 When all entries are added to one list you are asked whether you would like to create another ACL You may define up to 99 ACLs To create another ACL type y and press Enter Would you like to configure another list no y Enter up to 20 IP address...

Page 80: ... IP address or the word any to denote any IP address any This entry matches every IP address no use in adding more entries to this list Would you like to configure another list no y Enter ACL number 2 Does this entry permit access yes Enter IP address or the word any to denote any IP address 10 1 1 0 Enter wildcard bits 0 0 0 0 Would you like to add another entry to this list no y Does this entry ...

Page 81: ...se to disable SNMP management skip the rest of this section and go to Step 9 Configuring the Topology Dependent Parameters The rest of the dialog is not presented as it is irrelevant when SNMP management is disabled Step 3 Type the SNMP GET community name and press Enter The SNMP agent that resides inside the SCE 2000 will respond only to GET requests that use this community string Enter SNMP GET ...

Page 82: ...e to add another SNMP SET community no Step 9 Enter the SNMP trap managers menu Would you like to configure SNMP trap managers no y Type y and press Enter The SNMP trap managers dialog begins If you choose not to configure SNMP trap managers the dialog skips to the authentication failure trap status See step 14 Step 10 Type the trap manager IP address and press Enter Enter SNMP trap manager IP add...

Page 83: ...on configuring one trap manager one GET community and one SET community and enabling the authentication failure trap as well as all enterprise traps Would you like to enter the SNMP configuration menu no y Enable SNMP management no y Enter SNMP GET community name public Enter Access list number allowing access with this community string use 0 to allow all 0 Would you like to add another SNMP GET c...

Page 84: ... single SCE 2000 is deployed on one or two SCAS BB Console links Cascade two cascaded SCE 2000s are deployed on two SCAS BB Console links working as a fully redundant solution Physically connected link cascade topology only In a cascade topology the user must assign an index to each of the links This index is used to identify the services per link In a single SCE Platform deployment the indices of...

Page 85: ...nfiguration In actual practice all questions may not be presented for a particular configuration depending on the topology deployed Study the examples that follow to understand the procedure for various topologies To configure topology dependent parameters complete the following steps Step 1 Enter the topology configuration menu Would you like to enter the Topology configuration menu no y Type y a...

Page 86: ...2 and press Enter Enter admin status of the SCE after abnormal boot 1 Operational 2 Not Operational Enter your choice 1 The following examples present the procedure for configuring the topology related parameters for various topologies EXAMPLE 1 Following is a sample topology configuration for a non redundant topology using an optical splitter that is a single SCE 2000 connected in receive only co...

Page 87: ...the system configuration is completed EXAMPLE 3 Following is a sample topology configuration for a secondary SCE 2000 in a redundant inline topology In this topology there are two SCE 2000s that are cascaded via the cascade GBE ports ports 3 and 4 Each SCE 2000 is connected inline to both sides subscribers network of one GBE link In this case the user must specify the physically connected link ind...

Page 88: ...lowing errors were found Warning RDR formatter destination 10 1 1 1 is not allowed in the IP access class Step 3 You are asked whether to apply and save the configuration Apply and Save this configuration yes no To apply and save the configuration type y and press Enter To abort the setup procedure without applying or saving the configuration recommended if there are errors type n and press Enter ...

Page 89: ...initial configuration of the SCE 2000 platform EXAMPLE 1 Following is an example of a configuration that the user aborted due to errors detected in the configuration Note that no confirmation is requested for the decision to abort the setup Had there been no errors confirmation would have been requested before aborting Data collection for the system configuration is completed Would you like to vie...

Page 90: ...mote destination ftp vk vk 10 1 1 253 h copyofstartup txt Committing configuration Configuration completed successfully Saving configuration Writing general configuration file to temporary location Backing up general configuration file Copy temporary file to final location Done EXAMPLE 3 Following is an example of a configuration that was aborted although no errors were detected Data collection fo...

Page 91: ...er end of the Ethernet cable into your management network Make sure that you push on the RJ 45 connector attached to the cable until you hear a click which indicates that the connector is fully inserted and secured in the receptacle Gently pull on the plug to confirm whether the plug is locked into the socket If the Link LED on the SCE 2000 management port does not light try removing the cable and...

Page 92: ...ork check the Mng 1 port LEDS There are two Mng LEDs Link Active and 10 100 1000 refer to Front Panel At this point check that the Link Active LED is green The state of the 10 100 1000 LED will depend on the Ethernet network settings Green indicates 100 Mbps and Off indicates 10 Mbps Step 2 Test connectivity From the host that you intend to use for remote management ping to the SCE 2000 by typing ...

Page 93: ...r cabling the Gigabit Ethernet ports and for configuring Gigabit Ethernet GBE interface parameters EXAMPLE The following example displays a typical ping response where the target IP address is 10 1 1 201 C ping 10 1 1 201 pinging 10 1 1 201 PING 10 1 1 201 56 data bytes 64 bytes from host 10 1 1 201 icmp_seq 0 time 0 ms 64 bytes from host 10 1 1 201 icmp_seq 1 time 0 ms 64 bytes from host 10 1 1 2...

Page 94: ......

Page 95: ...onnected to the module See Cabling the External Optical Bypass Module on page A 6 for complete instructions This chapter contains the following sections Connecting the line ports to the network 6 1 Installing a Cascaded System 6 12 Loading and Activating a Service Control Application 6 16 Connectingthelineportstothenetwork The procedures for cabling the line ports configuring the interface paramet...

Page 96: ...y the SCE 2000 resides physically on the GBE Gigabit Ethernet link between the subscribers which are usually connected through either a BRAS in DSL access a PDSN in wireless access a CMTS in the Cable access or a switch or router aggregator in other topologies and the network where the SCE 2000 usually connects to a router or layer 3 switch network element Figure 6 1 Cabling Diagram for Single Lin...

Page 97: ...ology cabling is similar to that for single link inline in that either the first GBE link first two ports or the second GBE link third and fourth ports can be used as illustrated in the diagram above The remaining pair of ports is unused Either port 1 or port 3 is used for connecting to the network element that is deployed on the subscriber side of the SCE 2000 while port 2 or port 4 is used for c...

Page 98: ...ers Note Receive only topologies can be implemented using either an optical splitter or a switch If a switch is used it must support SPAN functionality that includes separation between ingress and egress traffic and multiple SPAN ports destinations The following two diagrams illustrate the connections for dual links with a single SCE 2000 deployed for both inline and receive only topologies Figure...

Page 99: ...ion Installing a Cascaded System on page 6 12 Note Receive only topologies can be implemented using either an optical splitter or a switch If a switch is used it must support SPAN functionality that includes separation between ingress and egress traffic and multiple SPAN ports destinations When two SCE 2000s are used the first two ports in each SCE 2000 are connected to the links while ports 3 and...

Page 100: ... 6 6 OL 7824 02 Inline topologies require connecting both Receive and Transmit fibers to the SCE 2000 Cascade ports always require both Receive and Transmit fibers to be connected The following diagram illustrates the connections for a dual link two SCE 2000 platform inline topology Figure 6 5 Cabling Diagram Dual Link Inline Topology Two Cascaded SCE 2000s ...

Page 101: ...gs Type copy running config startup config and press Enter Configuring GigabitEthernet Auto Negotiation To configure GBE auto negotiation for a specified GBE port interface complete the following steps Step 1 To enter the Global Configuration Mode at the SCE 2000 prompt type configure and press Enter The SCE 2000 config prompt appears Step 2 To enter the desired GBE port interface type interface G...

Page 102: ...E 2000 may be ordered with either Multimode or Single Mode transceivers The transceiver type is indicated on the front panel under the ports Note that both transceivers on any individual SCE 2000 are the same either 850nm Multimode OR 1310nm Single Mode Table 6 1 Fiber Specifications SCE Model Transceiver Transmit Power Receive Power Typical Max Distance SCE 2000 4xGBE MM 850nm Multimode 9 5 to 4 ...

Page 103: ... on the connector until you hear a click which indicates that the connector is fully inserted and secured in the receptacle Always make sure that you insert the connector completely into the socket Figure 6 6 Cabling the GBE Interface Step 2 Verify that the link LED is green If the link LED does not light try removing the network cable plug and reinserting it firmly into the module socket ...

Page 104: ...and Tx LEDs indicate that packets are being received transmitted by the SCE 2000 platform In optical splitter topologies the Rx LEDs are the sole indicators The Tx LEDs do not blink since the Tx is not connected to the port in this topology Viewing the Counters to Verify that the Network Traffic is Reaching the Device In an inline topology you can monitor traffic via the platform counters for both...

Page 105: ...s the GigabitEthernet counters This command enables you to verify that traffic is taking place You can see that the counters increase together with the increased number of packets that flow through the SCE 2000 Again in bump in the wire topology both the Rx and Tx counters apply as traffic monitors For receive only topologies using an external splitter only the Rx counters apply EXAMPLE The follow...

Page 106: ...ted Parameters for Redundant Topologies on page 6 13 Step 5 Make sure that the SCE 2000 platforms have synchronized and active SCE 2000 platform was selected Use the show interface linecard 0 connection mode command Step 6 If you want to start with bypass sniffing change the link mode to your required mode in both SCE 2000 platforms on both links The bypass mode will be applied only to the active ...

Page 107: ...y Connection mode Redundancy is achieved by cascading two SCE 2000 platforms Therefore the connection mode for both SCE 2000 platforms may be either Inline cascade Receive only cascade Physically connected links For each of the cascaded SCE 2000 platforms this parameter defines the number of the link Link 0 or Link 1 connected to this SCE 2000 platform Priority For each of the cascaded SCE 2000 pl...

Page 108: ...y The connection mode would be the same as the first and the behavior of the SCE 2000 platform if a failure occurs is also bypass SCE 2000 config if connection mode inline cascade physically connected links link 0 priority secondary on failure bypass Link Mode The SCE 2000 platform has an internal hardware card used to maintain the links even when the SCE 2000 platform fails This hardware card has...

Page 109: ... option to configure the link mode for all links SCE 2000 platforms only It is recommended that both links be configured together Use the all links option Link mode is relevant only to inline topologies It is recommended that in cascaded topologies both SCE 2000 platforms be configured for the same link mode otherwise the service will be unpredictable Sniffing can only be configured for all links ...

Page 110: ...provides the basic functionalities of Service Control analysis and enforcement A Service Control solution requires that a Service Control application be loaded into the platform to take advantage of the unique SCE platform capabilities Loading and activating an application includes the following stages Downloading the application provided as an SLI file to the SCE 2000 disk Activating the applicat...

Page 111: ...Conditions Prior to System Startup on page 7 1 Starting the System and Observing Initial Conditions on page 7 2 CheckingConditionsPriortoSystemStartup Check the following conditions before you start your SCE 2000 platform Both power supply units are installed and connected First time startup at installation SCE 2000 platform connected to local console CON port The console terminal is turned on and...

Page 112: ...status LED to change from orange to flashing orange or flashing green Step 5 Observe the initialization process When the system boot is complete the console screen displays a script and system banner similar to the following Cisco Internetwork Operating System Software IOS tm 7300 Software C7300 JS M Version 12 1 9 CISCO RELEASED VERSION Copyright c 1986 2001 by Cisco Systems Inc Compiled Tue 17 J...

Page 113: ... On the SCE 2000 Front panel examine that the Status LED is flashing green Step 2 To display the operation status of the system at the SCE 2000 prompt type show system operation status and press Enter A message displaying the operation status of the system appears If the system is operating in order the following message appears System Operation status is Operational EXAMPLE The following example ...

Page 114: ...ring a Previous Configuration on page 7 9 ViewingConfiguration When you enter configuration commands it immediately effects the SCE 2000 platform operation and configuration This configuration referred to as the running config is saved in the SCE 2000 platform volatile memory and is effective while the SCE 2000 platform is up After reboot the SCE 2000 platform loads the startup config which includ...

Page 115: ...1 version 1 clock timezone CET 1 snmp server community public ro snmp server host 10 1 1 253 traps version 1 public interface LineCard 0 connection mode active no silent no shutdown flow aging default timeout UDP 60 interface FastEthernet 0 0 ip address 10 1 5 109 255 255 0 0 interface FastEthernet 0 1 interface FastEthernet 0 2 exit line vty 0 4 no timeout exit SCE 2000 One of the useful show com...

Page 116: ...n A02A Software revision G001 Serial number 043P6982 Power Supply type AC SML Application information is Application file tffs0 temp sli Application name Application help Original source file H work Emb jrt V2 5 sml actions drop drop_basic_anyflow san Compilation date Wed September 22 2004 at 21 25 21 Compiler version SANc v2 50 Build 32 gcc_codelets true built on Tue September 22 2004 09 51 57 AM...

Page 117: ...ose of configuration and management All interfaces supply an API to the same database of the SCE 2000 platform and any configuration made through one interface is reflected through all interfaces Furthermore when saving the running configuration to the startup configuration from any management interface all configuration settings are saved regardless of the management interface used to set the con...

Page 118: ...net 0 0 ip address 10 1 5 109 255 255 0 0 interface FastEthernet 0 1 interface FastEthernet 0 2 exit line vty 0 4 no timeout exit SCE 2000 SCE 2000 copy running config startup config Writing general configuration file to temporary location Backing up general configuration file Copy temporary file to final location SCE 2000 For backup purposes the old startup config file is saved under the director...

Page 119: ... the CLI command more Restoring a previous startup configuration means renaming the file so it overwrites the startup configuration config txt file To restore a previous startup configuration complete the following steps Step 1 At the SCE 2000 prompt type more tffs0 system prevconf config txt to view the configuration file The system displays the configuration information stored in the file Step 2...

Page 120: ...ess 10 1 5 109 255 255 0 0 interface FastEthernet 0 1 interface FastEthernet 0 2 exit line vty 0 4 exit SCE 2000 copy tffs0 system prevconf config tx1 tffs0 system config txt SCE 2000 PerformingComplexConfigurations After you have installed your SCE 2000 platform hardware checked all external connections turned on the system power allowed the system to boot up and performed the initial system conf...

Page 121: ... When the SCE restarts it loads the startup configuration so all changes made in the running configuration will be lost You are advised to save the running configuration before performing reload as described in Saving the Configuration Settings on page 7 7 To reboot your SCE 2000 platform complete the following steps Step 1 At the SCE 2000 prompt type reload and press Enter A confirmation message ...

Page 122: ...ing steps Step 1 Connect to the serial console port The CON connector on the SCE 2000 platform front panel 9600 baud The SCE 2000 prompt appears Step 2 Type reload shutdown A confirmation message appears Step 3 Type Y to confirm the shutdown request and press Enter EXAMPLE The following example shows the commands for system shutdown SCE 2000 reload shutdown You are about to shut down the system Th...

Page 123: ...cument that accompanied your SCE 2000 platform before using the troubleshooting procedures in this chapter This chapter contains the following sections Troubleshooting Overview 8 1 Problem Solving Using a Subsystems Approach 8 9 TroubleshootingOverview This section describes the troubleshooting methods used in this chapter and describes how the SCE 2000 platform is divided into subsystems for more...

Page 124: ...Step 5 Step 6 System startup successful all interfaces operating normally TroubleshootingTools There are three tools that will help you to successfully troubleshoot your SCE 2000 installation CLI Commands for Troubleshooting on page 8 2 The User Log on page 8 4 Check the LEDs on page 8 7 CLI Commands for Troubleshooting Use the following commands to provide information to help you troubleshoot ins...

Page 125: ...route Displays the entire routing table and the destination of last resort default gateway Following is a sample output from the show ip route command gateway of last resort is 10 1 1 1 show access lists Shows all access lists or a specific access list Following is a sample output from the show access lists command Standard IP access list 1 Permit 10 1 1 0 wildcard bits 0 0 0 255 deny any show tel...

Page 126: ...on page 8 4 for an explanation of commands related to the user log The User Log The user log is an ASCII file that can be viewed in any editor It contains a record of system events including startup shutdown and errors You can use the Logger to view the user log to determine whether or not the system is functioning properly as well as for technical support purposes The Logging System Events are lo...

Page 127: ...ger get user log file name ftp username password ipaddress path and press Enter The SCE 2000 prompt appears To copy the user log to an internal location complete the following steps Step 1 From the SCE 2000 prompt type logger get user log file name target filename and press Enter The SCE 2000 prompt appears Viewing the User Log Note This command is not recommended when the user log is large Copy a...

Page 128: ...e counters are not cleared during boot time To view the user log counters for the current session complete the following steps Step 1 From the SCE 2000 prompt type show logger device user file log counters and press Enter The logger lines information appears followed by the SCE 2000 prompt To view the non volatile logger counters for both the User log file and the debug log file complete the follo...

Page 129: ... technical support staff To generate a log file for technical support complete the following steps Step 1 From the SCE 2000 prompt type logger get support file filename and press Enter The support information file is created using the specified filename and the SCE 2000 prompt appears This operation may take some time Check the LEDs The front panel LEDS are the most immediate problem detection mec...

Page 130: ...iguration is applied Flashing green Warning SCE 2000 is fully operational as above but one of the following occurred Line ports GBE ports to the link are down Management port link is down Temperature raised above threshold Voltage not in required range Fans problem Power supply problem Insufficient space on the disk Note If the condition that caused the SCE 2000 to be in Warning state is resolved ...

Page 131: ...system has booted successfully the initial system banner should be displayed on the console screen If it is not displayed see Connecting the Local Console on page 5 1 to verify that the terminal is set correctly and that it is properly connected to the console port If the banner is displayed but the Status LED is flashing orange indicating a warning state check the user log At the prompt type more...

Page 132: ...switch back on Faulty power cable Turn the switch to the off position remove the cable and replace it Faulty power supply If the system still fails to come up when the power supply is connected to a different power source with a new power cable the power supply unit is probably faulty Contact a service representative Table 8 4 Power Supply LEDs LED Label Color State Function IN Green On The input ...

Page 133: ...ge file does not exist in the specified location Verify package file location and try again In the output of the command the package file type is management image instead of system image Package file type mismatch Verify that you are trying to open the correct package file In the output of the command the package file platform is not the correct installation file for the SCE 2000 Package file plat...

Page 134: ...se Possible Solution Management link down Mng LINK LED not lit Status is WARNING Status LED is flashing orange CLI command show interface FastEthernet 0 0 ping to management interface fails RJ 45 connector is not connected to the platform or to the network Reconnect the cable to the Mng 1 port and to network Cable is connected to Mng 2 port Reconnect the cable to the Mng 1 port Cable is broken Che...

Page 135: ...nfiguration Guide CLI command show ip route host ip address Routing tables are incorrectly configured when the host used as client is not in the same network as the SCE Platform and there is more than one gateway on the SCE Platform network Check reconfigure routing tables See Initial System Configuration on page 5 3 Refer to IP Configuration in the Cisco SCE 2000 4xGBE Software Configuration Guid...

Page 136: ... Peer does not receive traffic from SCE 2000 GBE link is lit and Tx LED is flashing GBE link is up but not receiving from peer GBE link is lit but Rx LED is not flashing Table 8 7 Troubleshooting the Link Interface Subsystem Symptom Diagnostic Action Possible Cause Possible Solution Link is down LINK LED not lit Status is WARNING Status LED is flashing orange Output counters not incrementing CLI c...

Page 137: ... incrementing show interface GigabitEthernet 0 Auto negotiation is disabled at the SCE 2000 but enabled at peer Check auto negotiation Configuring the GBE Interface Parameters on page 6 7 configuration in the SCE 2000 and in peer GBE link is up GBE interface link LED is continuous green No traffic received GBE interface Rx LED is not flashing No traffic is being transmitted to the SCE 2000 from it...

Page 138: ......

Page 139: ...e loss of power in the SCE 2000 platform The SCE 2000 platform includes redundant Power Supply Units and redundant power feeds in both the DC and AC versions However in case either both PSUs fail or both power feeds stop providing power to the SCE 2000 platform simultaneously the network link will be preserved by the External Optical Bypass module Maintenance window implementation In certain situa...

Page 140: ... to the External Optical Bypass module Note that the power connection also provides the logical control functionality The External Optical Bypass module is normally inactive not in bypass and simply transfers the two GBE signals to and from the SCE 2000 platform In case the SCE 2000 platform stops providing power to the External Optical Bypass module or in case the power cable is disconnected from...

Page 141: ...operation of the bypass module when it is active in bypass The data traffic flows through the bypass module and the GBE link no longer includes the SCE 2000 platform Note that when the bypass module is active it puts the SCE 2000 platform into a loop connection creating a shortcut between the SCE 2000 platform GBE interfaces Figure A 2 External Optical Bypass Module Active in bypass ...

Page 142: ...element on the Network side of the link CONTROL RJ 45 port that connects to the Bypass connector on the rear panel of the SCE 2000 platform The SCE 2000 platform controls the External Optical Bypass module via this connection by the presence or absence of electrical power Pigtail fiber connectors Four fiber cables that connect to the GBE link ports on the front panel of the SCE 2000 platform NET T...

Page 143: ...install each module in a separate mounting panel Up to three modules may be installed in one mounting panel To install the External Optical Bypass module in a 19 rack complete the following steps Step 1 Using the screws attached to the module screw it into an empty position in the mounting panel Step 2 Secure the module panel to the two front posts of the rack above the SCE 2000 platform Leave at ...

Page 144: ...g only one module the connections are as follows Connect the fiber steps 3 and 4 to the GBE 1 Line ports on the SCE 2000 platform Connect the control cable to the Bypass 1 9 pin D Type connector on the rear panel of the SCE 2000 platform If installing two modules repeat the entire procedure for the second module with the following changes Connect the fiber steps 3 and 4 to the GBE 2 Line Cascade p...

Page 145: ... the SUB cable of the fiber of the External Optical Bypass module to the SUB GBE port of the SCE 2000 platform Rx Tx Step 4 Connect the NET cable of the fiber of the External Optical Bypass module to the NET GBE port of the SCE 2000 platform Rx Tx Step 5 Power up the SCE 2000 platform as explained in Starting the System and Observing Initial Conditions on page 7 2 Warning Auto Negotiation should b...

Page 146: ...from the Bypass 9 pin D Type connector on the rear panel of the SCE 2000 platform to the Control connector on the External Optical Bypass module The SCE 2000 platform immediately starts providing power to the External Optical Bypass module so the bypass module becomes inactive and starts transferring the traffic to the SCE 2000 platform The No Bypass LED should therefore be lit The figure below il...

Page 147: ...ed 15 ms max Operating Wavelength Multi Mode 850 nm Single Mode 1310 nm Operating Temperature 10 C to 65 C 14 F to 149 F Storage Temperature 30 C to 70 C 22 F to 158 F Weight 12 oz 340 g Table A 1 Control cable pinouts Function Pin D type side Pin RJ 45 side Bypass Present common to 2 1 1 Bypass Present common to 1 2 2 GND 3 3 GND 4 4 5V 5 5 5V 6 6 7 NC 7 8 NC 8 9 NC Shield Shield Shield ...

Page 148: ......

Page 149: ...e Shipping Container Contents 2 6 Cisco Technical Support Website ix Cisco com viii Clearing the User Log 8 5 CLI Command Line Interface for cascaded topology 6 12 CLI Commands 6 12 CLI Commands for Troubleshooting 8 2 Configuration completing and saving 5 23 recovering 7 9 saving 7 7 viewing 7 4 Configuring GigabitEthernet Auto Negotiation 6 7 Configuring the Connection Mode 6 13 Configuring the ...

Page 150: ...the External Bypass Module A 4 Installing the Module in a Rack A 4 Installing the SCE 2000 on a Workbench or Tabletop 4 6 Installing the SCE 2000 Platform 4 4 Installlation 4 1 in a rack 4 7 on a workbench 4 6 precautions 4 5 interface SCE platform management 1 2 Introduction 1 1 L LEDs 4 15 examining 6 10 front panel 2 3 Link mode 6 13 physically connected 3 9 5 19 6 12 Link Continuity 3 3 Link M...

Page 151: ... 24 Removing the Fan Module 4 25 Removing the Power Supply Unit 4 19 Replacing the Battery 4 26 Replacing the Fan Module 4 25 Replacing the Power Supply Unit 4 20 Requirements site 4 3 4 4 S Saving the Configuration Settings 7 7 SCE 2000 Component List 2 7 SCE 2000 Configuration 3 8 SCE 2000 Installation Checklist 2 8 SCE 2000 Operational Status 8 7 SCE Platform front panel 2 3 SCE Platform Manage...

Page 152: ... related parameters 3 7 5 19 6 12 single SCE 2000 3 4 two SCE 2000 3 6 Topology Considerations 3 1 Topology Related Parameters 3 7 Topology Related Parameters for Redundant Topologies 6 12 Troubleshooting 8 1 Troubleshooting Overview 8 1 Troubleshooting the Firmware Package Installation 8 10 Troubleshooting the Link Interface Subsystem 8 13 Troubleshooting the Management Subsystem 8 11 Troubleshoo...

Reviews: