background image

13

To join the shared-line call:

1.

Highlight the remote-in-use call that you want to join.

2.

Press 

more

 to navigate to

 cBarge 

and press 

cBarge

.

Place Call from Your Local Directory

To access the local phone directory established by the system administrator: 

1.

Press the 

Setup 

button and select Directory.

2.

Press the Navigation 

Up

 or 

Down

 button or select the Local Directory.

3.

Press the Navigation 

Up

 or 

Down

 button to select the Last, First, or Number field search option. 

4.

Using the keypad, enter the last name or first name for the entry.

When entering letters, select the appropriate number key of the letter you want, and press that key a number of times that 
equals the position of the target letter. For example, to enter a B, press the 2 key two times, and to enter a C, press the 2 
key three times. Use the backspace

 (<<) 

soft key to make corrections. 

5.

Press 

Search 

to find your selection.

6.

If your search results in multiple listings, use the Navigation 

Up

 or 

Down

 button to select the correct number. 

7.

If your search results in multiple pages, use the 

Next

 and 

Prev

 soft keys to move back and forth between the previous and 

next pages. 

8.

Press 

Dial

 to dial the selected number.

Program Personal Speed-Dial Buttons

After a system administrator defines one or more speed-dial instances for a Cisco Unified IP phone, you can reprogram numbers 
that are not locked or program numbers into an instance that has an empty dial string: 

1.

Select an available phone line by lifting the handset, pressing 

NewCall

, or pressing a line button. Listen for the dial tone.

2.

Press the pound key (

#

).

3.

Press the speed-dial button that you want to program. A short beep confirms that you are starting to program this button.

4.

Enter the speed-dial number. The digits appear on the phone display. When you are entering speed-dial numbers, use the 
backspace (

<<

) soft key to erase digits that you entered incorrectly.

To remove a speed-dial number without replacing it with a new one:

1.

Press the pound key (

#

).

2.

Press the same speed-dial button a second time to indicate that you are done entering the speed-dial digits and to store the 
new speed-dial number.

3.

Hang up the handset, or press a new speed-dial button and repeat this procedure.

Place a Call from Your System Speed-Dial Directory or Fast Dial

To place a call from your system speed-dial directory:

1.

Select an available Cisco Unified IP Phone line (off hook or 

NewCall

) and get a dial tone.

2.

Press the 

Setup 

button


and go to

 CME Services,

 and select Speed Dial.

3.

Use the 

Navigation

 button to scroll through the options. Use 

Select

 to select speed-dial options. 

  –

Press 

2

 for Local Speed Dial.

  –

Press 

3

 for Personal Speed Dial (functionality varies depending on your system configuration).

4.

Use the 

Navigation

 button to scroll through the speed-dial phone list. 

5.

To dial the selected phone number, either press 

Select

 or enter the number on the keypad.

6.

Press 

Cancel

 to go to the previous page.

Summary of Contents for 521SG - Unified IP Phone VoIP

Page 1: ...USER GUIDE Cisco Unified Communications Manager Express for Cisco Unified IP Phone 521SG and 524SG User Guide 1 Overview 2 Operating Your Phone 3 Phone Features Index ...

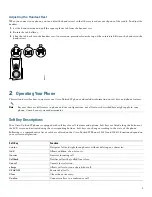
Page 2: ... call status phone number date time and soft key tabs 2 4 way navigation pad and select center button Allows you to scroll through soft button features and displays phone numbers from your Placed Calls when phone is on hook Use select button to select an item that is highlighted on the screen 3 Soft keys buttons Engages the functions displayed on the corresponding LCD tabs 4 Cisco Unified Communic...

Page 3: ...9 Mute button Toggles mute on and off 10 Speaker button Toggles speaker on and off 11 Headset button Toggles headset on and off 12 Keypad Functions as a traditional phone keypad 13 Handset Functions as a traditional handset 1 Optional DC adapter port DC5V for phones not provided with inline power 2 Headset port 3 AC to DC power supply 4 AC power cord Name continued Description continued ...

Page 4: ...4 5 Network port 10 100 WAN for connecting to the network 6 Handset port 7 Access port 10 100 PC for connecting your phone to your computer ...

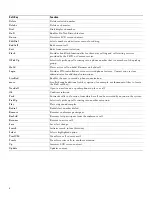
Page 5: ... to your phone Consult your system administrator Soft Key Descriptions Your Cisco Unified IP phone is equipped with soft keys for call features and options Soft keys are listed along the bottom of the LCD screen and activated using the corresponding buttons Soft keys can change according to the state of the phone Following is a comprehensive list of soft keys offered on the Cisco Unified IP Phones...

Page 6: ... instructions LiveRcd Enables the user to record a phone conversation more Scrolls through additional soft key options for example use the more soft key to locate the DnD soft key NewCall Opens a new line on a speakerphone to place a call Ok Confirms selection Park Forwards calls to a location from which a call can be retrieved by anyone in the system PickUp Selectively picks up calls coming into ...

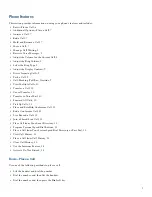
Page 7: ...nsfer a Call 10 Cancel Transfer 10 Transfer to Voice Mail 10 Forward All Calls 10 Pick Up Calls 11 Place and Establish Conference Call 11 End a Conference Call 11 Live Record a Call 12 Join a Shared Line Call 12 Place Call from Your Local Directory 12 Program Personal Speed Dial Buttons 12 Place a Call from Your System Speed Dial Directory or Fast Dial 13 View Call History 13 Place a Call from Cal...

Page 8: ... is active using a different line 1 Press the line button for a new line The first call is automatically placed on hold 2 Enter a number Answer a Call Use one of the following methods to answer a call Press to answer with a headset if unlit Or if is lit press Answer Press to answer with the speakerphone or press Answer Press Answer to switch from a connected call to answer a new call or if the cal...

Page 9: ... to reselect the call 2 Press Resume to reconnect to the call For calls on a separate line Press the Line button for the incoming call The call on the other line is automatically put on hold To return to the original call Press the Line button associated with the original call Retrieve Voice Messages To retrieve voice messages 1 Select an available line by lifting the handset pressing the speakerp...

Page 10: ...8 Press Exit to return to the main directory menu Divert Incoming Calls To forward any incoming call to the call forward destination set on the Cisco Unified IP phone Press the DnD soft key Note If the call forward destination is not set pressing the DnD soft key disables the ringer Park a Call Call park allows a phone user to place a call on hold at a designated parking spot from which the call c...

Page 11: ...dCall then press Resume to return to the original call Cancel Transfer 1 To cancel your consultative call transfer attempt Press EndCall 2 To reconnect to the original caller Press Resume Transfer to Voice Mail To transfer a call to the recipient s voice mail 1 Press TrnsfVM to place the call on hold 2 Enter the recipient s extension number and press TrnsfVM again Forward All Calls To forward all ...

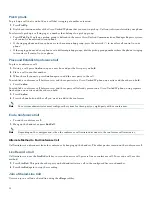
Page 12: ...rence call between two and three parties to a Cisco Unified IP phone one active and the other on hold Press Confrn To establish a conference call between two and three party calls already present on a Cisco Unified IP phone using separate line buttons one active and the other on hold 1 Press Confrn 2 Press the Line button of the call you want to add to the conference Note Your system administrator...

Page 13: ...ocked or program numbers into an instance that has an empty dial string 1 Select an available phone line by lifting the handset pressing NewCall or pressing a line button Listen for the dial tone 2 Press the pound key 3 Press the speed dial button that you want to program A short beep confirms that you are starting to program this button 4 Enter the speed dial number The digits appear on the phone...

Page 14: ...gits as needed Use delChr to erase digits that you enter incorrectly 3 Press Dial to place the call Clear Call History To clear all numbers in the directory histories Press Clear Note The Clear soft key clears all call history lists Selective clearing of call history lists is not supported Use the Intercom Feature Cisco Unified Communications Manager Express supports intercom functionality for one...

Page 15: ... reference SPCP Activate Do Not Disturb page 15 Supported Additional Options Place a Call page 8 Supported Adjust the Display Contrast page 10 Supported Adjust the Ring Volume page 9 Supported Adjust the Volume for the Current Call page 9 Supported Answer a Call page 8 Supported Basic Place a Call page 7 Supported Call Blocking Toll Bar Override page 11 Supported Clear Call History page 14 Support...

Page 16: ...e 9 Supported Select the Ring Type page 9 Supported Transfer to Voice Mail page 11 Supported Transfer a Call page 11 Supported Use the Intercom Feature page 14 Supported View Call History page 14 Supported Table 1 Features supported in SPCP protocols Phone Features page reference SPCP ...

Page 17: ...el 31 0 800 020 0791 Fax 31 0 20 357 1100 Cisco has more than 200 offices worldwide Addresses phone numbers and fax numbers are listed on the Cisco Website at www cisco com go offices Cisco Cisco Systems the Cisco logo and the Cisco Systems logo are registered trademarks or trademarks of Cisco Systems Inc and or its affiliates in the United States and certain other countries All other trademarks m...

Page 18: ...18 ...

Reviews: