2-14
Solaria One/Solaria One
+
Service Manual
020-101039-02 Rev. 1 (06-2013)
Section 2: Adjust the Image
You do not always have to turn the screws simultaneously. However, if you adjust one screw at a time you will
need to complete an equal or equal and opposite turn on the other screw to prevent binding and to achieve the
correct adjustment.
2.7.4
Evaluate Convergence Adjustments
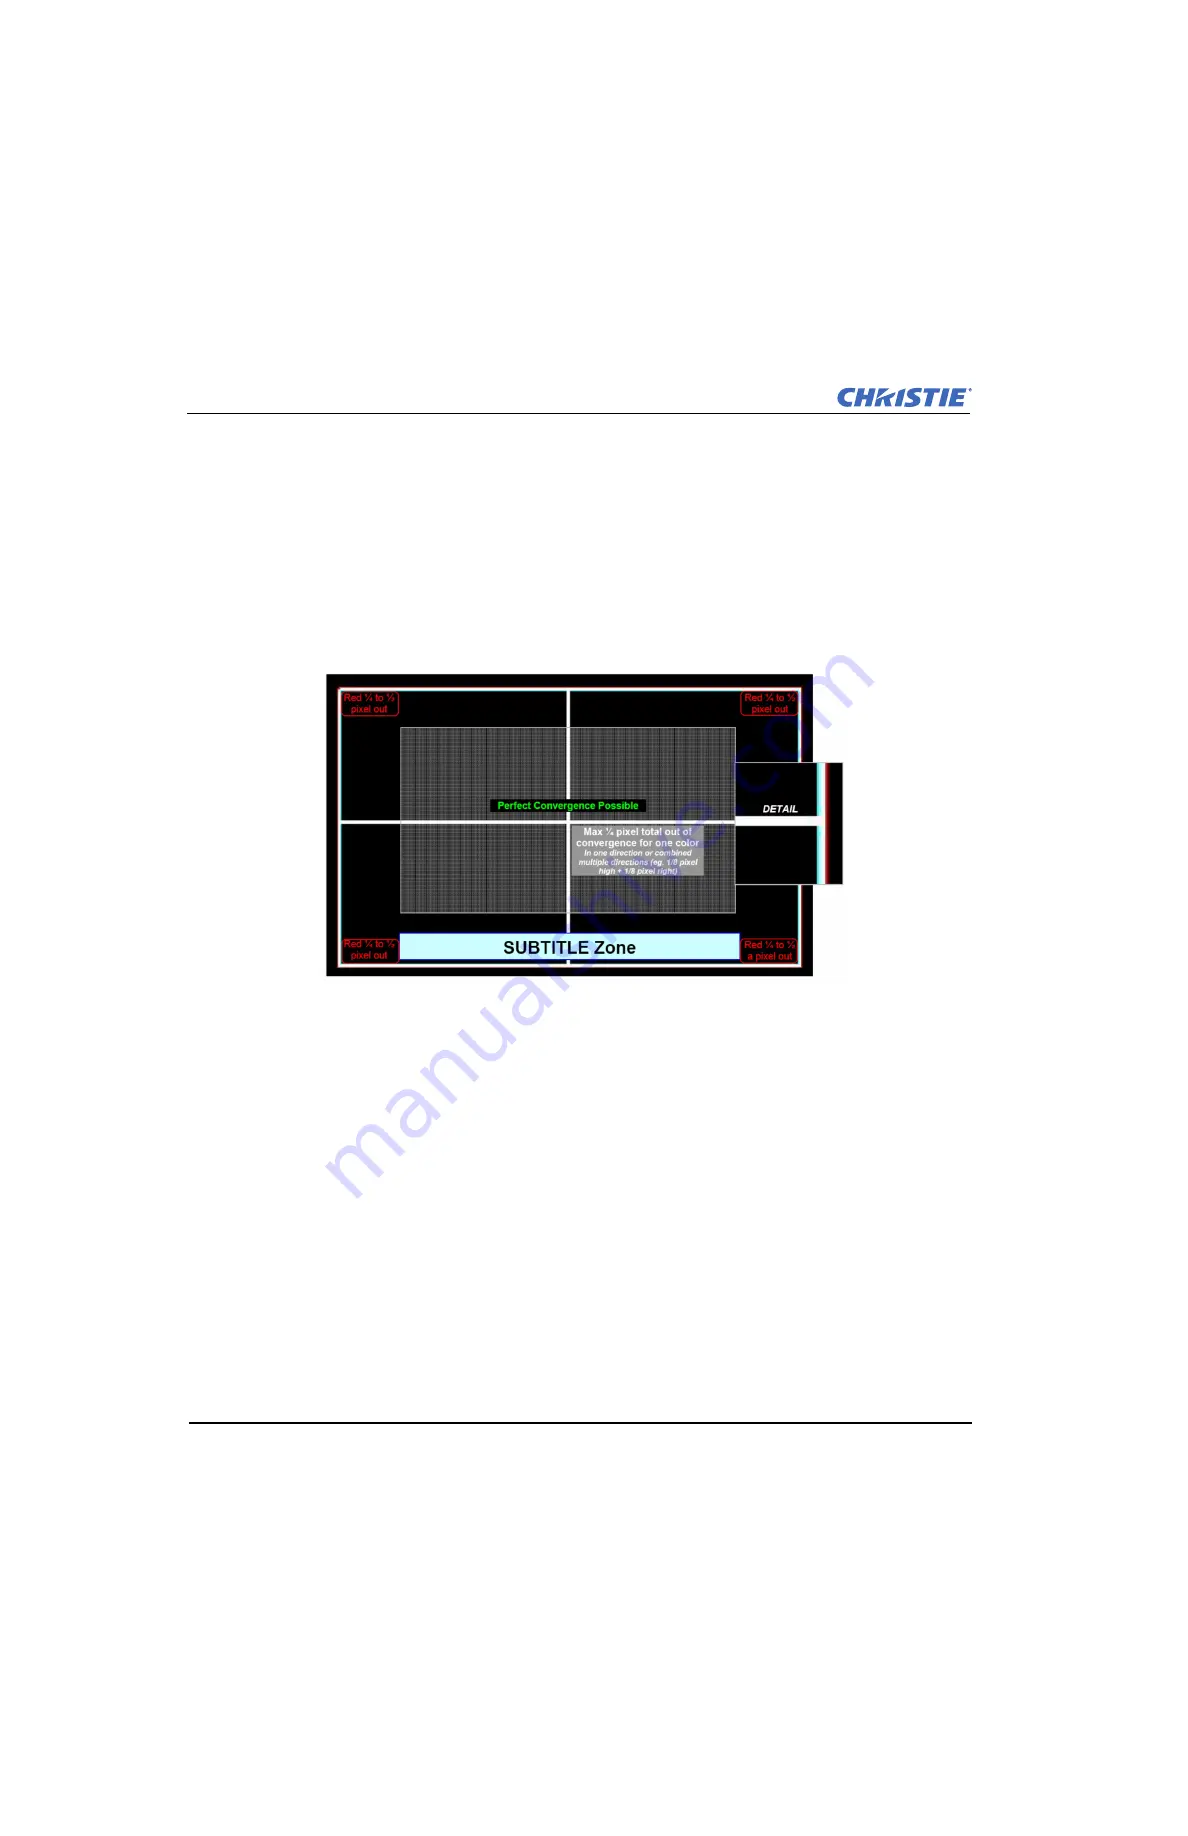
When your convergence adjustment is complete, the test pattern should have these characteristics:
• The center area should be perfectly aligned and display solid white pixels.
• The Red should be evenly 1/4 to 1/2 a pixel out all the way around the outer area and display cyan
(green+blue) toward the center of the screen.
• Green and Blue should always be perfectly aligned to each-other (to within ¼ pixel total in one or a combina-
tion of directions.)
2.8
Manually Override the Shutter
Use this procedure to override the shutter when it remains partially open or closed. When time permits, replace
the shutter assembly.
1. Turn the lamp off and cool the projector for at least 15 minutes.
2. Turn the projector off and then disconnect it from AC power.
3. Remove the top lid.
4. Remove the high security lid.
Summary of Contents for Solaria One
Page 1: ...Solaria One Solaria One S e r v i c e M a n u a l 020 101039 02 ...
Page 2: ......
Page 3: ...Solaria One Solaria One S e r v i c e M a n u a l 020 101039 02 ...
Page 8: ......
Page 28: ......
Page 70: ......
Page 76: ......
Page 80: ......
Page 87: ......


