Section 3: Operation
3-62 Christie DS+60/DW30/Matrix 3000 User’s Manual
Edge Blending Procedure
BEFORE YOU BEGIN:
Make sure your source
hardware and/or software can supply a tiled image
for the number of projector in use, and that the tiling
includes overlapping data of approximately 12.5-
25% along shared edges (see Figure 3.34). Tiling
not a projector feature.
Physically align the projectors and images from
your intended external source, then match colors
and Brightness Uniformity.
IMPORTANT
For a shared edge, the following
Blend
procedures and
settings should be identical on BOTH projectors.
1. Start with 2 full-screen projector images overlapped by approximately 12/5%-25%
each. Display full white field test pattern from both.
2. In the Edge Blending submenu, enable the top checkbox to activate all controls.
3.
SET STARTING POINTS FOR ADJUSTMENT
:
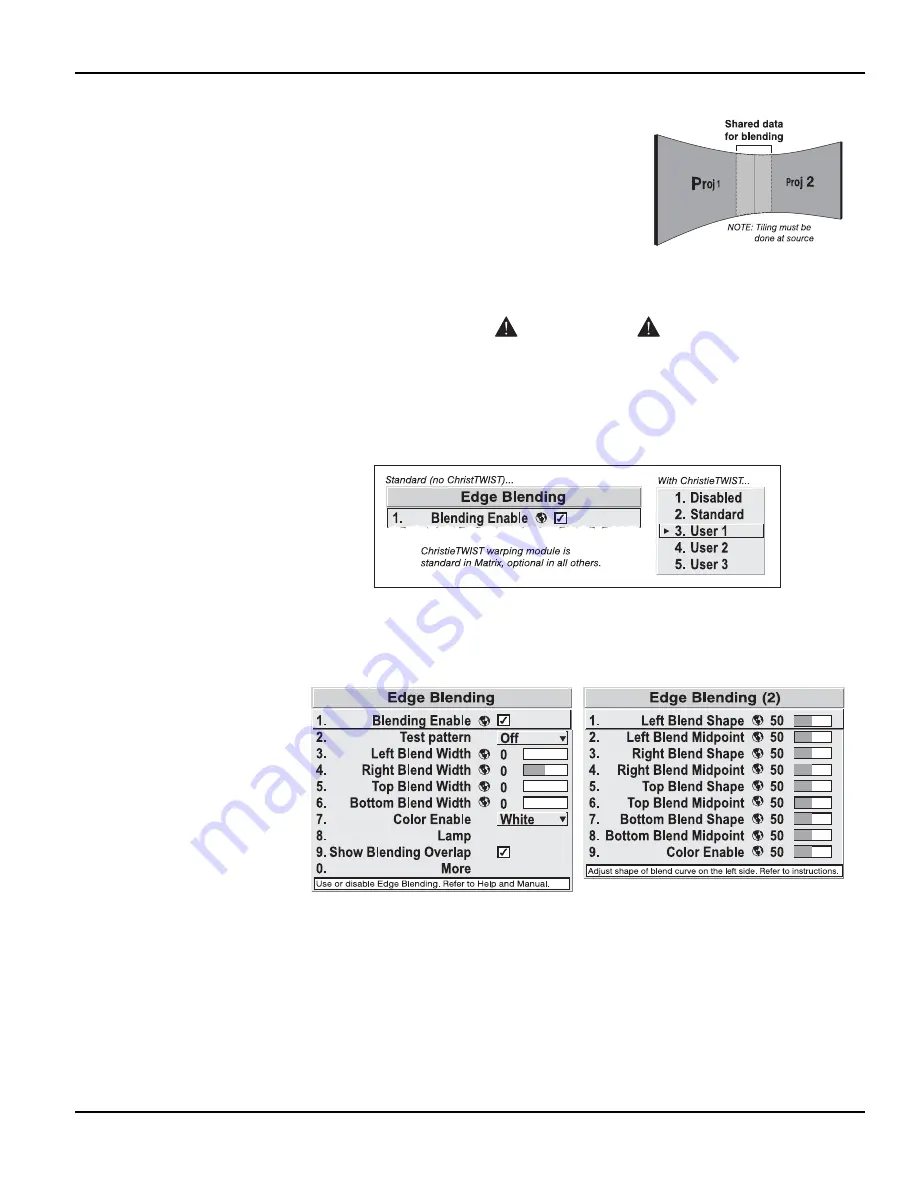
Set all blend widths to 0.
Go to “More” and set everything in the Edge Blending (2) menu to 50.
Figure 3.35. Set Starting Points for Each Projector
4.
SET BLEND WIDTH
: On one projector, increase the Blend Width for an overlapping
edge (for example, if the projector’s image is on left, its right edge overlaps the
adjacent image—adjust Right Blend Width). Use the same setting on the second
projector for this shared edge.
5. Re-adjust width (both projectors) until the overly bright band at the midpoint of the
overlapping blends disappears or just changes to very light gray. For the shared
edge, use the same Blend Width setting on each projector. If the best effect appears
to be between two settings, choose the wider setting for both projectors.
Figure 3.34. Tiling Example


