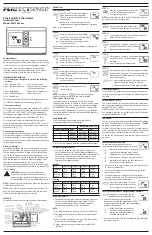
TO TEST COOLING AND DEHUMIDIFICATION:
Press MODE button until COOL icon turns on. Cooling begins
within 10 sec and remains on for 4 minutes. If system is 2-speed,
low speed comes on for first 2 minutes, followed by high speed for
second 2 minutes. At the end of 4-minute run, cooling stops, and
MODE reverts back to OFF. At any time during 4-minute run time,
cooling may be turned off by pressing MODE button until OFF
appears. While cooling is on, successive presses of HUMIDITY
button turn dehumidify output on and off. While this output is
active, "dh" appears in cool set point display. Equipment outputs
for different equipment types are listed in Table 2.
TO TEST PRIMARY HEATING AND HUMIDIFICATION:
Press MODE button until HEAT icon turns on. Primary heating
begins within 10 sec and remains on for 4 minutes. This will be
furnace or electric heat in AC system and heat pump heating in
heat pump system. If system has 2 stages of primary heat, first
stage will be on for 2 minutes followed by second stage for 2
minutes. At the end of 4-minute run, heating stops, and MODE
reverts back to OFF. At any time during 4-minute run time, heating
may be turned off by pressing MODE button until OFF appears.
While heating is on, successive presses of HUMIDITY button turn
humidify output on and off. While this output is active, "hu"
appears in heat set point display. Equipment outputs for different
equipment types are listed in Table 2.
TO TEST AUXILIARY HEATING:
Auxiliary heating only exists in heat pump systems. To test, press
MODE button until EHEAT icon turns on. This will be electric
heat in standard heat pump systems and furnace in dual fuel
systems. Auxiliary heating begins within 10 sec and remains on for
4 minutes. If there are 2 stages of auxiliary heat, first stage comes
on for 2 minutes followed by second stage for 2 minutes. At the
end of 4-minute run, heating stops and MODE reverts back to
OFF. At any time during 4-minute run time, heating may be turned
off by pressing MODE button until OFF appears. Actual outputs
for different equipment types are listed in Table 2.
Step 6—Final Settings
Be sure to return DIP switch No. 4 back to OFF position to exit
installer setup mode. Assuming system is to be left in operation
after installation is complete, use MODE button to select between
HEAT, COOL, or AUTO to provide desired operation of heating,
cooling, or both.
The default set points and programmed schedule conform to the
Energy Star® requirements of the U.S. Department of Energy for
both heating and cooling. These provide energy saving tempera-
ture settings. Refer to Table 3.
If programmed schedule is to be used, make sure HOLD icon is
off. This feature is turned on and off by HOLD button.
If fixed temperatures are desired, use HOLD button to turn on
HOLD icon. This will maintain set points, not allowing them to
change with programmed schedule.
The FAN button may be used to select between AUTO (fan on
only with equipment) and FAN (fan on continuously) fan modes.
For further information on temperature selection and program-
ming, refer to Homeowner’s Guide.
HUMIDITY CONTROL FEATURES
The various humidity control features of the Thermidistat Control
are explained below. They are grouped into 2 sections: humidifi-
cation and dehumidification. At the end of each section, instruc-
tions on how to select each feature are given.
HUMIDIFICATION
The Thermidistat Control directly connects to a standard 24-vac
humidifier to control humidification in the home. A humidify set
point between 10 and 45 percent relative humidity is selected by
the homeowner, or all humidification can be turned off. When
humidity in home drops below set point, humidifier will be turned
on to raise humidity level. Humidification can only occur in
heating mode (HEAT or AUTO/HEAT). Five different humidifi-
cation selections are available and are described below.
1. Normal Humidify
In normal humidify, humidifier will be on if there is a
humidity demand and any heating equipment is on. This will
include furnace, heat pump, or auxiliary heat. In heat pump
applications, this is an improvement over using an external
humidistat, which only supplies humidity when auxiliary heat
is on.
2. Fan Humidify
This configuration allows a humidify demand to turn on fan
and humidifier together, even if there is no heat demand. It is
particularly useful when the furnace is oversized, resulting in
short heating cycles. It allows the humidifier to run longer,
supplying more humidity to the home. Note that fan hours will
increase, using more electricity. Also, the humidifier delivers
less moisture to cooler air than it does to heated air.
3. Auto Humidify
This feature is designed to eliminate the problem of sweating
windows in very cold weather. When selected, the set point is
automatically reduced by 1 percent for every drop of 2°F in
outdoor temperature between 50°F and 0°F. The set point may
be changed at any time, and it will continue to track outdoor
temperature from the new set point and current outdoor
temperature. The adjusted set point range is still limited to
between 10 and 45 percent relative humidity. To use this
feature, an outdoor temperature sensor MUST be attached. If
not, E3 error message will be displayed.
Table 2—Equipment Outputs
1-SPEED AC
2-SPEED AC
1-SPEED HP
2-SPEED HP
Cool—0 to 2 minutes
Y, G
Y1, G
Y, G, O
Y1, G, O
Cool—2 to 4 minutes
Y, G
Y1, Y2, G
Y, G, O
Y1, Y2, G, O
Heat—0 to 2 minutes
W1
W1
Y, G
Y1, G
Heat—2 to 4 minutes
W1, W2
W1, W2
Y, G
Y1, Y2, G
Eheat—0 to 2 minutes
---
---
W1
W1
Eheat—2 to 4 minutes
---
---
W1, W2†
W1*
* Two-stage heat not available
NOTE: For Y—use terminal Y/Y2, for Y1—use terminal Y1/W2, for W2—use terminal O/W2,
for O—use terminal O/W2, for W1—use terminal W/W1, for W2†, use terminal Y1/W2
Table 3—Energy Star Default Schedule
SCHEDULE
HEAT
COOL
Wake 6:00 AM
68°F
78°F
Day 8:00 AM
60°F
85°F
Evening 5:00 PM
68°F
78°F
Sleep 10:00 PM
60°F
82°F
8