7.
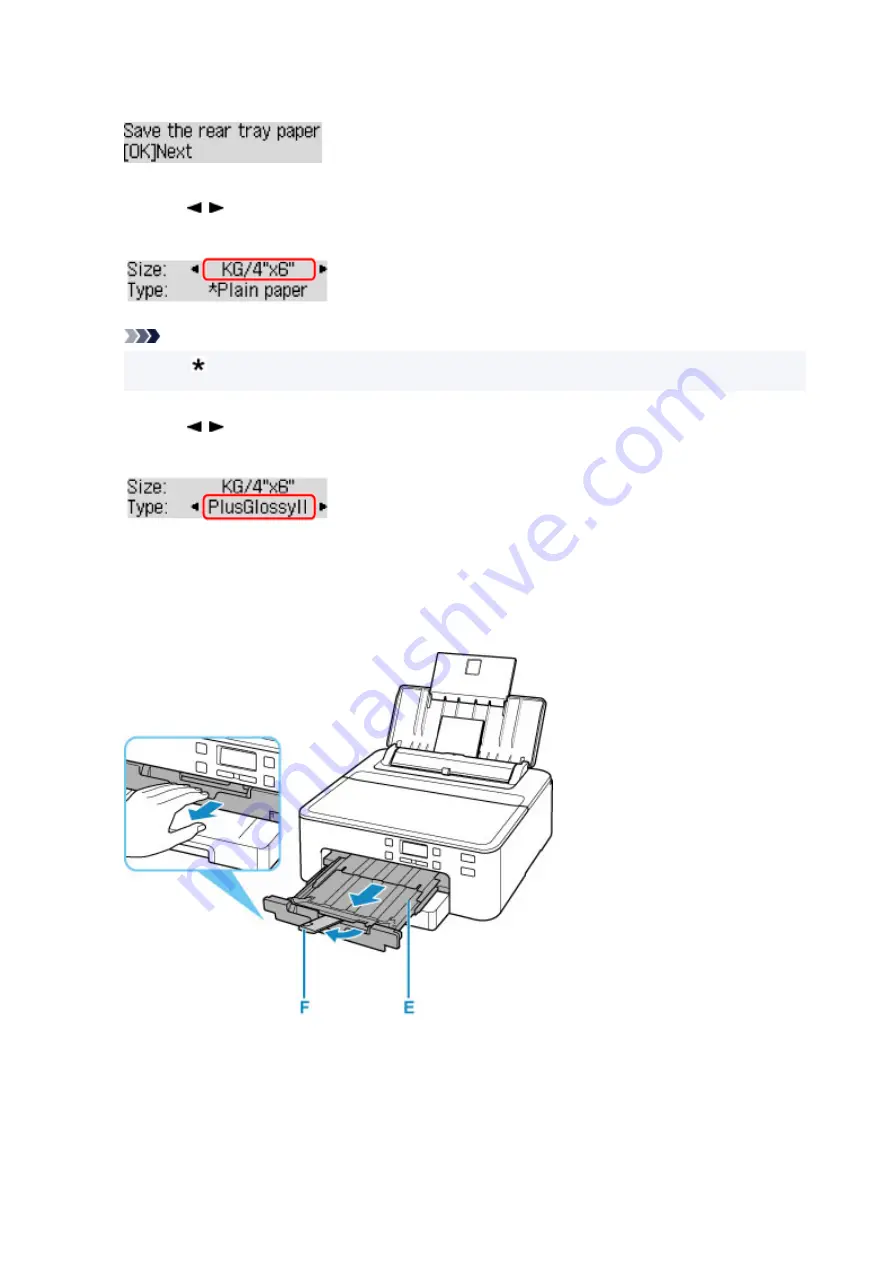
Press the
OK
button.
8.
Use the button to select the size of the loaded paper on the rear tray, then press the
OK
button.
Note
• The (asterisk) on the LCD indicates the current setting.
9.
Use the button to select the type of the loaded paper on the rear tray, then press the
OK
button.
Follow the instructions of any messages displayed to register the paper information.
10.
Pull out paper output tray (E) and extend paper output support (F).
Be sure to pull out the paper output tray before printing. If not, printing will not start.
11.
Start Easy-PhotoPrint Editor.
For Windows:
The procedure below is for a computer running the Windows 10 operating system.
30
Summary of Contents for TS700 Series
Page 1: ...TS700 series Online Manual English ...
Page 83: ... TR9530 series 83 ...
Page 112: ...4 Store multi purpose tray under cassette How to Detach Attach Multi purpose Tray 112 ...
Page 123: ...Replacing Ink Tanks Replacing Ink Tanks Checking Ink Status on the LCD Ink Tips 123 ...
Page 134: ...Adjusting Print Head Position 134 ...
Page 146: ...Safety Safety Precautions Regulatory Information WEEE EU EEA 146 ...
Page 171: ...Main Components Front View Rear View Inside View Operation Panel 171 ...
Page 235: ...Custom Size Others 235 ...
Page 245: ...Note Selecting Scaled changes the printable area of the document 245 ...
Page 263: ...In such cases take the appropriate action as described 263 ...
Page 297: ...Printing Using Canon Application Software Easy PhotoPrint Editor Guide 297 ...
Page 345: ...Other Network Problems Checking Network Information Restoring to Factory Defaults 345 ...
Page 350: ...Problems while Printing from Smartphone Tablet Cannot Print from Smartphone Tablet 350 ...


