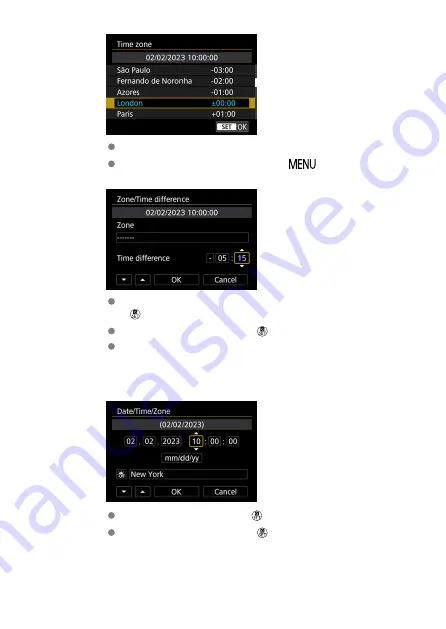
Select the time zone.
If your time zone is not listed, press the <
> button, then set the
difference from UTC in [
Time difference
].
Select a [
Time difference
] option (+–/hour/minute), then press the
<
> button.
After setting the item, press the <
> button.
After entering the time zone or time difference, select [
OK
].
3.
Set the date and time.
Select an item, then press the <
> button.
After setting the item, press the <
> button.
239
Summary of Contents for RowerShot V10
Page 1: ...Advanced User Guide E CT2 D251 A CANON INC 2023 ...
Page 13: ...Note To stream video see Live Streaming 13 ...
Page 24: ...Attaching the Strap Attach the included wrist strap to the camera strap mount 24 ...
Page 28: ...3 Close the cover 28 ...
Page 37: ...Menu Operations and Settings Menu Screen Menu Setting Procedure Dimmed Menu Items 37 ...
Page 86: ...Grid A grid can be displayed on the screen 1 Select Grid display 2 Select an option 86 ...
Page 111: ...Note You can also magnify display by double tapping with one finger 111 ...
Page 119: ...4 Erase the image Select Erase 119 ...
Page 121: ...4 Erase the images Select OK 121 ...
Page 123: ...4 Erase the images Select OK 123 ...
Page 152: ...Note When you will not use Bluetooth setting Bluetooth settings to Disable is recommended 152 ...
Page 181: ...5 Set the IP address Go to Setting the IP Address 181 ...
Page 184: ...4 Set the IP address Go to Setting the IP Address 184 ...
Page 197: ...3 Use the connected device as needed 197 ...
Page 203: ...1 Select Wi Fi settings 2 Select MAC address 3 Check the MAC address 203 ...
Page 226: ...3 Select OK 226 ...
Page 241: ...Language 1 Select Language To set it initially select Language 2 Set the desired language 241 ...
Page 258: ...The camera turns off by itself A power saving feature is enabled 258 ...


