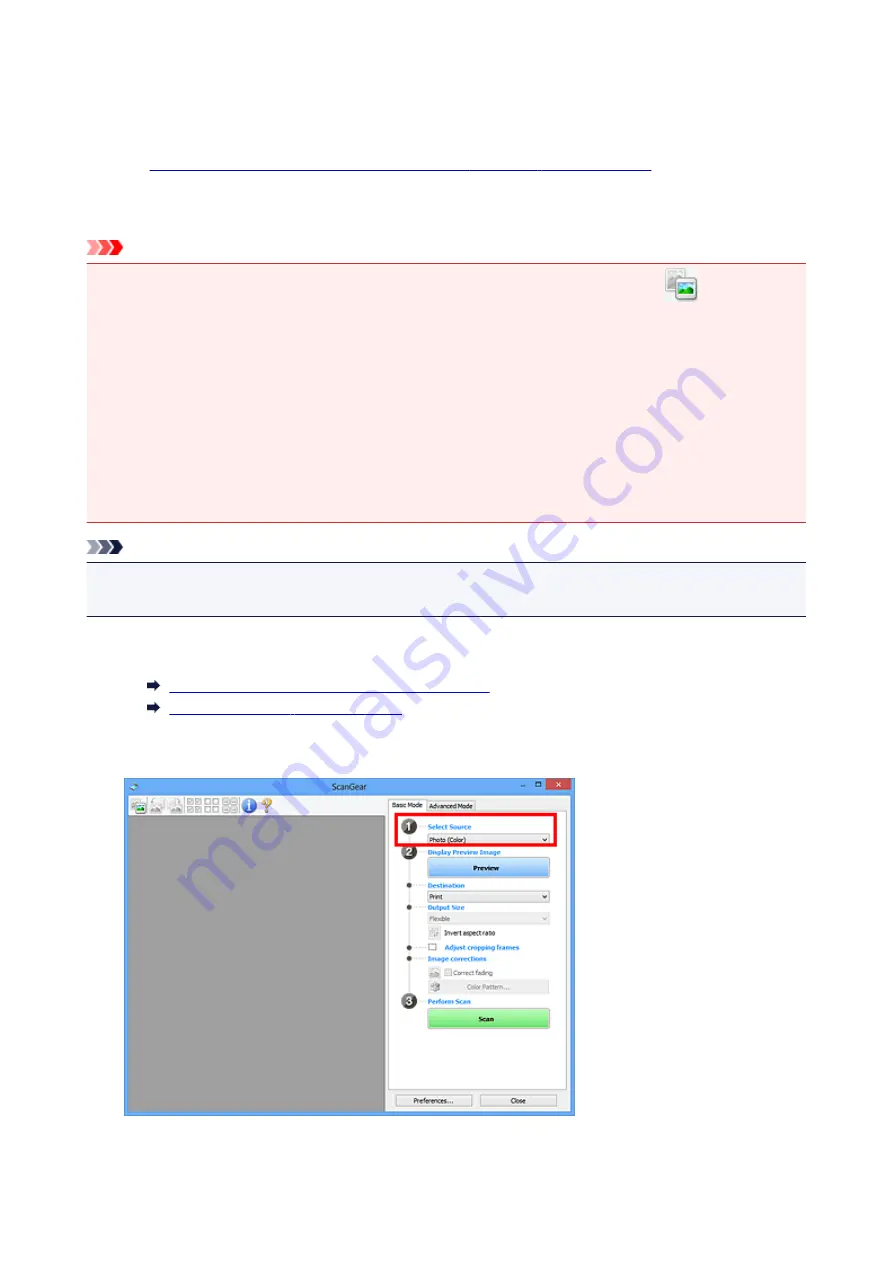
Scanning in Basic Mode
Use the
Basic Mode
tab to scan easily by following the on-screen steps.
Refer to "
Scanning Multiple Documents at One Time with ScanGear (Scanner Driver)
" to scan multiple
documents at one time from the Platen.
When scanning from the ADF (Auto Document Feeder), documents are scanned without preview.
Important
• The following types of documents may not be scanned correctly. In that case, click
(Thumbnail)
on the Toolbar to switch to whole image view and scan.
• Photos that have a whitish background
• Documents printed on white paper, hand-written text, business cards, etc.
• Thin documents
• Thick documents
• The following types of documents may not be scanned correctly.
• Documents smaller than 1.2 inches (3 cm) square
• Photos that have been cut to various shapes
Note
• When using a model supporting ADF duplex scanning, you can scan both sides of the documents
automatically from the ADF.
1. Place the document on the Platen or ADF, then start ScanGear (scanner driver).
Placing Items (When Scanning from a Computer)
Starting ScanGear (Scanner Driver)
2. Set
Select Source
according to the document placed on the Platen or ADF.
605
Summary of Contents for PIXMA MG5600 Series
Page 88: ...88 ...
Page 122: ...Safety Guide Safety Precautions Regulatory and Safety Information 122 ...
Page 129: ...Main Components Front View Rear View Inside View Operation Panel 129 ...
Page 131: ... 10 platen glass Load an original here 131 ...
Page 144: ...Loading Paper Originals Loading Paper Loading Originals 144 ...
Page 172: ...Replacing an Ink Tank Replacing an Ink Tank Checking the Ink Status 172 ...
Page 221: ...Note The effects of the quiet mode may be less depending on the print quality settings 221 ...
Page 235: ...Language selection Changes the language for messages and menus on the LCD 235 ...
Page 246: ...Information about Network Connection Useful Information about Network Connection 246 ...
Page 293: ...5 Delete Deletes the selected IP address from the list 293 ...
Page 324: ...Checking the Ink Status with the Ink Lamps 324 ...
Page 358: ...Note Selecting Scaled changes the printable area of the document 358 ...
Page 369: ...Related Topic Changing the Printer Operation Mode 369 ...
Page 393: ...Note During Grayscale Printing inks other than black ink may be used as well 393 ...
Page 398: ...Adjusting Brightness Adjusting Intensity Adjusting Contrast 398 ...
Page 485: ...9 Press the Color button The machine starts printing 485 ...
Page 516: ...Scanning Scanning from a Computer Scanning from the Operation Panel of the Machine 516 ...
Page 599: ...Related Topic Scanning Items Larger than the Platen Image Stitch 599 ...
Page 620: ...620 ...
Page 643: ...Related Topic Scanning in Basic Mode 643 ...
Page 696: ...When scanning is completed the scanned image appears in the application 696 ...
Page 756: ...Problems with Printing Quality Print Results Not Satisfactory Ink Is Not Ejected 756 ...
Page 840: ...1401 Cause The print head may be damaged Action Contact the service center 840 ...
Page 841: ...1403 Cause The print head may be damaged Action Contact the service center 841 ...
Page 842: ...1405 Cause The print head may be damaged Action Contact the service center 842 ...
Page 849: ...1660 Cause The ink tank is not installed Action Install the ink tank 849 ...
Page 877: ...5B00 Cause Printer error has occurred Action Contact the service center 877 ...
Page 878: ...5B01 Cause Printer error has occurred Action Contact the service center 878 ...
Page 879: ...5B12 Cause Printer error has occurred Action Contact the service center 879 ...
Page 880: ...5B13 Cause Printer error has occurred Action Contact the service center 880 ...
Page 881: ...5B14 Cause Printer error has occurred Action Contact the service center 881 ...
Page 882: ...5B15 Cause Printer error has occurred Action Contact the service center 882 ...


