


■ Access Backup and Restore from Command WorkStation
You can access Backup and Restore from Command WorkStation.
1. Launch Command WorkStation and login to the
imagePRESS Server
with Administrator privileges.
2. From the Server menu, select Device Center.
3. In Device Center window, select Tools > Fiery Resources and Settings or Fiery System Image.
The Backup and Restore will display on the default web browser window.
■ Backing up or restoring the imagePRESS Server(Web Tools)
The following tasks describe using Backup and Restore on WebTools for backing up and restoring the
imagePRESS Server
.
● Setup automatic scheduled backup
NOTE:
When you set up the scheduled backup, only the latest backup will be stored. Previous backups will be deleted.
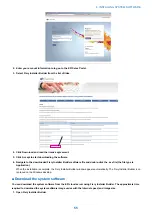
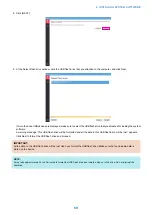
1. In the Backup and Restore window, click Fiery System Image > Schedule Backup.
If you have not logged in as an Administrator user, you are required to do so. Enter the administrator’s password, and click
Log In.
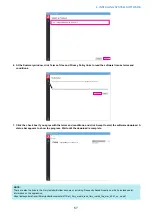
2. Select Enable automatic backup, and select when you want to start the backup process on the
imagePRESS Server
.
NOTE:
The backup process takes more than an hour to complete and it requires the
imagePRESS Server
to be Idle status. If the
imagePRESS Server
is not in Idle status, the backup process does not start.
3. Click Save.
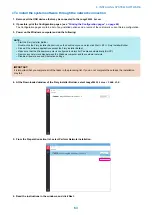
● Backup manually
1. In the Backup and Restore window, click Fiery System Image.
2. Click Backup Now.
3.
imagePRESS Server
Log in as an Administrator.
4. In the Backup dialog box select one of the following options:
• USB- Select this option if you want to create a backup on a USB flash drive.
• Internal hard drive- Select this option if you want to create a backup on the internal storage device of the
imagePRESS
Server
. You must specify the file name of the backup image. The default image name is the server name of the
imagePRESS Server
.
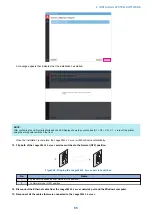
5. Click Continue.
6. If you choose USB in Step 4, then select one of the following options in the Create USB backup dialog.
• New image- Select this option if you want to create a backup of the current
imagePRESS Server
. You can select Create
bootable image option to make the USB flash drive or the USB HDD a bootable device.
NOTE:
If you select the Create bootable image option, then the USB flash drive or the USB HDD specified as the destination becomes a
bootable device.
• Fiery factory image- Select this option if you want to create a backup of the
imagePRESS Server
factory image. When
you select the Fiery factory image option, then Create bootable image option is enabled automatically.
7. In the Create USB Backup dialog box make a note of the Estimated size of the backup file.
For information on the USB flash drive and USB HDD requirement, see
“USB flash drive or USB HDD requirements” on page
.
4. INSTALLING SYSTEM SOFTWARE
52
Summary of Contents for P 400
Page 7: ...Introduction 1 Introduction 2 Specifications 7...
Page 16: ...Using the imagePRESS Server 2 Using the imagePRESS Server 11...
Page 21: ...REPLACING PARTS 3 Replacing parts 16...
Page 51: ...INSTALLING SYSTEM SOFTWARE 4 Installing system software 46...


