


CPU and CPU cooling assembly
1
2
3
4
5
6
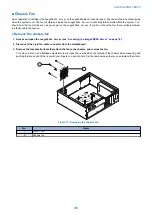
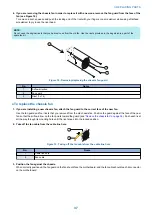
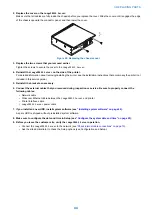
Figure 13: CPU cooling assembly
No.
Item
1
CPU fan
2
Heatsink
3
CPU
4
Load plate
5
CPU socket on motherboard
6
Socket lever
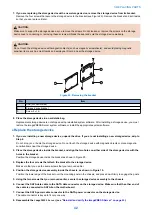
CAUTION:
If you remove the CPU from the motherboard in order to install it on a new motherboard, unpack the new motherboard and
remove the protective plastic cover on the CPU socket. Transfer the protective cover to the CPU socket of the old
motherboard to protect the circuitry. Follow standard ESD precautions while handling the motherboard and all components.
● To remove a CPU
1. Access and open the
imagePRESS Server
“Accessing the imagePRESS Server” on page 18
2. Remove the motherboard components (see
“To remove motherboard components from the motherboard” on page
).
3. Remove the motherboard from the chassis (see
“Remove the motherboard” on page 27
).
Place the motherboard on a flat, antistatic surface.
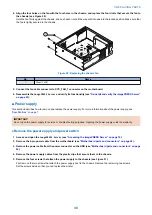
4. Remove the CPU fan cable from motherboard connector CPU FAN.
3. REPLACING PARTS
32
Summary of Contents for P 400
Page 7: ...Introduction 1 Introduction 2 Specifications 7...
Page 16: ...Using the imagePRESS Server 2 Using the imagePRESS Server 11...
Page 21: ...REPLACING PARTS 3 Replacing parts 16...
Page 51: ...INSTALLING SYSTEM SOFTWARE 4 Installing system software 46...


