


– 25 –
5
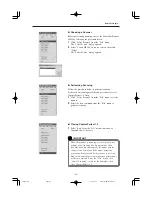
Specify the following folder and then click the OK button.
D:\USB Driver
(where “D” is the drive letter assigned
to your CD-ROM drive)
6
Click the Next button.
7
In the “Driver Files Search Results” screen, click the
Next button.
8
If the message “Digital Signature Not Found” appears,
simply click Yes to continue installation.
9
On the “Completing the Found New Hardware Wizard”
screen, click the Finish button.
CANON MS800 SCSI Scanner Device
1
Click the Next button to proceed to the “Install Hard-
ware Device Drivers” screen.
2
Select “Search for a suitable driver for my device
(recommended)” and then click the Next button to
proceed to the “Locate Driver Files” screen.
3
Select “Specify a location” and then click the Next button.
4
Load the setup disc into the computer’s CD-ROM drive.
5
Specify the following folder and then click the OK
button.
D:\INF
(where “D” is the drive letter assigned to your
CD-ROM drive)
6
Click the Next button.
7
In the “Driver Files Search Results” screen, click the
Next button.
8
If the message “Digital Signature Not Found” appears,
simply click Yes to continue installation.
9
On the “Completing the Found New Hardware Wizard”
screen, click the Finish button.
●
If you are using Windows XP, “Found New
Hardware Wizard” dialog appears when new
device is detected.
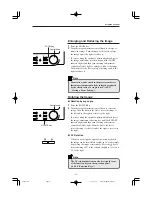
CANON USB Adapter for MS (only when connect-
ing via a USB port)
1
On the dialog asking you a permission to connect to the
Windows Update search site, Select “No, not this time”,
then click the Next button.
2
Load the setup disc into the computer’s CD-ROM drive.
3
In the “Welcome to the Found New Hardware Wizard”
screen, select “Install from a list or specific location
(Advanced)”, and then click the Next button.
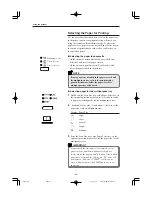
4
Select “Search for the best driver in these locations”,
and then clear the “Search removable media (floppy,
CD-ROM...)” check box. Select “Include this location
in the search”, specify the following folder and then
click the OK button.
D:\USB Driver
(where “D” is the drive letter assigned
to your CD-ROM drive)
5
Click the Next button.
6
Click the Continue Anyway button in the “Hardware
Installation” dialog box.
7
Click the Finish button in the “Completing the Found
New Hardware Wizard” screen.
Before You Begin...
CE-IE-323-01
07.5.14, 11:06
Page 25
Adobe PageMaker 6.5J/PPC