


0L40-03K
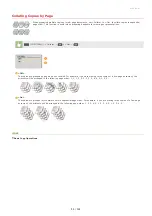
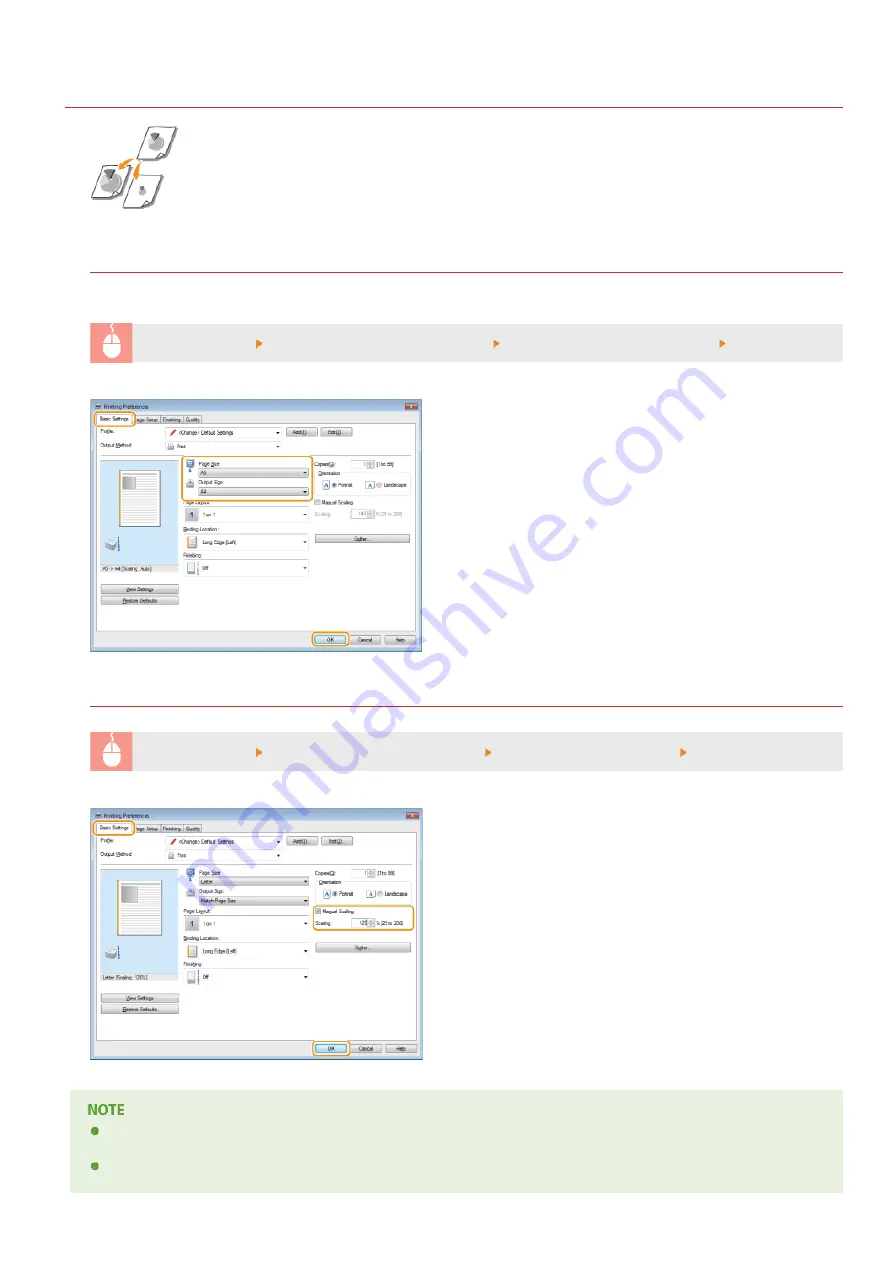
Enlarging or Reducing
You can make enlarged or reduced printouts by using a preset print ratio, such as A5 to A4, or a custom print
ratio that you set in increments of 1%.
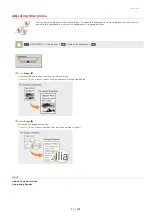
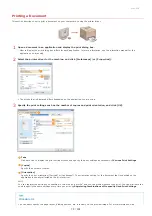
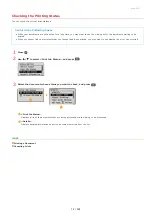
Setting Print Ratio by Specifying the Original Document and Paper Size (Preset Ratio)
The print ratio is automatically set based on the document and paper size you have specified.
[Basic Settings] tab Select the document size in [Page Size] Select the paper size in [Output Size] [OK]
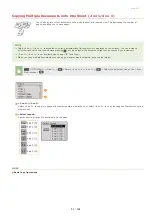
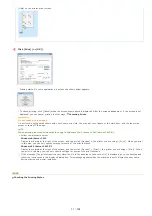
Specifying Print Ratio in Increments of 1%
[Basic Settings] tab Select the [Manual Scaling] check box Enter the print ratio in [Scaling] [OK]
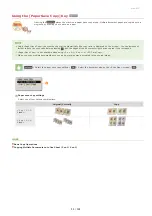
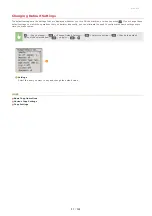
Depending on the selected paper size, you may not be able to set the optimum enlarging/reducing ratio. For example, there
may be large blank spaces on your printout, or portions of the document that are missing.
The enlarging/reducing settings on some applications have priority over those on the printer driver.
㻣㻢㻌㻛㻌㻟㻟㻢
Summary of Contents for imageCLASS MF211
Page 1: ...㻝㻌㻛㻌㻟㻟㻢 ...
Page 29: ...LINKS Using the Operation Panel 㻞㻥㻌㻛㻌㻟㻟㻢 ...
Page 48: ...LINKS Loading Paper in the Paper Drawer Loading Paper in the Manual Feed Slot 㻠㻤㻌㻛㻌㻟㻟㻢 ...
Page 50: ...Exiting Quiet Mode Press to exit quiet mode 㻡㻜㻌㻛㻌㻟㻟㻢 ...
Page 77: ...LINKS Printing a Document 㻣㻣㻌㻛㻌㻟㻟㻢 ...
Page 84: ...Printing a Document Printing Borders Printing Dates and Page Numbers 㻤㻠㻌㻛㻌㻟㻟㻢 ...
Page 171: ...Configuring DNS 㻝㻣㻝㻌㻛㻌㻟㻟㻢 ...
Page 178: ...LINKS Setting Up Print Server 㻝㻣㻤㻌㻛㻌㻟㻟㻢 ...
Page 184: ...Setting a Wait Time for Connecting to a Network 㻝㻤㻠㻌㻛㻌㻟㻟㻢 ...
Page 190: ...LINKS Setting IPv4 Address Setting IPv6 Addresses Viewing Network Settings 㻝㻥㻜㻌㻛㻌㻟㻟㻢 ...
Page 211: ...㻞㻝㻝㻌㻛㻌㻟㻟㻢 ...
Page 296: ...For more information Printing a Document 㻞㻥㻢㻌㻛㻌㻟㻟㻢 ...
Page 300: ...For more information about this function see Printing Posters 㻟㻜㻜㻌㻛㻌㻟㻟㻢 ...
Page 318: ...Click Back Exit 6 㻟㻝㻤㻌㻛㻌㻟㻟㻢 ...
Page 330: ...Make sure that the correct port is selected for the printer 㻟㻟㻜㻌㻛㻌㻟㻟㻢 ...
Page 337: ...㻝㻌㻛㻌㻠㻣 ...
Page 367: ...㻟㻝㻌㻛㻌㻠㻣 ...
Page 371: ...The uninstaller starts Click Uninstall Click OK 4 5 㻟㻡㻌㻛㻌㻠㻣 ...


